There’s a stand out section for me in the book Zen and the Art of Motorcycle Maintenance, and it is the part where the author describes making, or proposing to make makeshift ‘shims’ for his friends John and Sylvia Sutherland’s new and exclusively dealer serviced BMW motorcycle. Pirsig tries to explain how shims made from a discarded Coca-Cola can would be perfectly adequate and functionally identical to those fitted by the BMW Dealer’s mechanics at exorbitant costs. John Sutherland could not see this or be convinced, so programmed was he that only the main dealer has the expertise, equipment and materials to carry out such a task.
“In the book, the narrator describes the “romantic” approach to life of his friend, John Sutherland, who chooses not to learn how to maintain his expensive new motorcycle. John simply hopes for the best with his bike, and when problems do occur he often becomes frustrated and is forced to rely on professional mechanics to repair it. In contrast, the “classical” narrator has an older motorcycle which he is usually able to diagnose and repair himself through the use of rational problem-solving skills.”
So, what has this got to do with the 3 old cars in my family you may ask? A short time ago I wrote about the dreaded ‘Engine Fault’ light, cheap DIY diagnostic tools and repairing the EGR Valve. In that post I discovered and pointed out a missing ‘gasket’, missing for several years it turns out, omitted by accident or through lack of care by a ‘reputable’ local garage of self proclaimed ‘Motor Engineers’. At the time, needing the car back on the road and concluding that one more week running minus the gasket while I source a replacement can’t do that much harm, I re-assembled, tested and had the car back on the road.
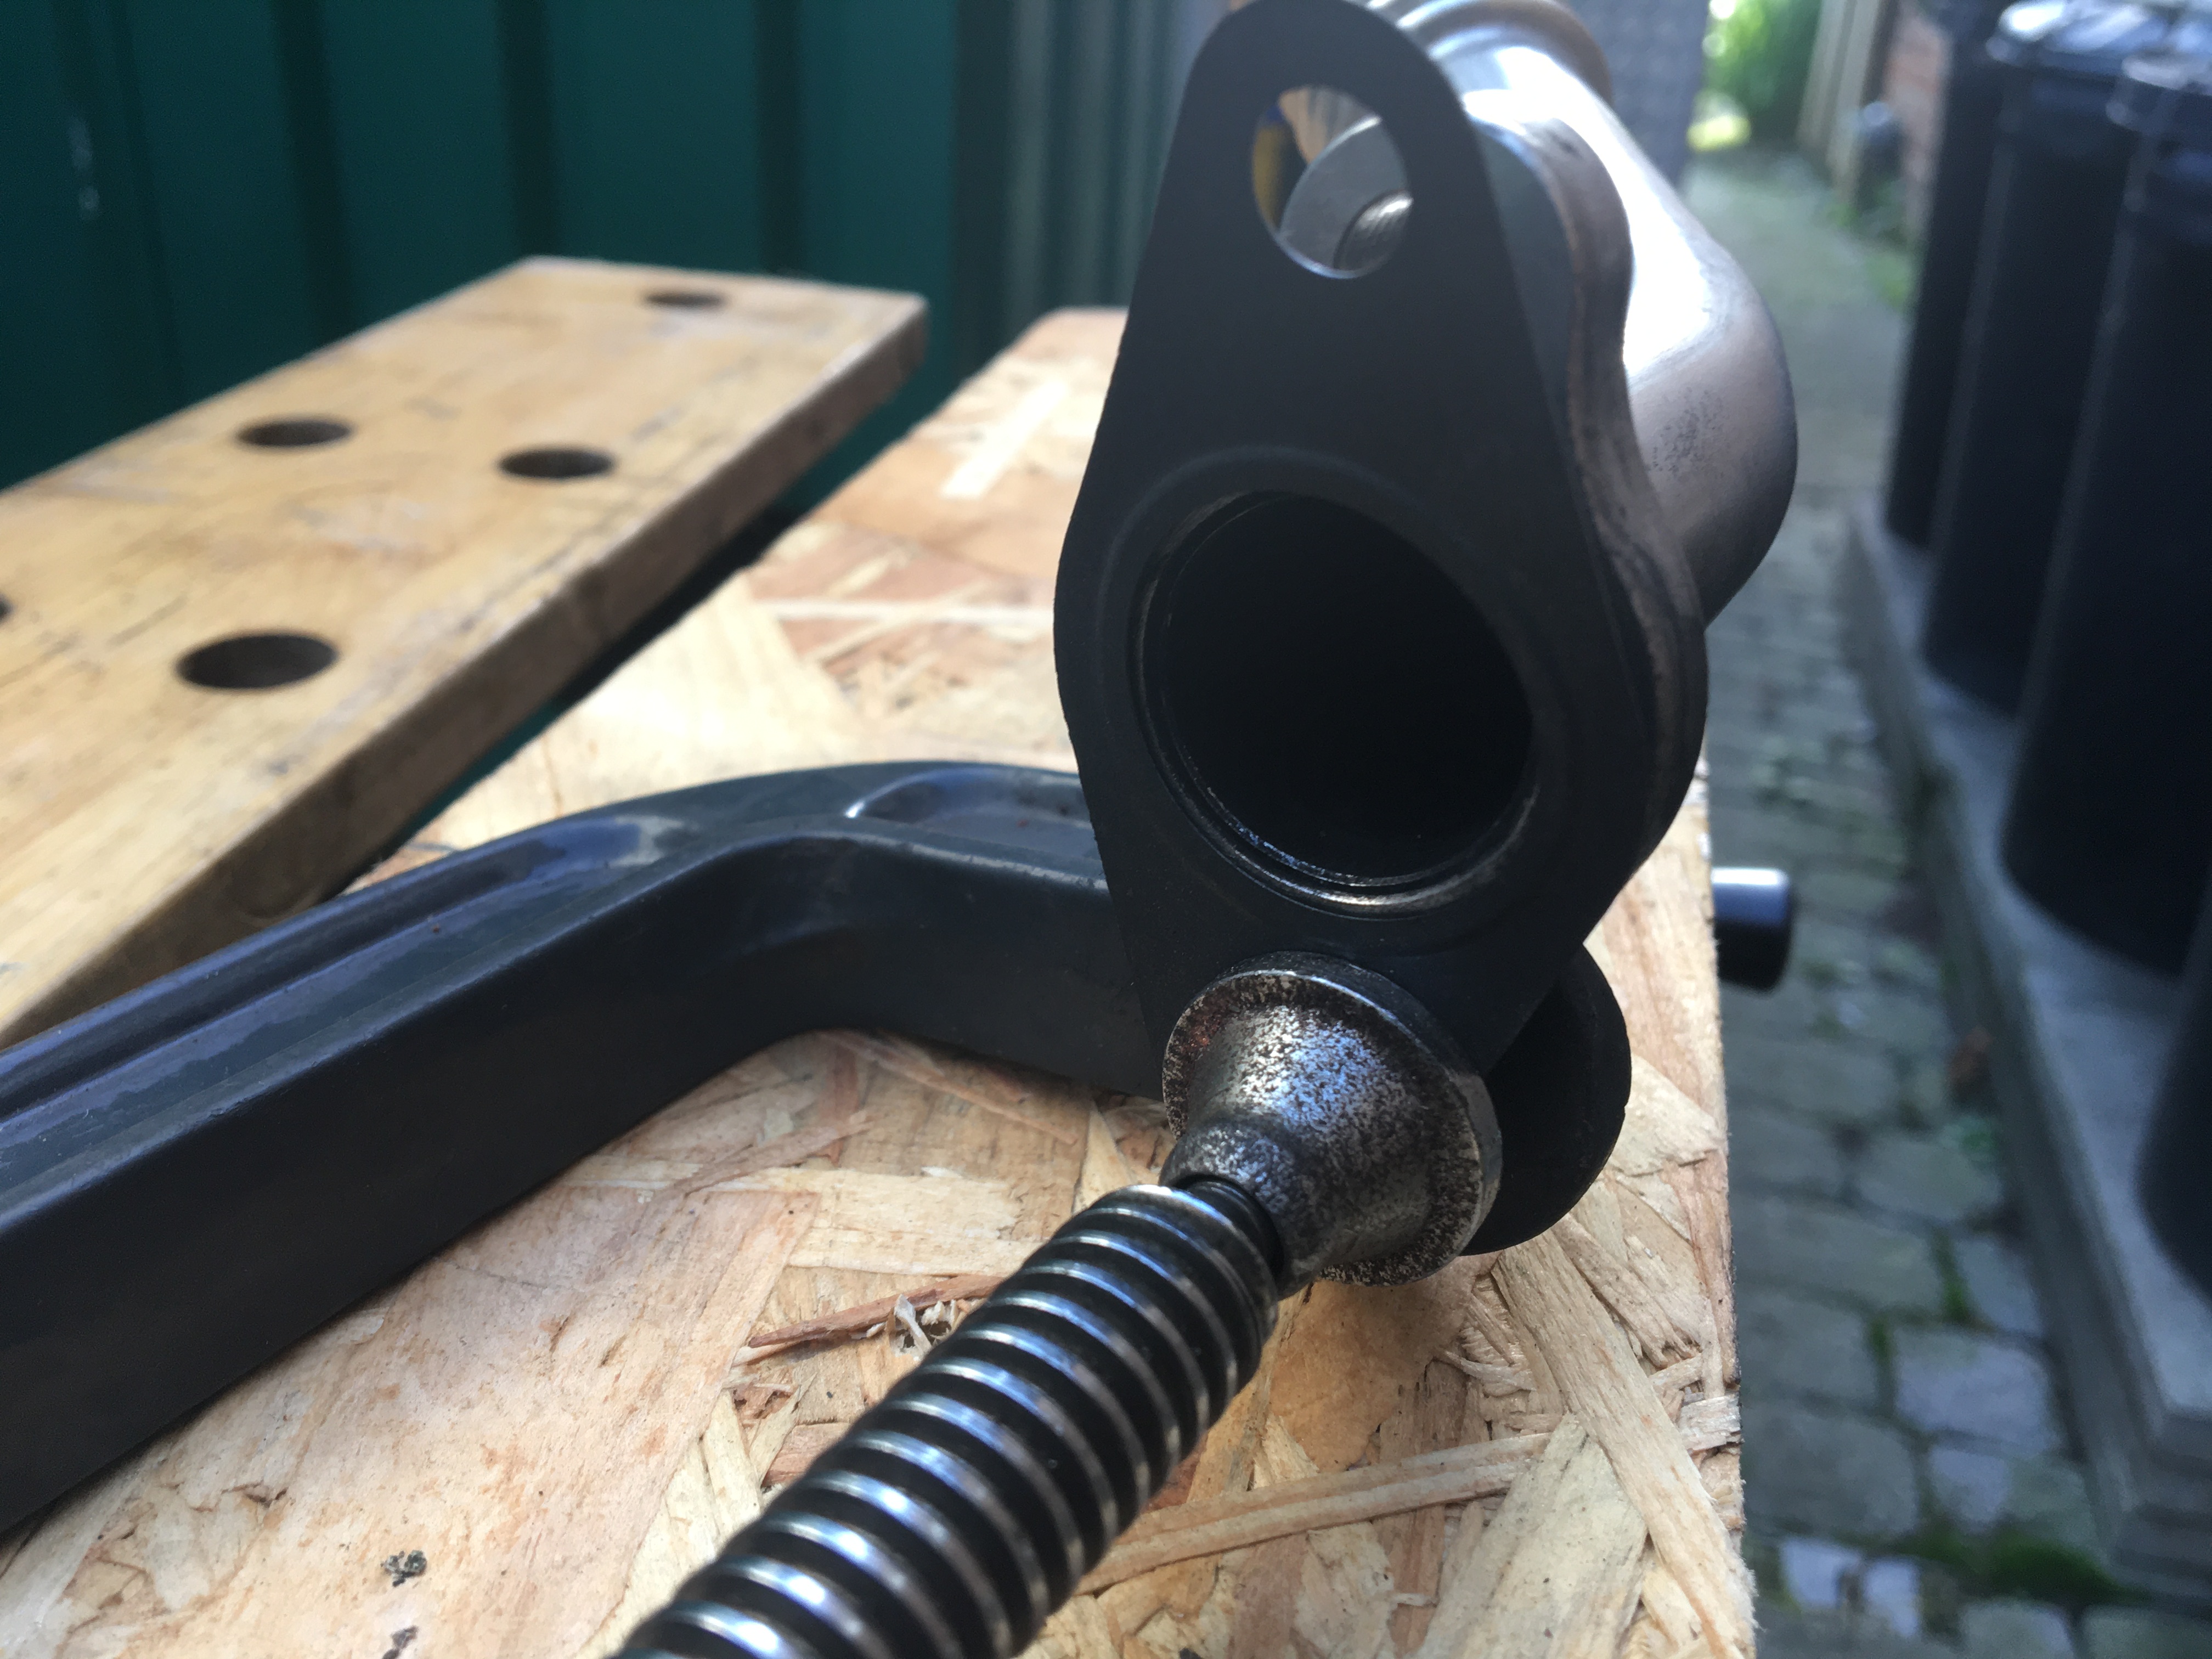
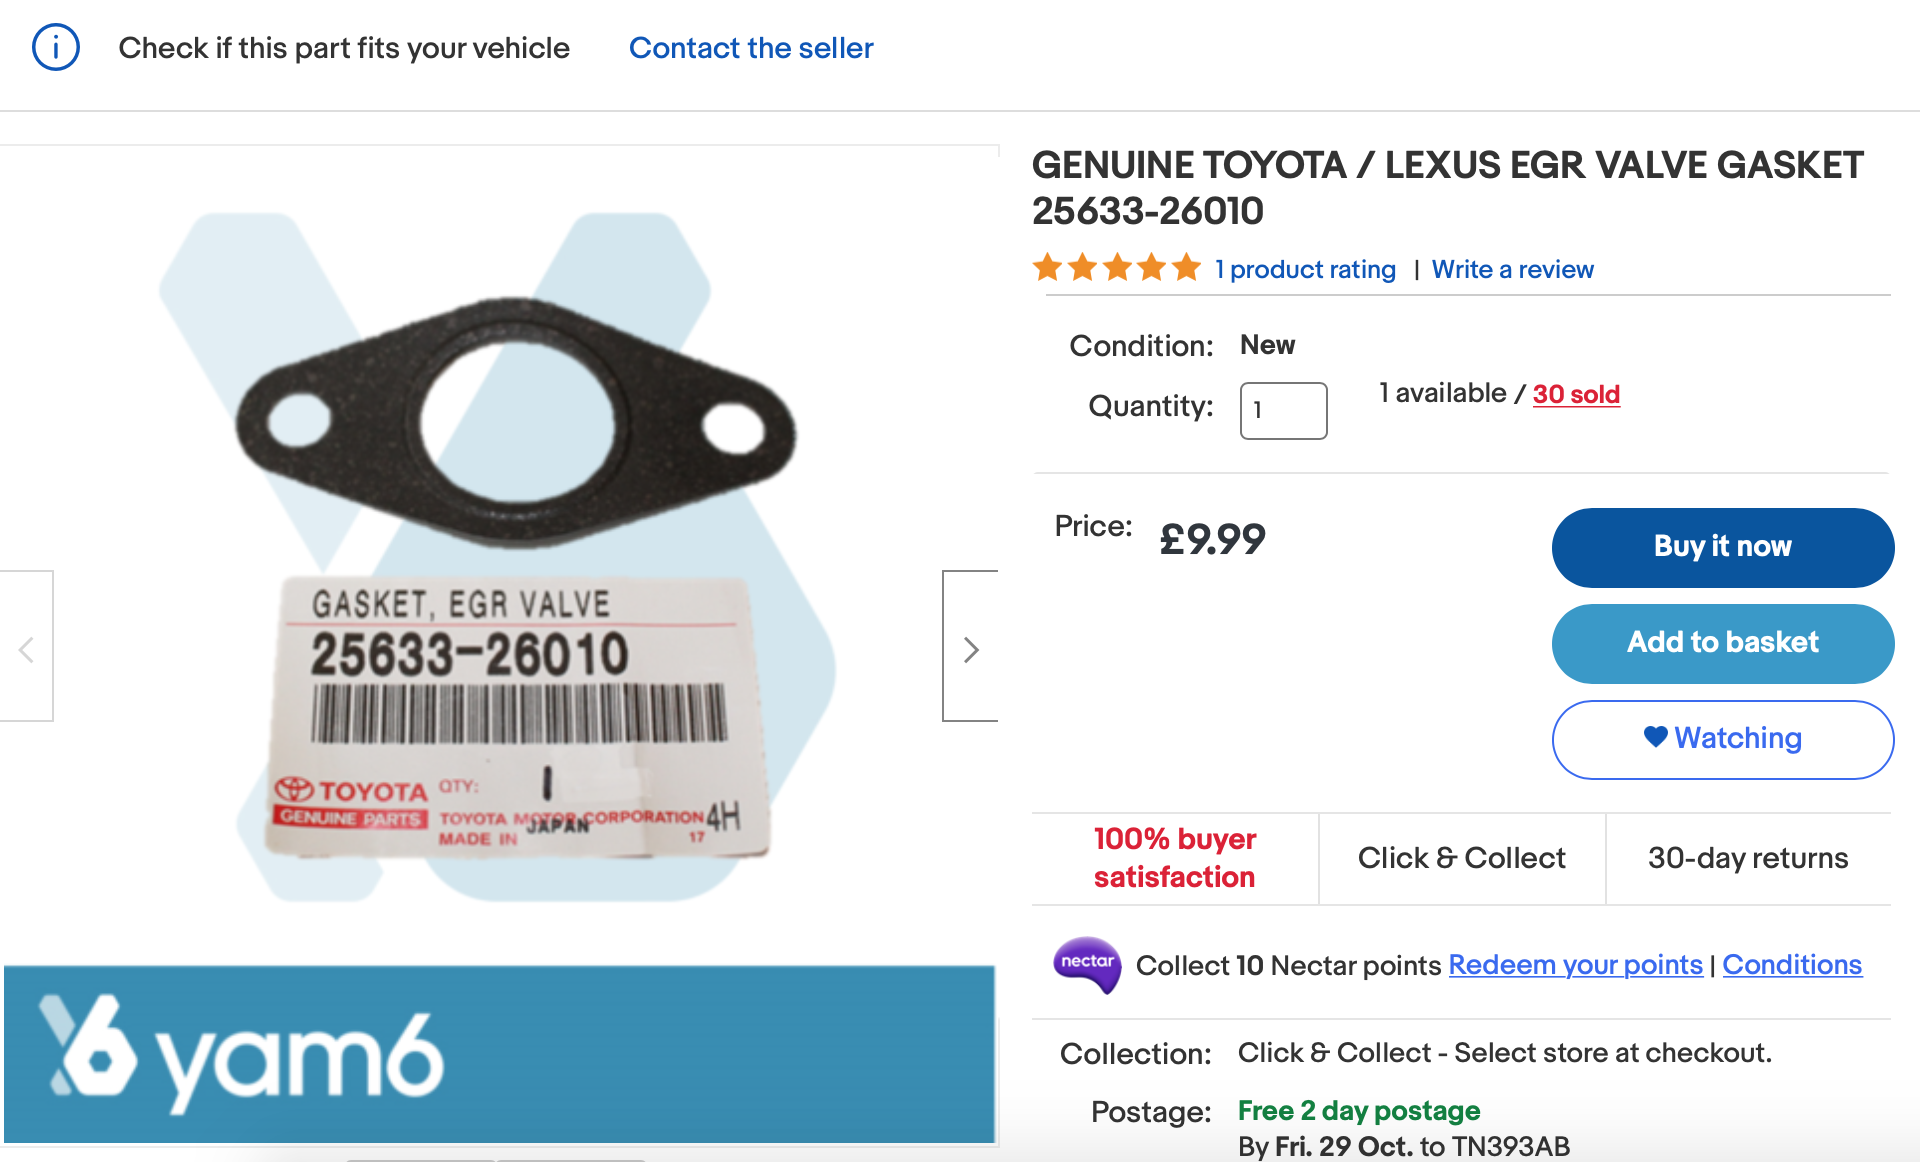
At the end of that previous post I even screen shot an image of the replacement gasket I’d found and ordered for what I considered quite a hefty price of £9.99! Anyway, gasket arrived but car was busy until this last Sunday when both car was available and weather favourable (yes I’m a wimp and have to work outside) for fitment, 1/2 hour, maybe one hour max? – Wrong! See below;
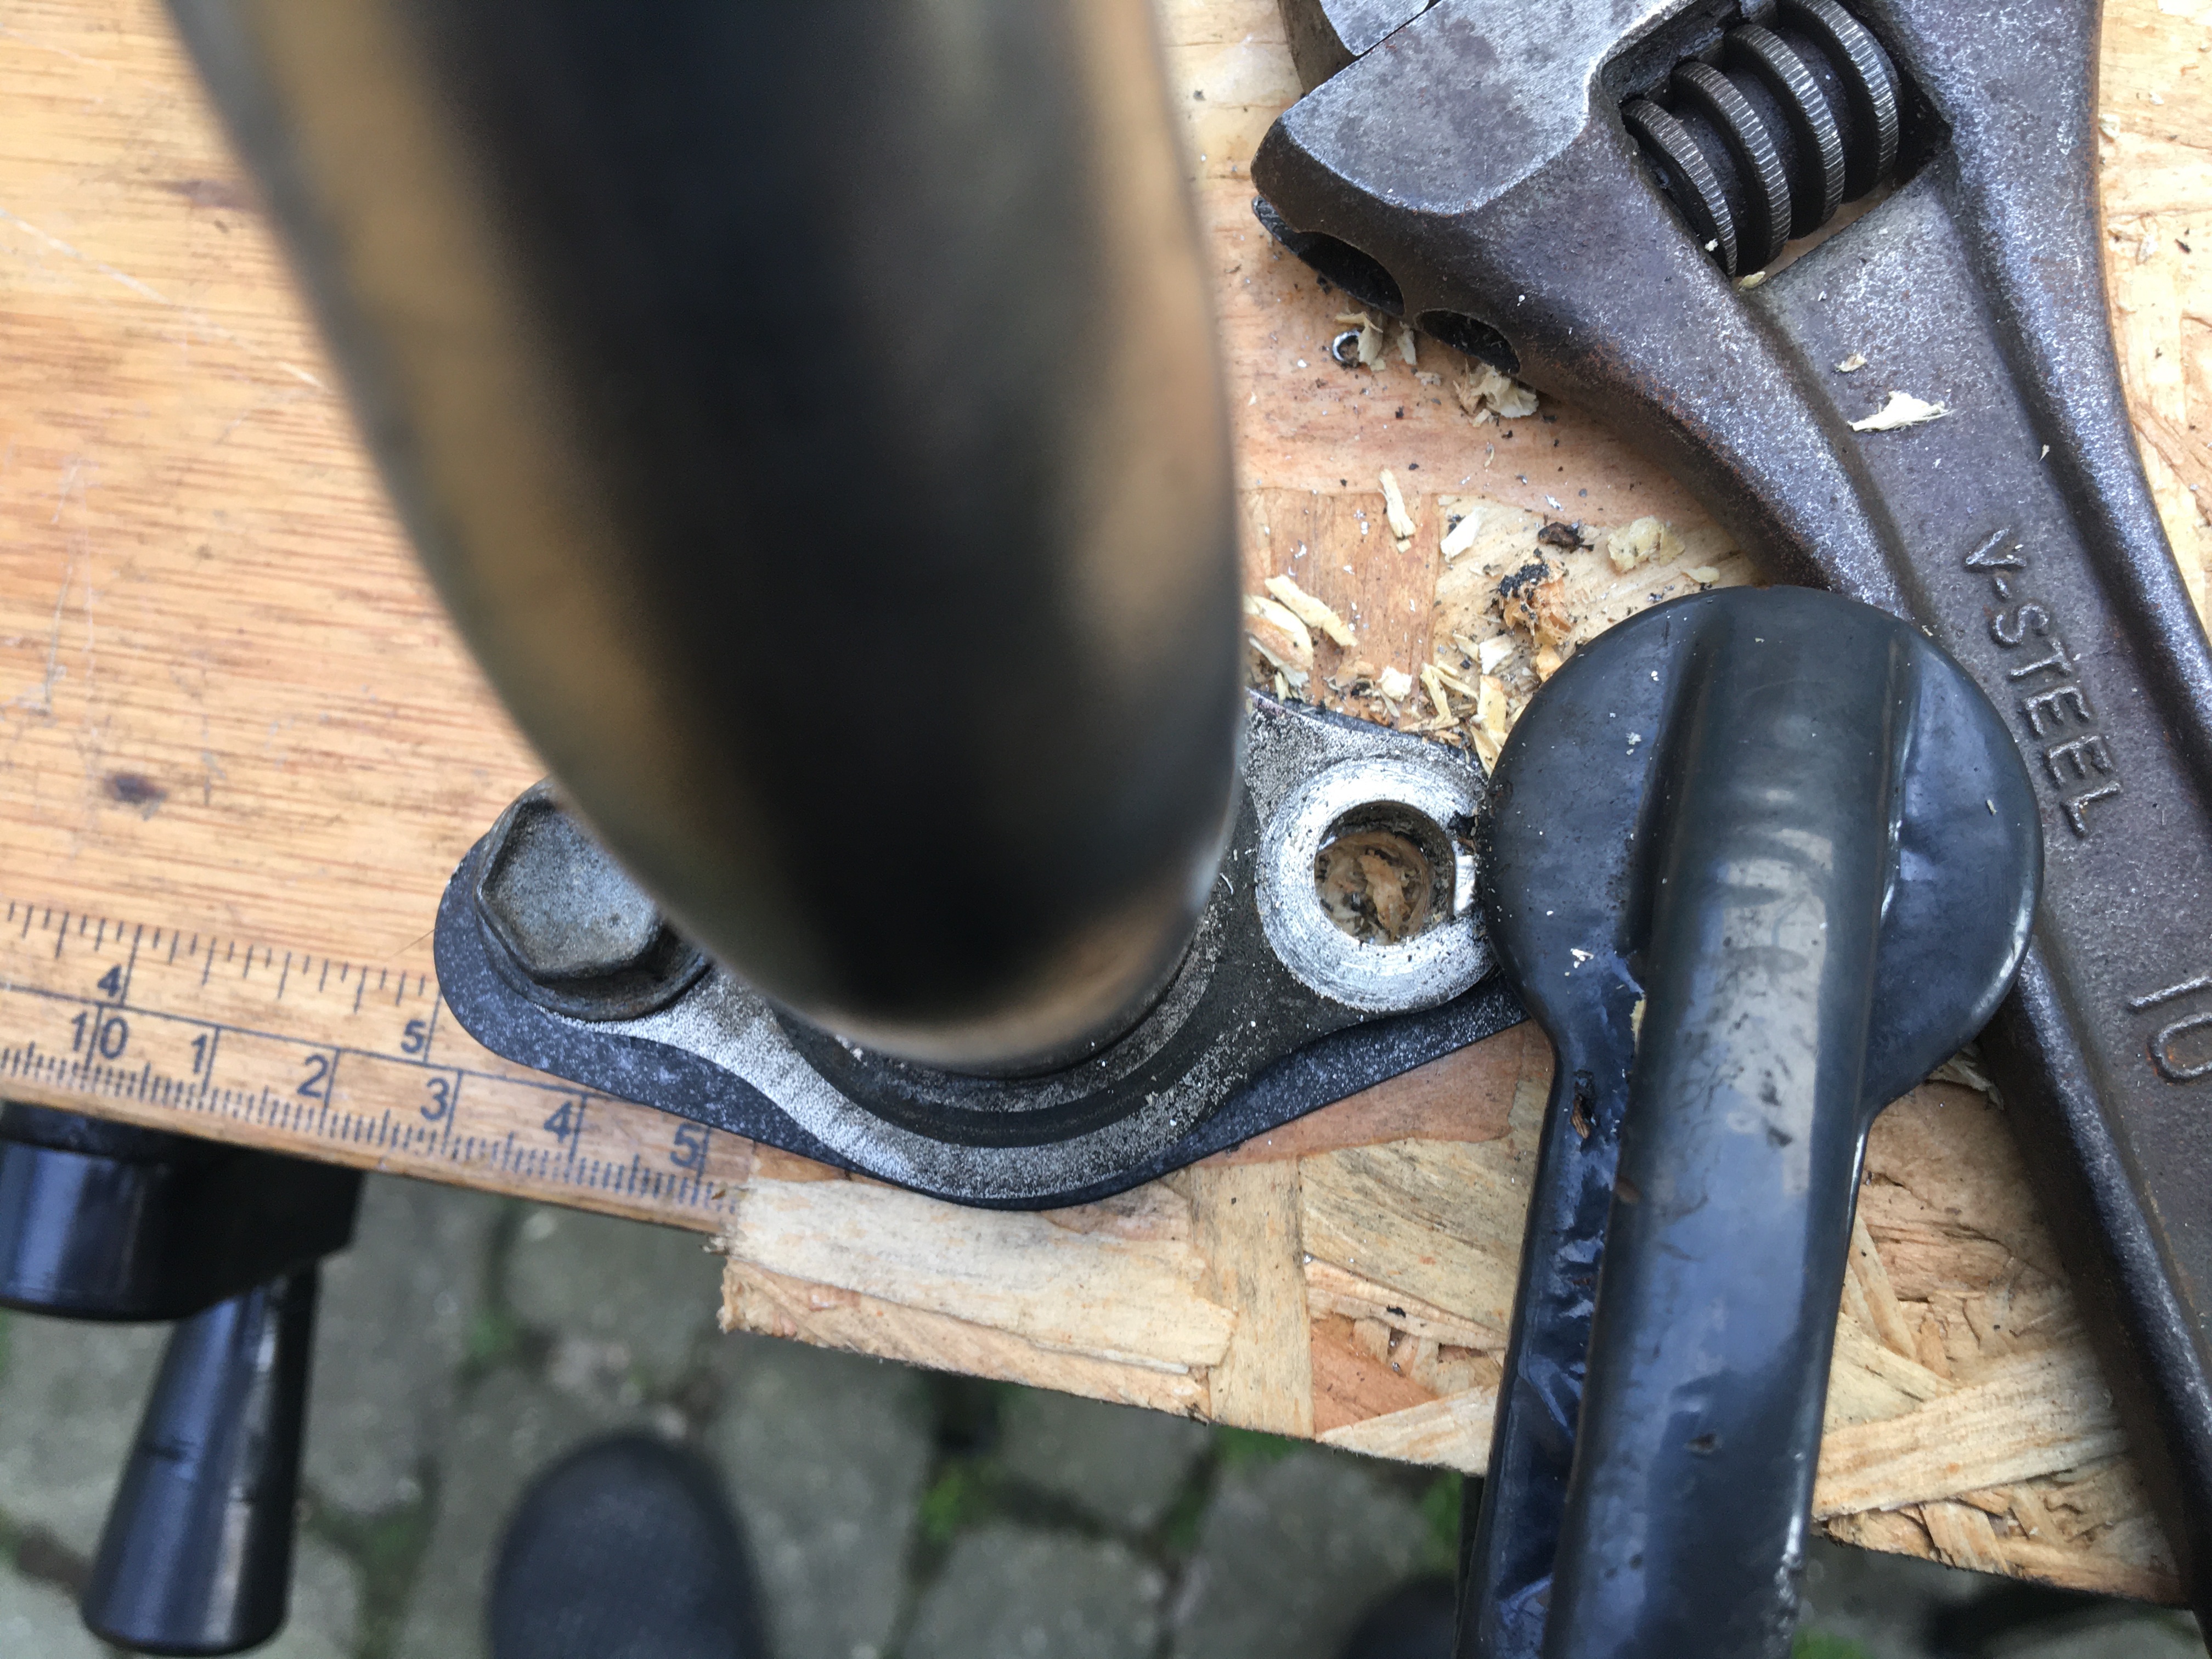
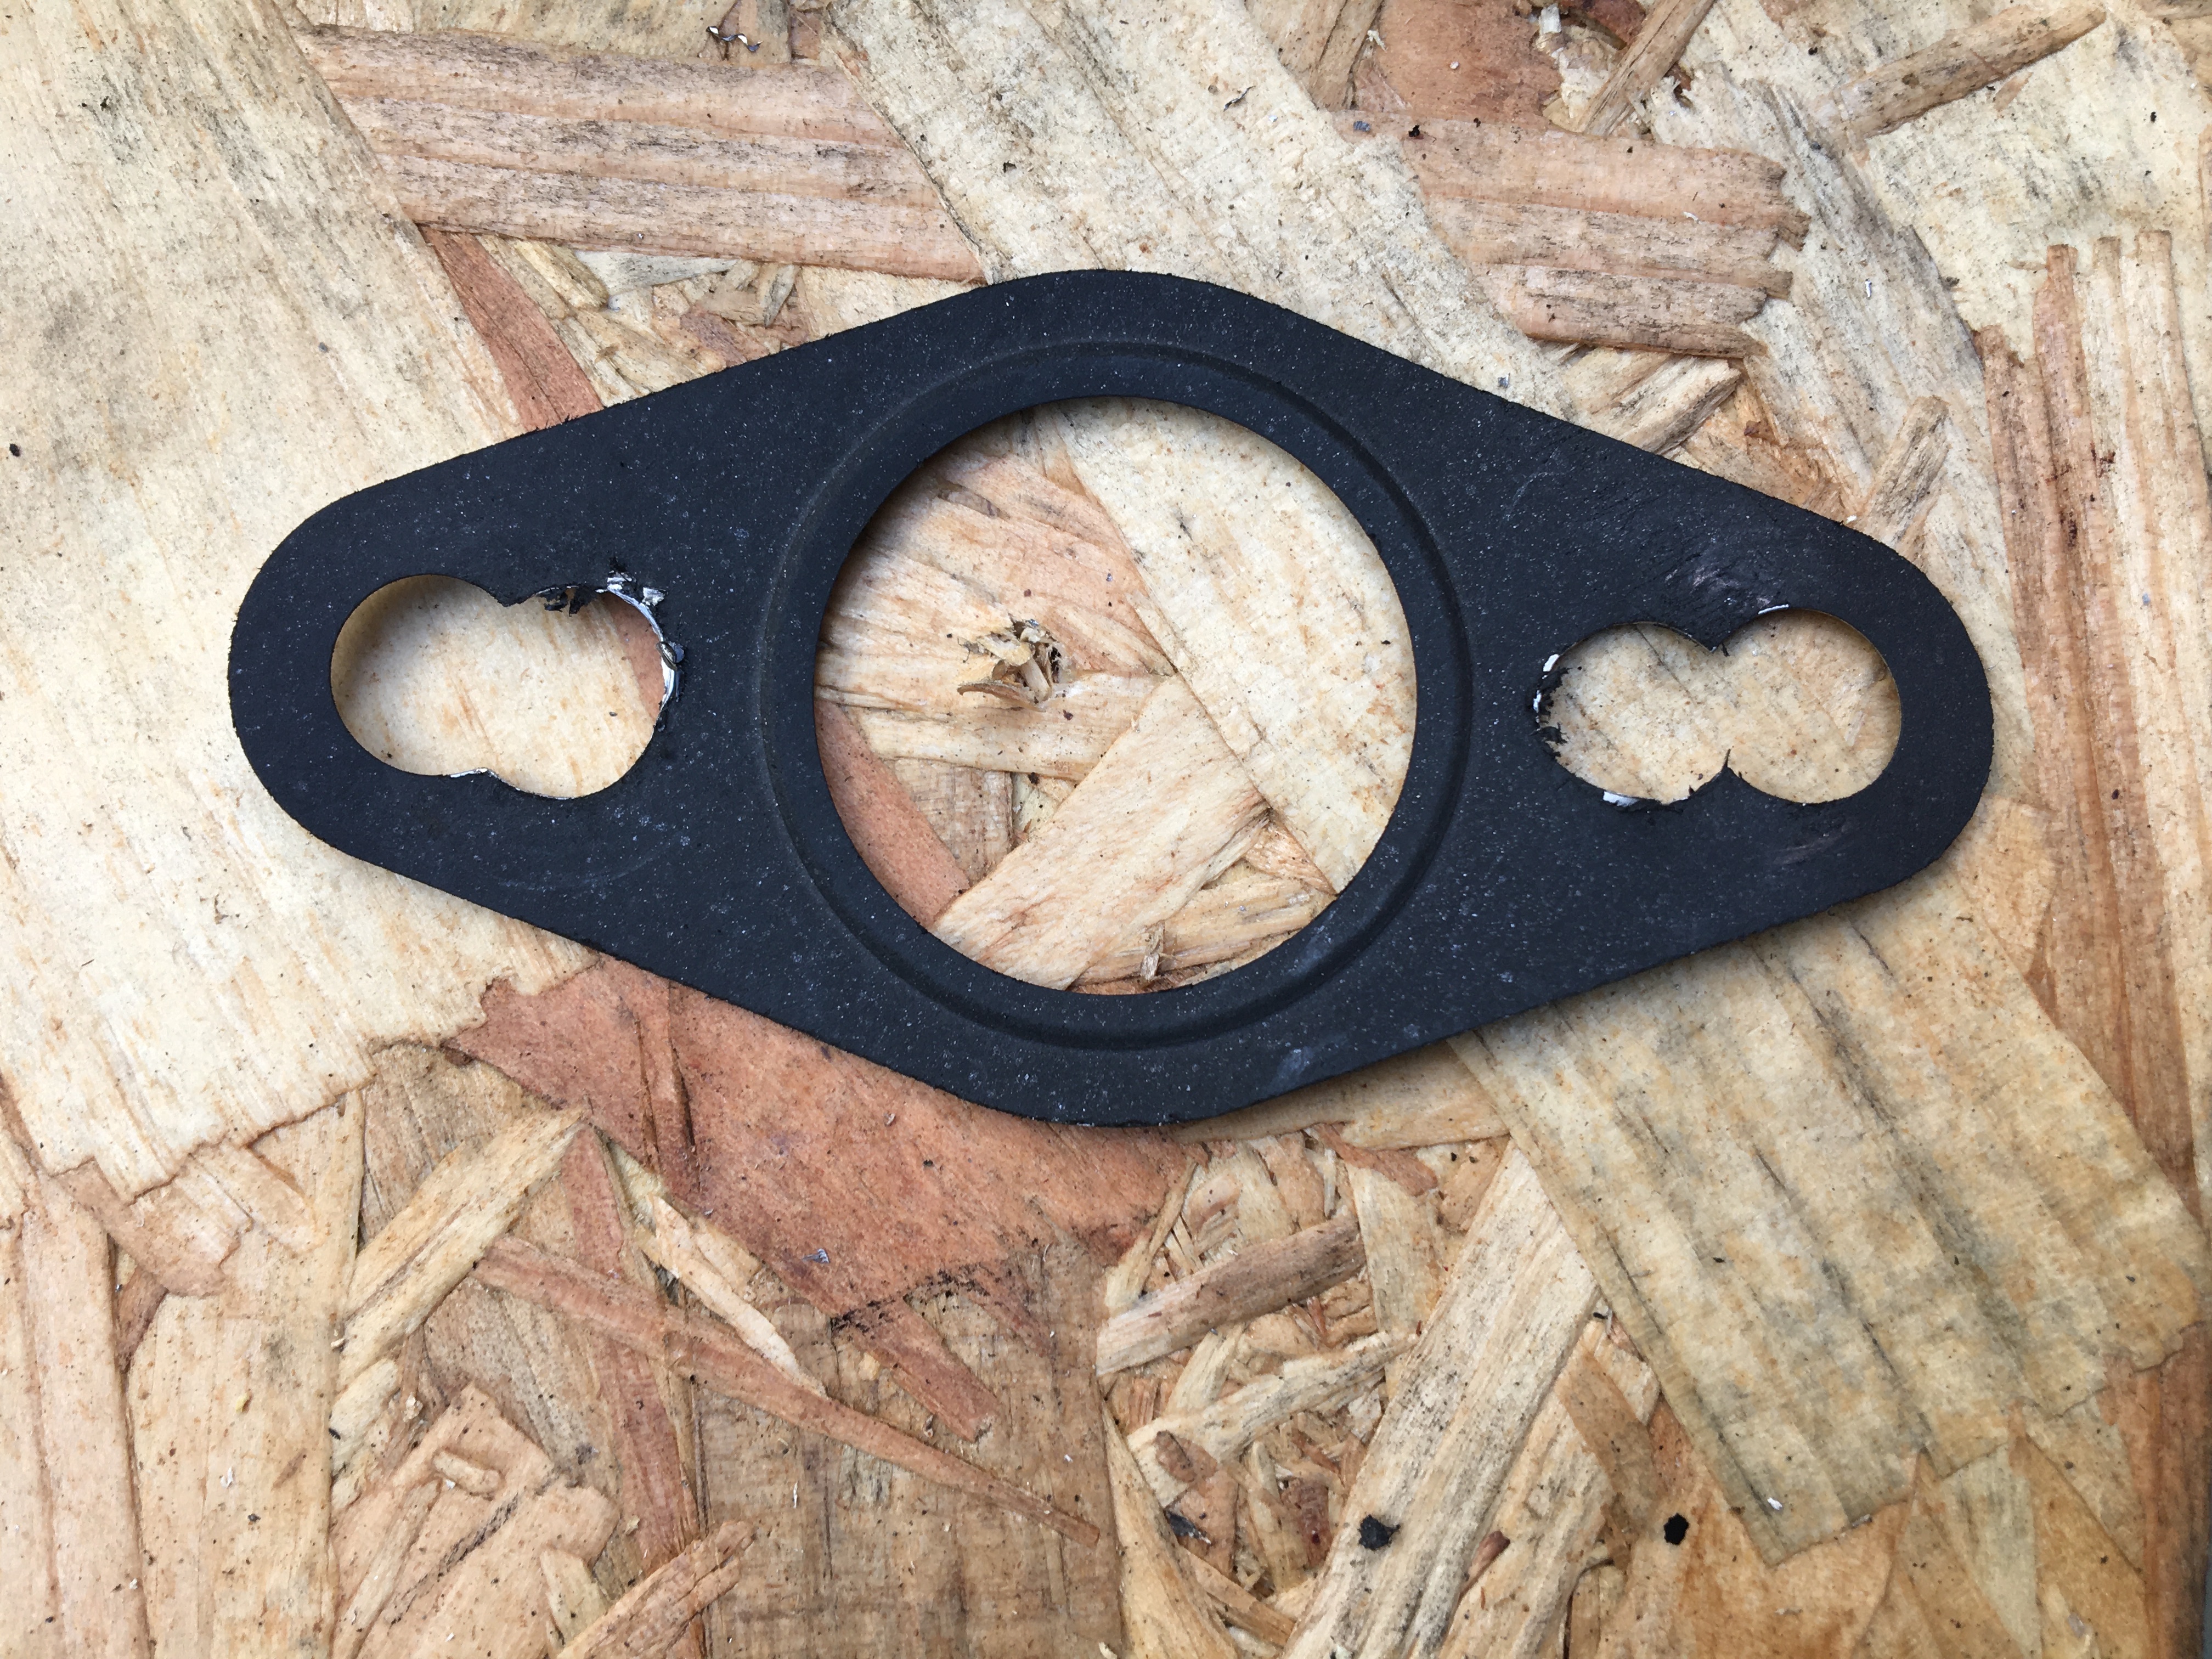
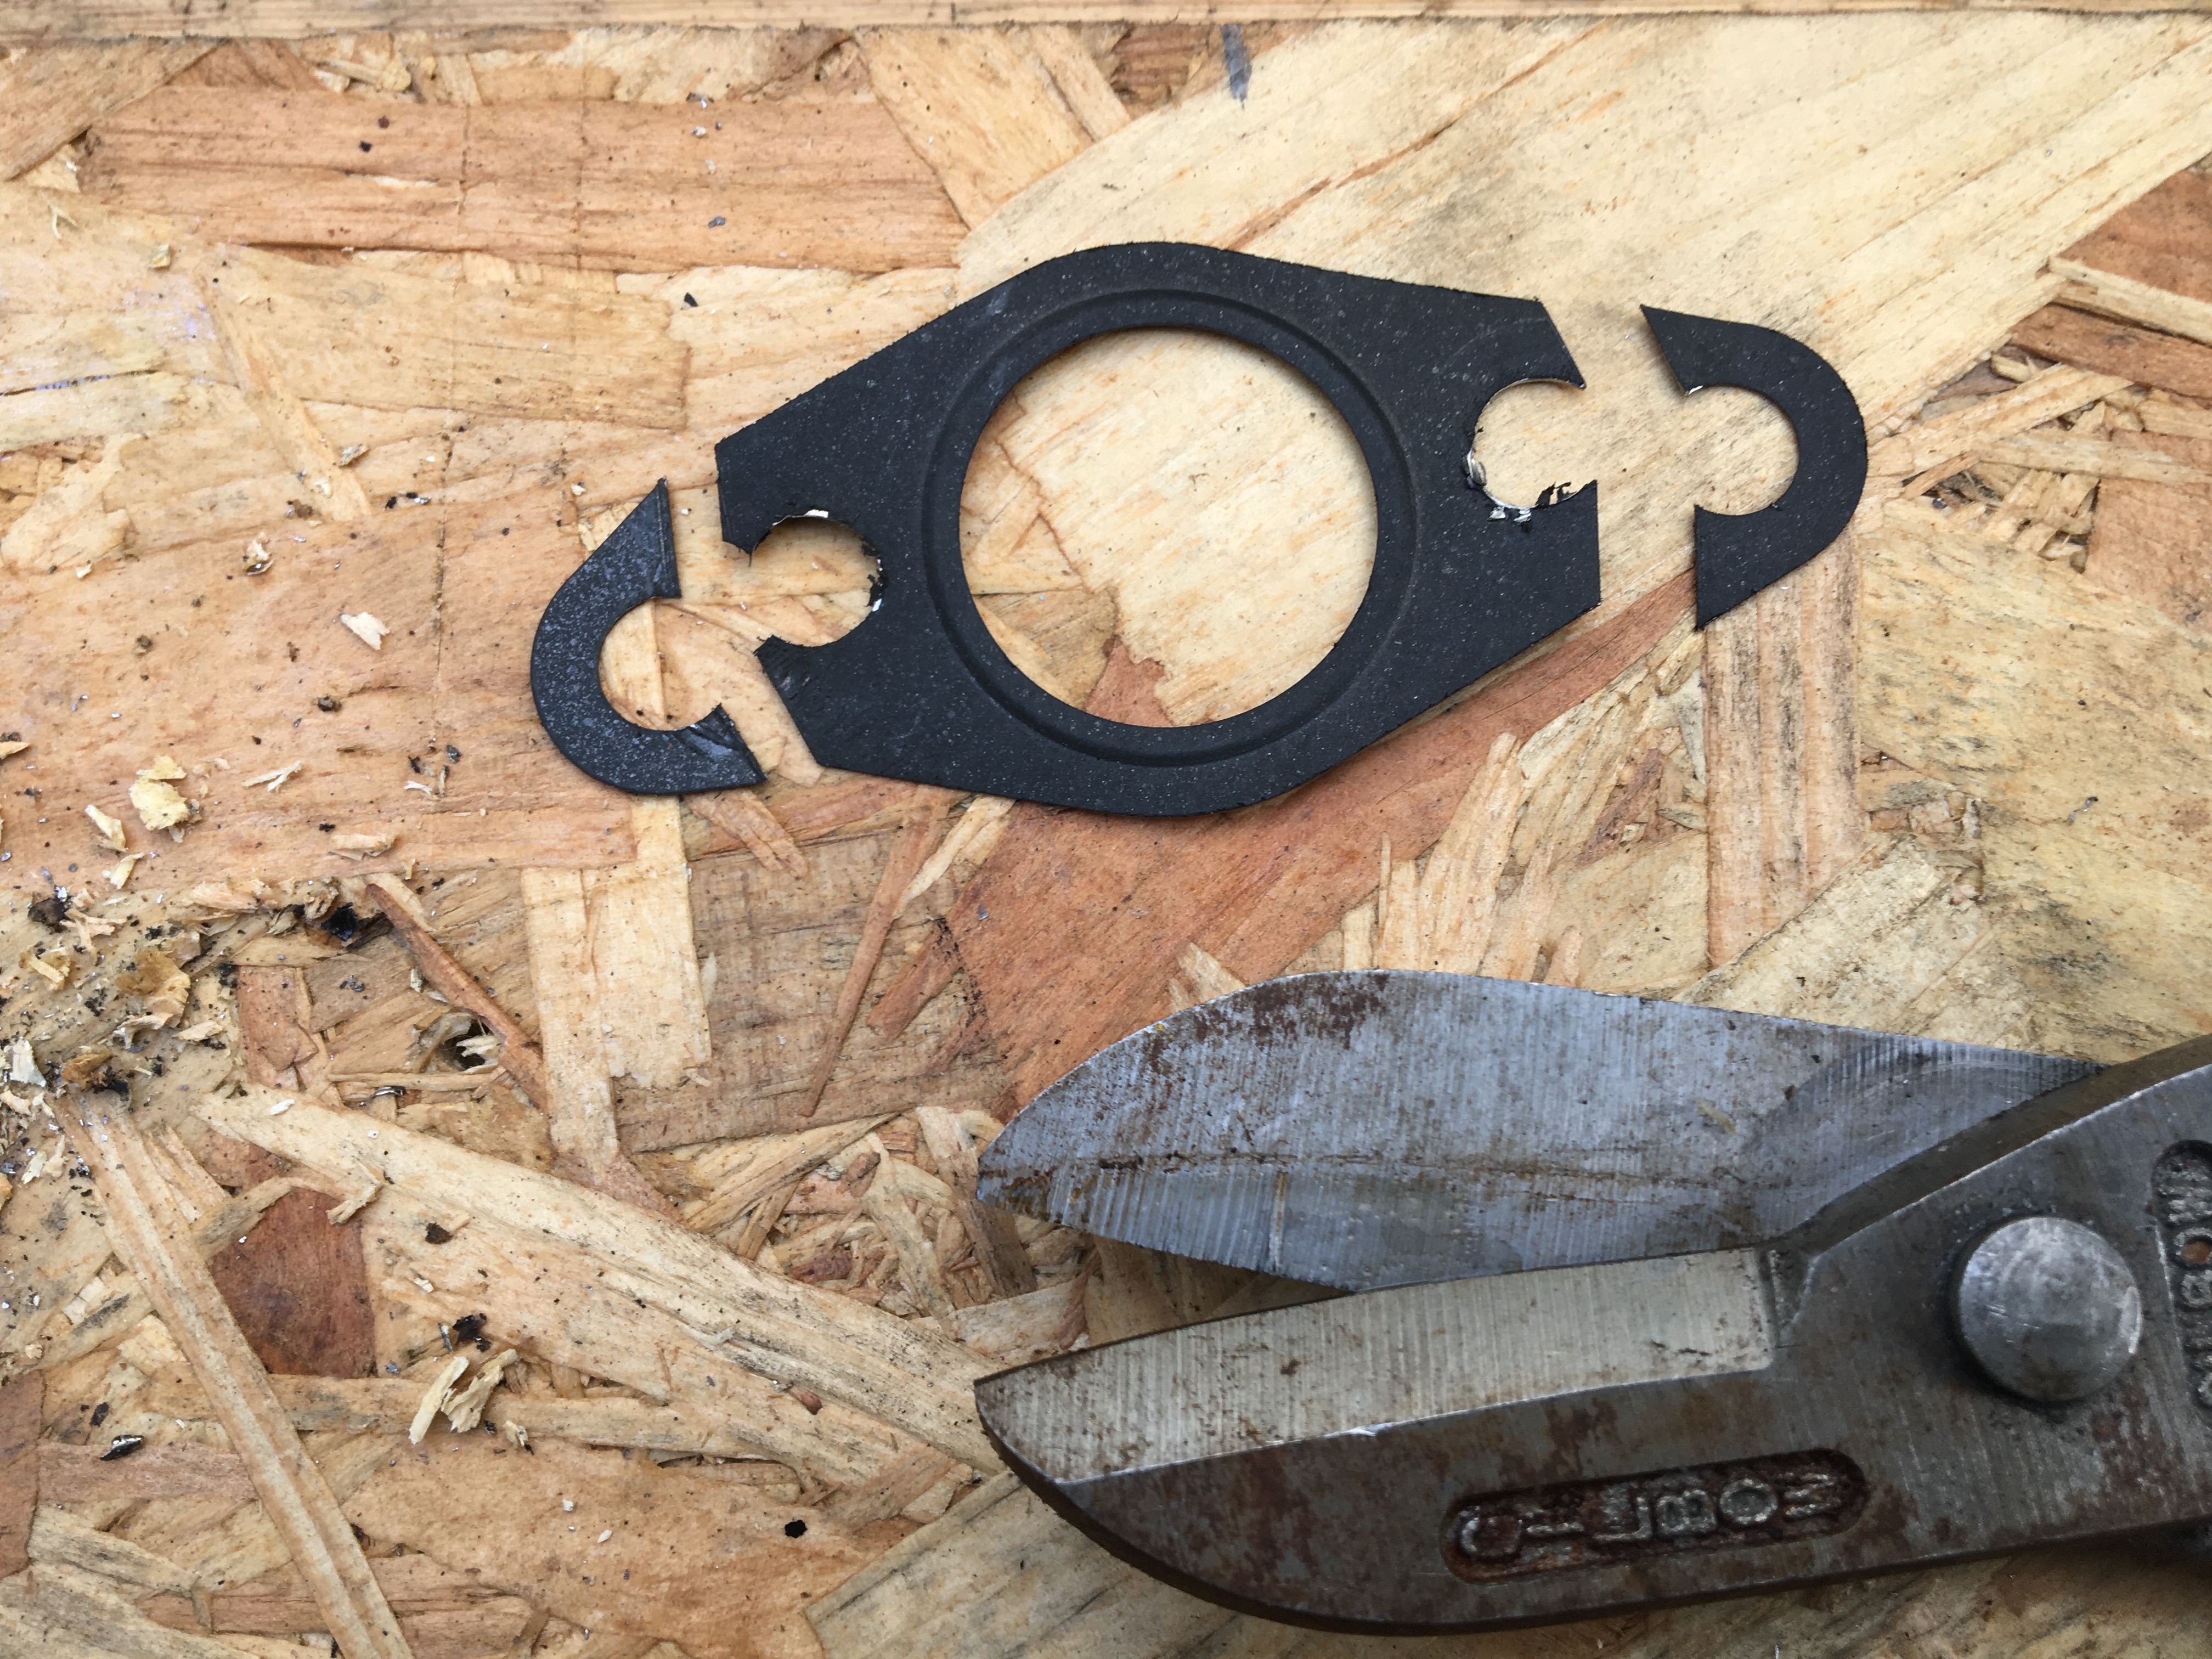
Spot the problem? Gasket is the right material, thickness and most importantly – the centre hole diameter is correct. The problem is the pitch of the 2 outside holes which the clamping bolts pass through. In fact this gasket is correct for the other end of the connecting manifold, I ordered wrong, my bad!I set about improvising a clamping arrangement to locate the gasket in the correct position so that I could use the clear bolt hole as a makeshift ‘jig’ and re-drill the clamping hole.The gasket is in fact steel with some sort of sealing/fibre coating. Here it is after successfully re-drilling and re-positioning the first bolt clearance hole, 8.5mm diameter. Using the first re-drilled hole I clamped the gasket to the manifold pipe so as to locate it correctly for the 2nd drilling operation …… Using my trusty G-Clamp, a work mate bench, scrap wood and battery drill I proceeded to re-drill the 2nd bolt hole, again using the manifold pipe itself as a makeshift ‘jig’.So here is the successfully modified gasket with bolt clearance holes now at the correct pitch. Not pretty but fully functional. I was hoping to be able to leave it in this form when re-fitting as the excess ‘ears’ would have been useful to hold the gasket in place while positioning the manifold and inserting the clamping bolts – but alas there was insufficient clearance so it was back to the tool shed for another modification …… Out with the tin snips and OFF with those excess ‘ears’! And here it is back in place, clamped, but most importantly ‘functional’.
When I was ‘on my tools’ in Heavy Engineering working as a Millwright, we used to say “the art of our trade was not when things went right, but how we overcame and resolved issues when things didn’t go right“. The little episode above reminded of that saying.
Please note: No Green ‘Recycling Wheelie Bins’ were harmed during the execution of this DIY Car Maintenance session 😉
The dreaded ‘Engine Fault‘ light that tells you nothing apart from “Brace yourself for an automotive industry scam that could relieve you of a a huge wad of £CASH£, because the nondescript ‘Engine Fault’ light commands you to seek ‘Professional‘ advice ASAP!
Your friendly local garage will then charge you anything from £25 – £45 to ‘Plug in the special Computer‘ and diagnose the fault. You then find yourself at the mercy of ‘Mr mechanic’s interpretation of whatever highly technical data only he and his specialist diagnosis tools have been privy to!
The great Automotive Industry Scam – The Engine Fault Dashboard Warning Light!
Our family car is a 2007 Toyota Corolla Verso, Diesel 2.2 litre ‘D4D’, with over 100,000 miles on the clock. We’ve owned it since 2015, 48,000 miles and at around £5,500.00 purchased from a local dealer, the most expensive and youngest car we’ve ever bought!
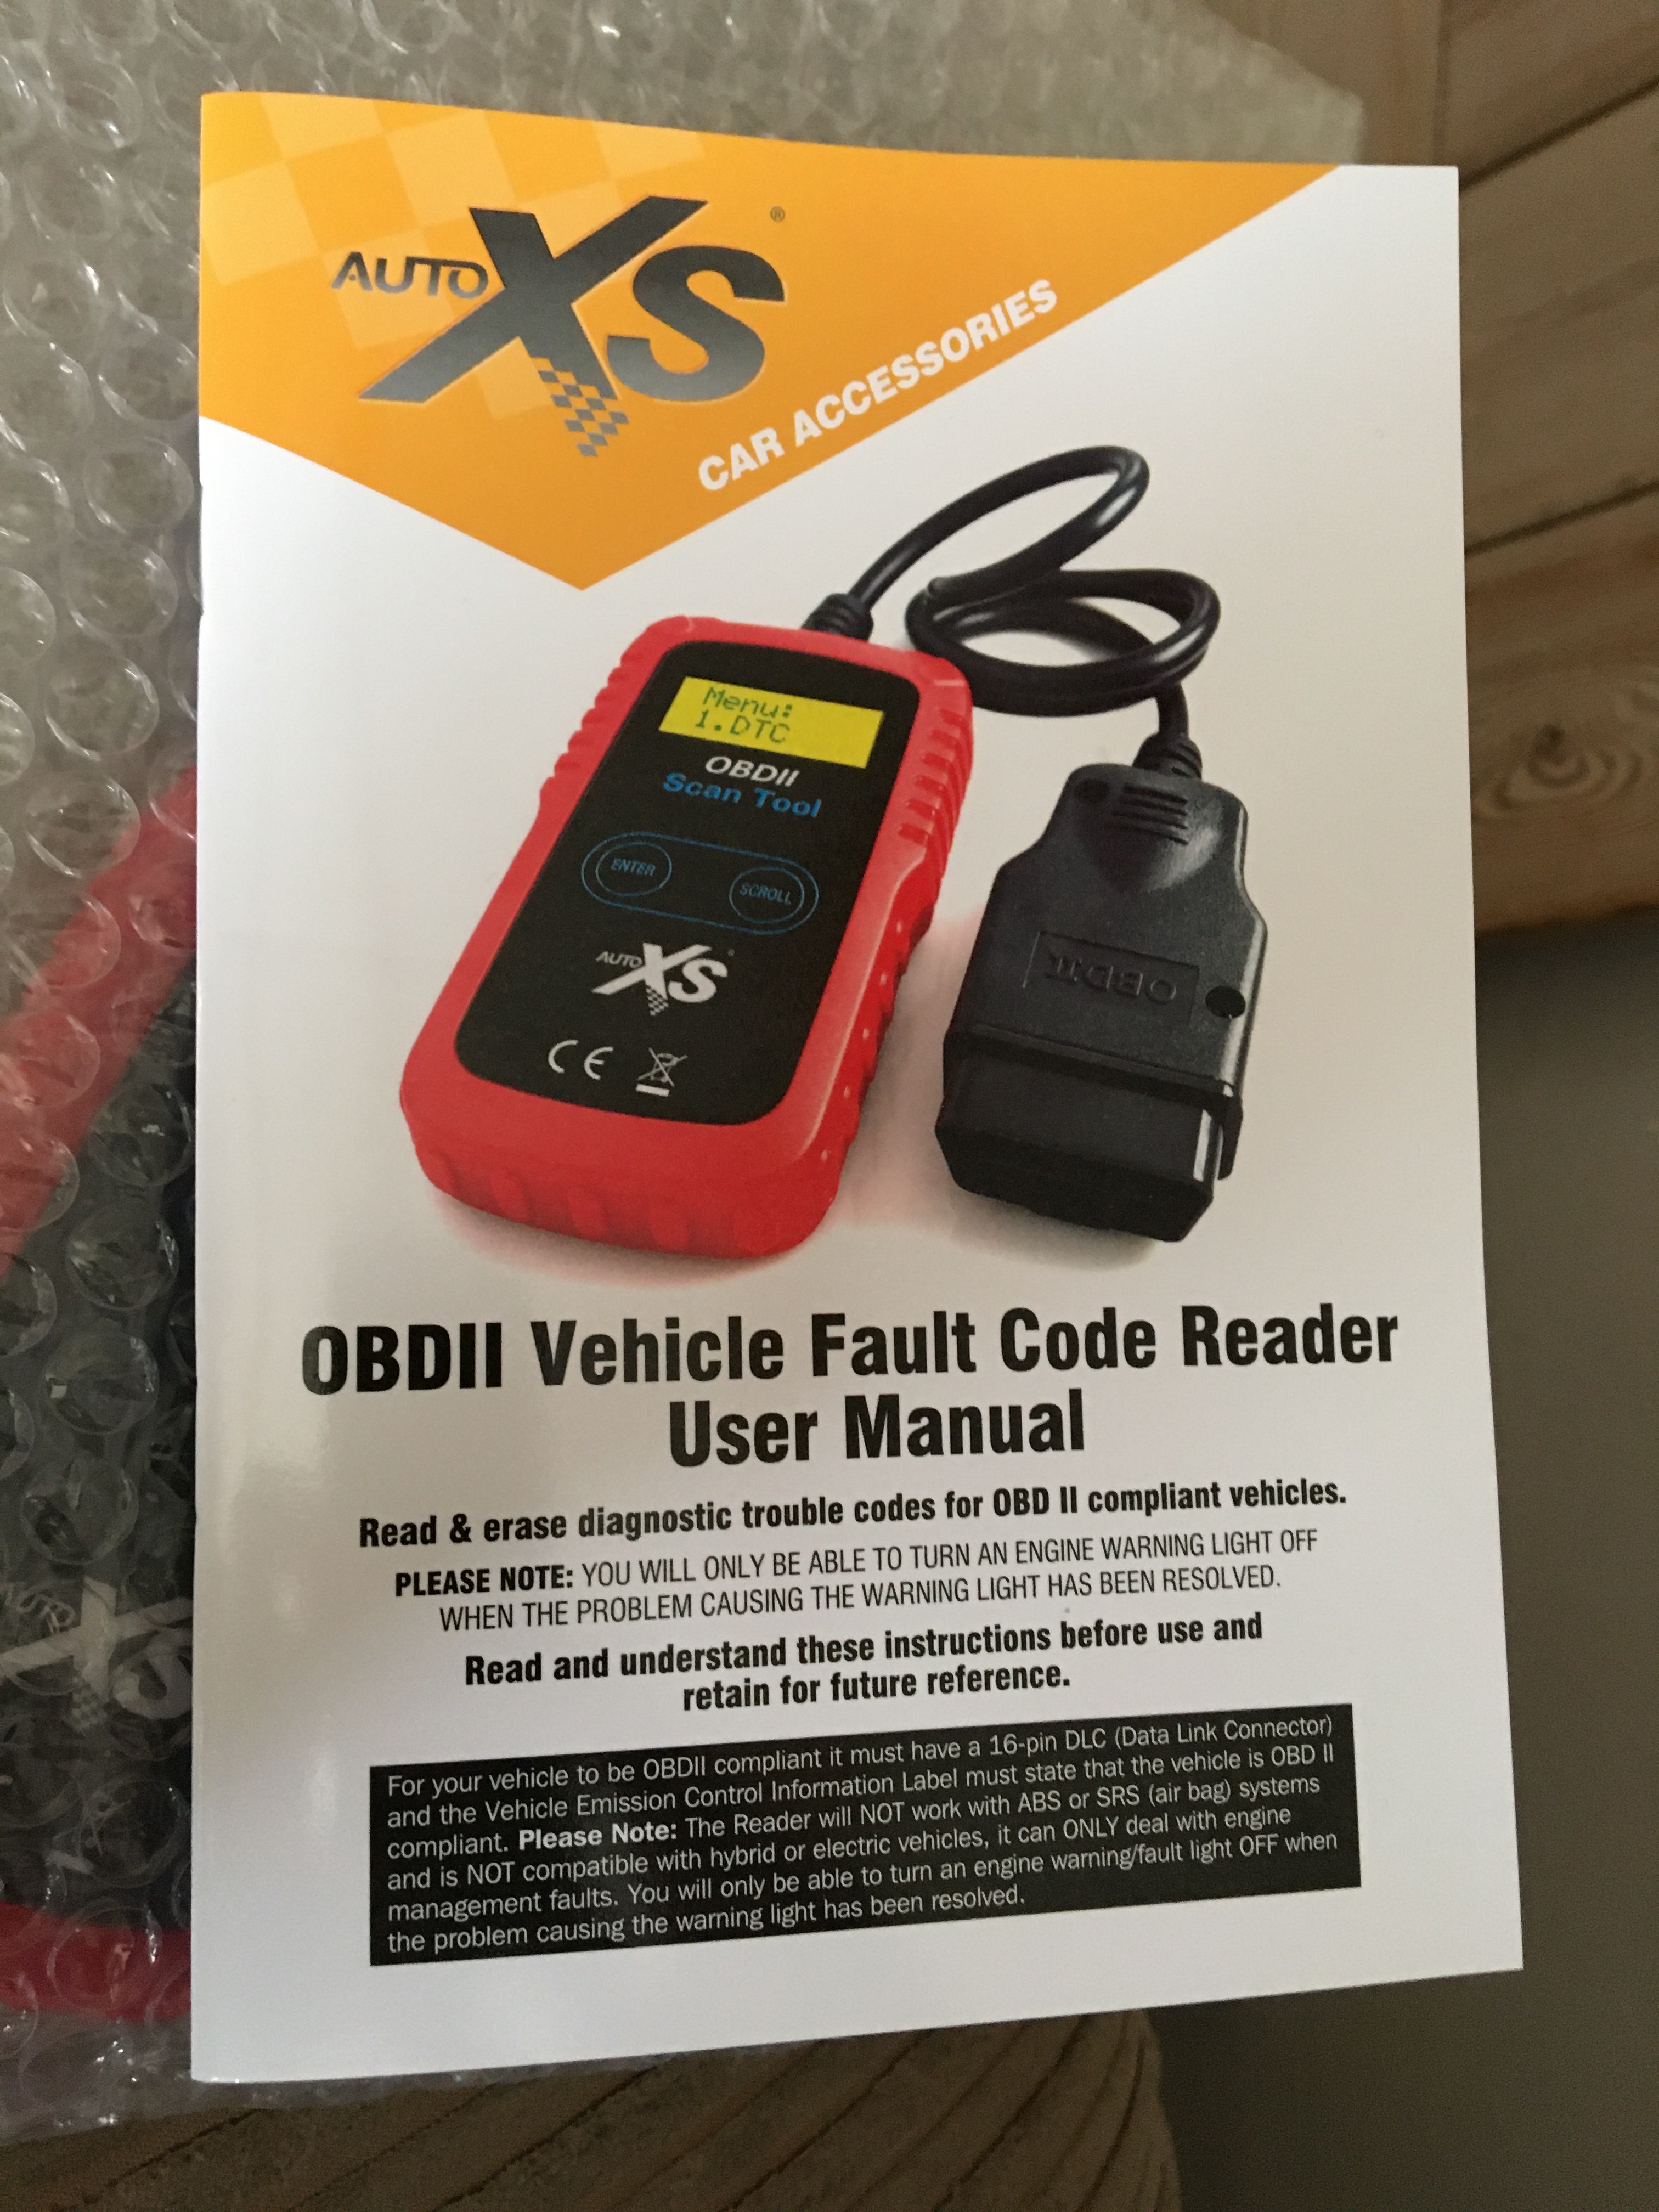
I wrote in a previous post about the mindful, ‘Zen’ like qualities of DIY Car Maintenance – and certainly, this past year alone I have saved many £000’s by carrying out my own servicing, brake replacement and other fault finding and repairs. About 6 months or so ago, I saw and purchased the OBDII gadget below from ALDI’s on-line portal, I thought at the time, this is probably a waste of £15.99 but hey, it might just come in handy?
£15.99, ALDI and may have just paid for itself many times over
….So, the gadget above sat in my tool shed for a few months waiting for one of my families 3 old cars to present the dreaded ‘Engine Fault’ instrument cluster warning light! Then a few days ago in the Toyota Corolla mentioned above, while nearing the end of a 120 mile round trip – ON comes said warning light along with belches of black exhaust smoke and reduced engine performance … Oh SHIT!
Next day, in daylight, I plugged in the yet unused OBDII gadget, followed the instructions, and Error Code ‘P0400’ presented itself along with ‘P0400 P’ (See Below)
The cheap & cheerful gadget came with a booklet of error codes and their meanings. As you can see from below ‘P0400’ is an EGR Flow Malfunction.
Now, I knew a little about our friend the ‘EGR’ – ‘Exhaust Gas Recirculation’ valve, because, a few years back (and without a fault code reading gadget), I reluctantly dropped the car and illuminated ‘Engine Fault’ light at my local garage of ‘Motor Engineers’, set off back home and awaited their call with diagnosis and estimated cost to rectify/repair. Nerve wracking, when there’s no budget for unexpected car repairs! When that call came it was my introduction to the term ‘EGR’ and the options of repair open to me;
(i) Replace the EGR Valve £260.00 + labour (unspecified) or (ii) Remove and attempt to clean out the EGR Valve, about £150.00 labour & sundries.
So I went for option (ii), collected the car next day, thanked Mr mechanic for saving me over £100.00 blah, blah … no more warning light and the car seemed to be running fine. Result, of sorts, Hmmm.
This time however I had my own diagnosis and error code. Half an hour’s ‘Googling’ and an excellent amateur YouTube video later, I was ready to once again practice ‘Zen and the Art of DIY Car Maintenance’, documented below in the form of iPhone photographs taken during the exercise …
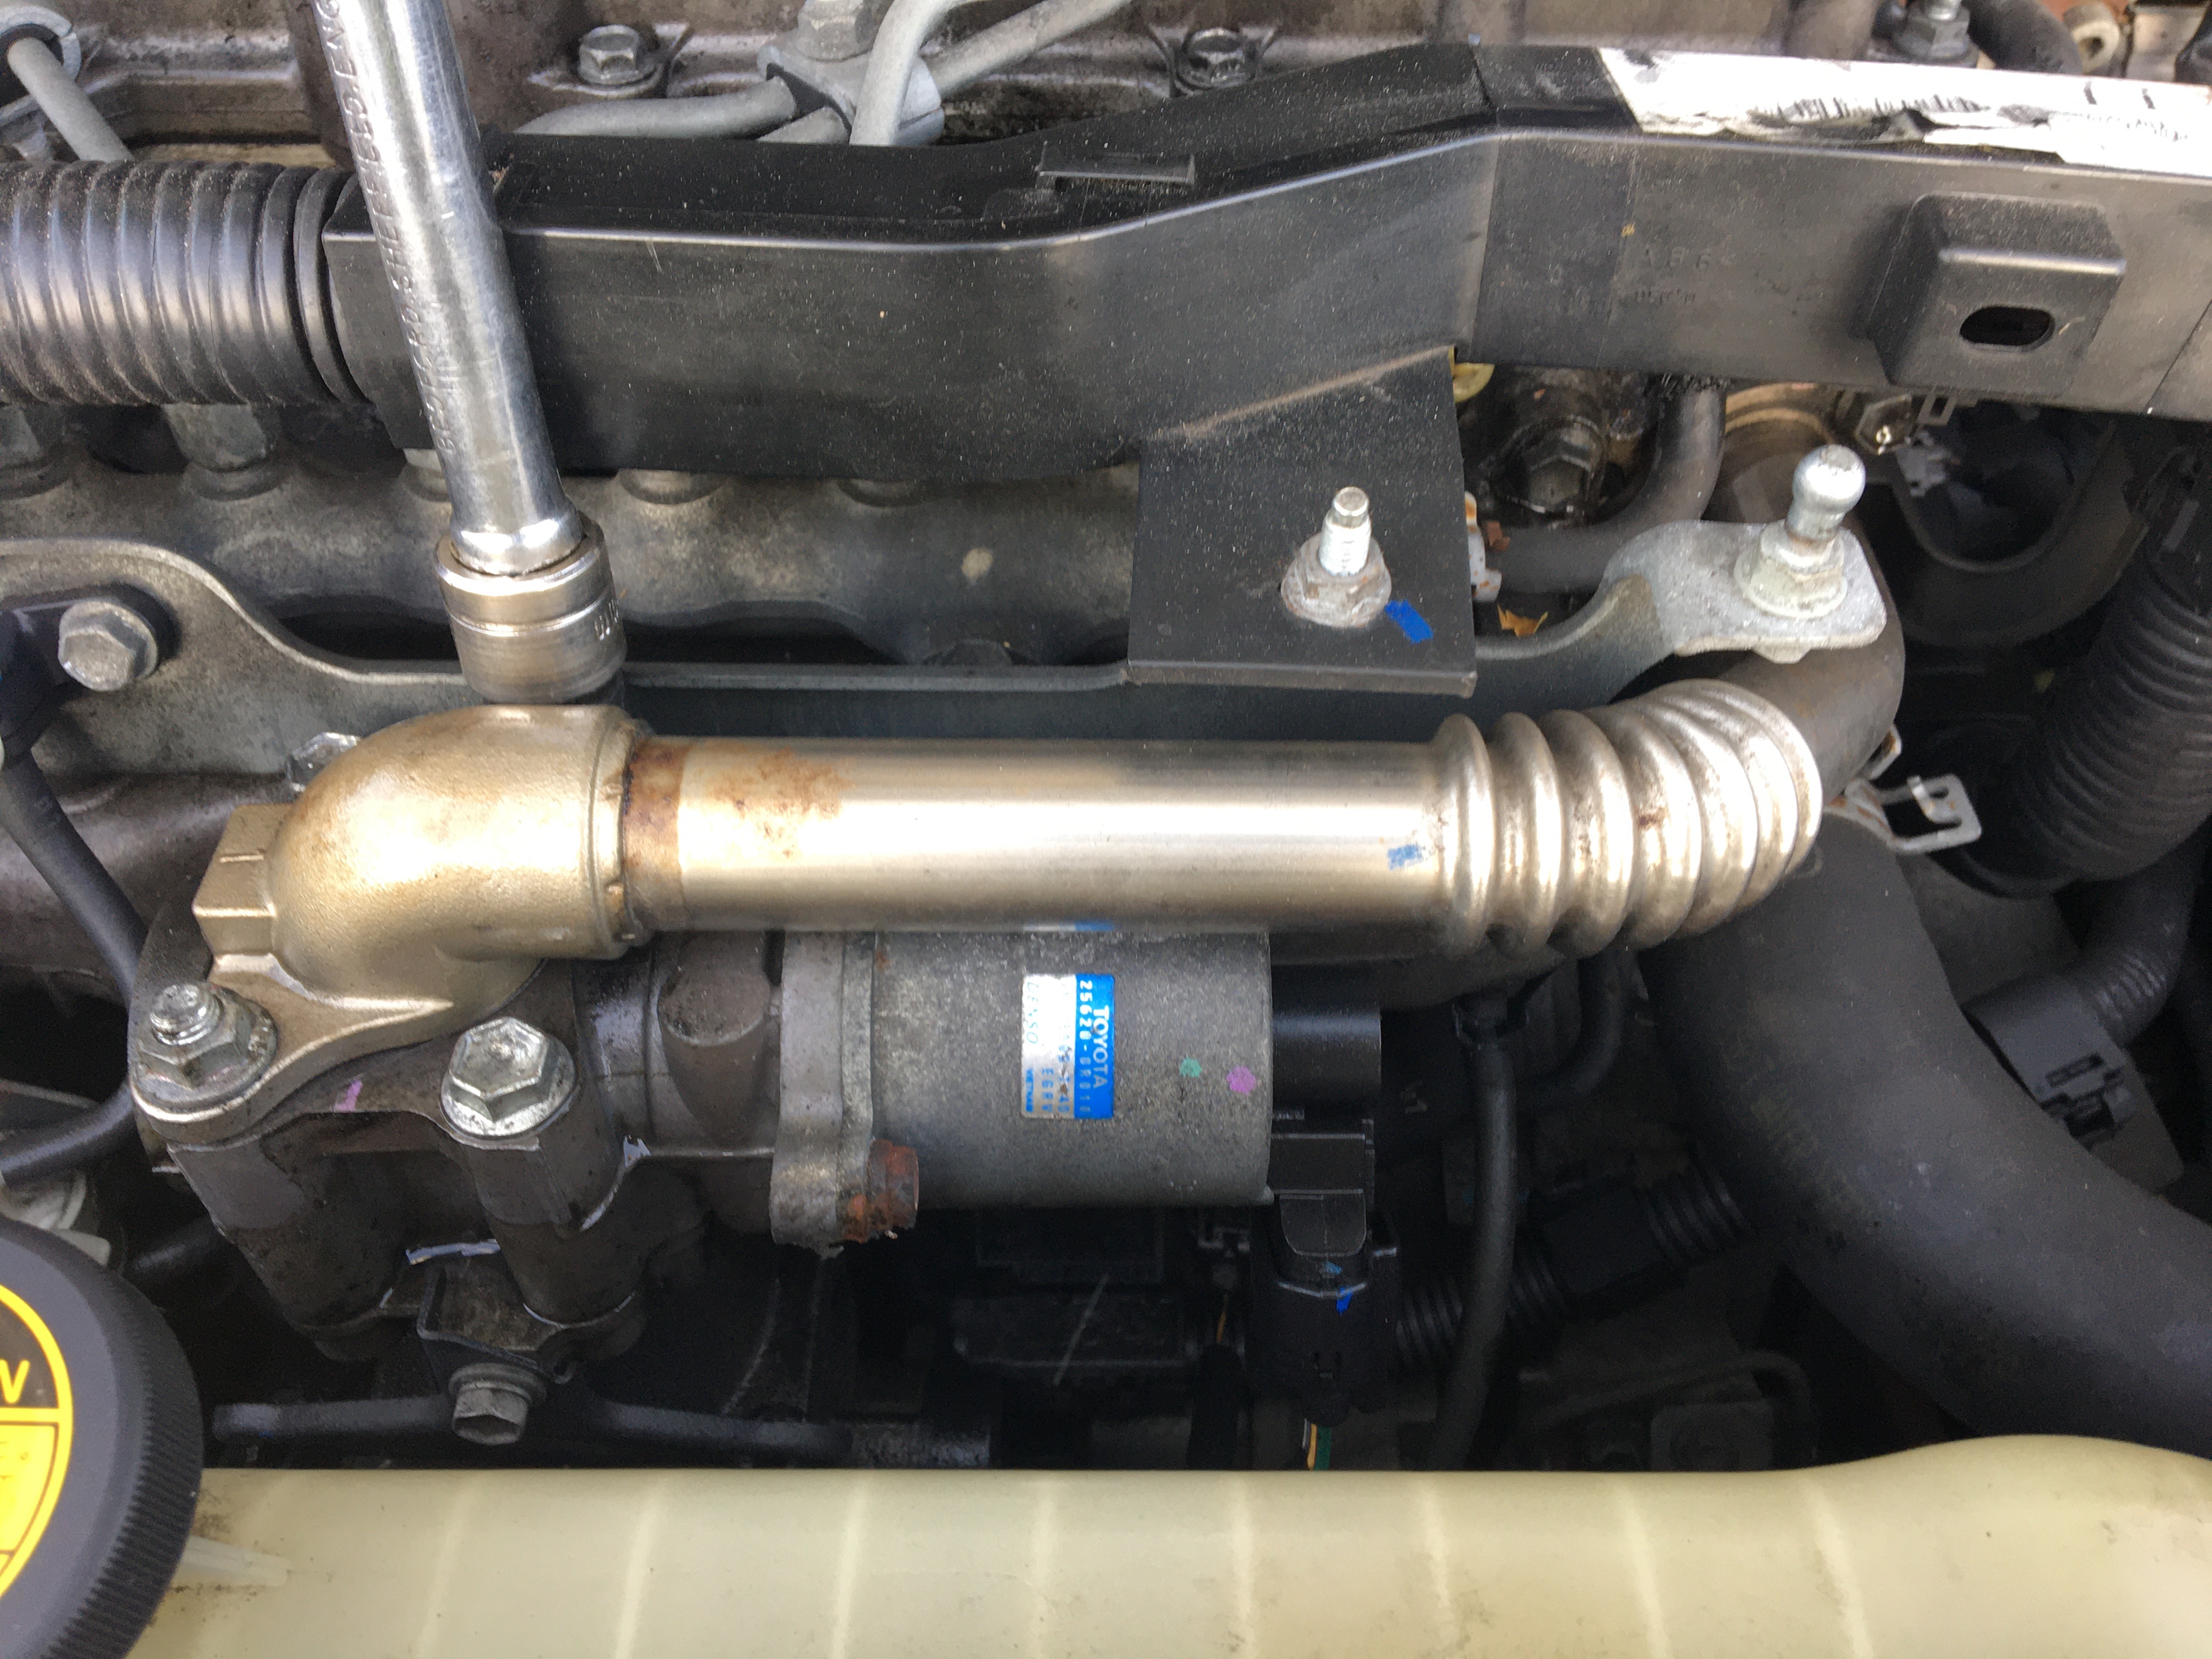
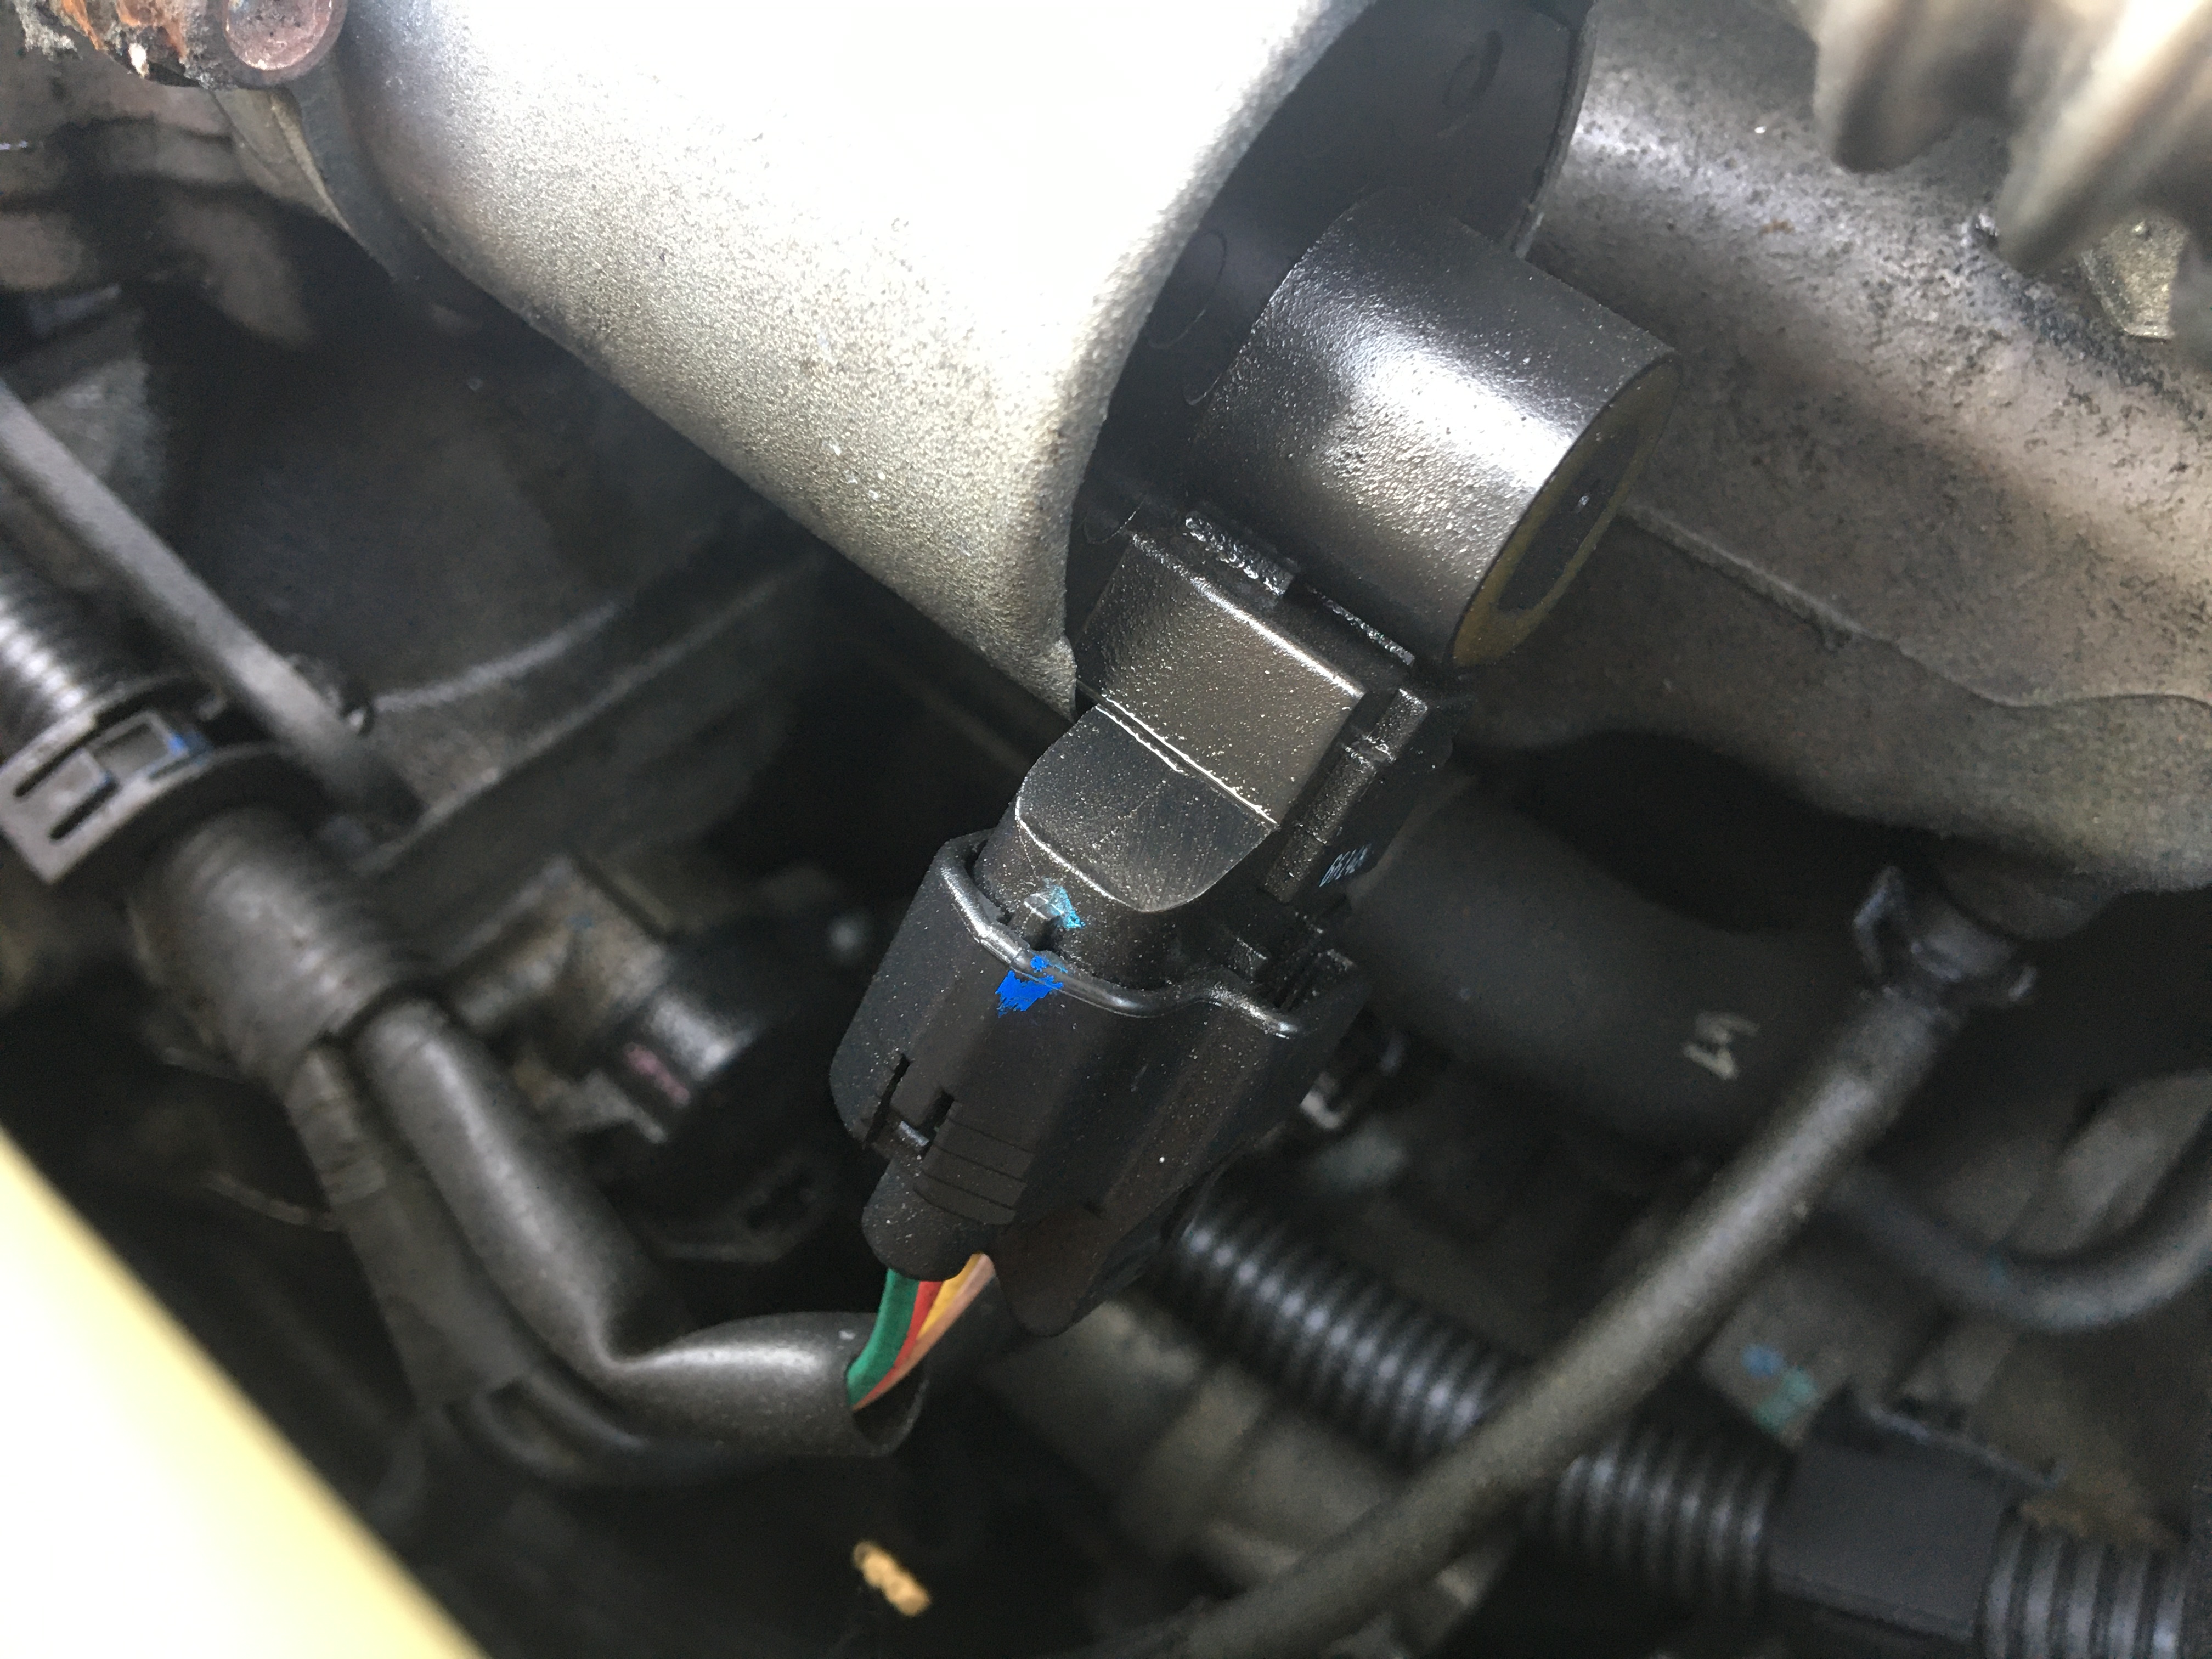
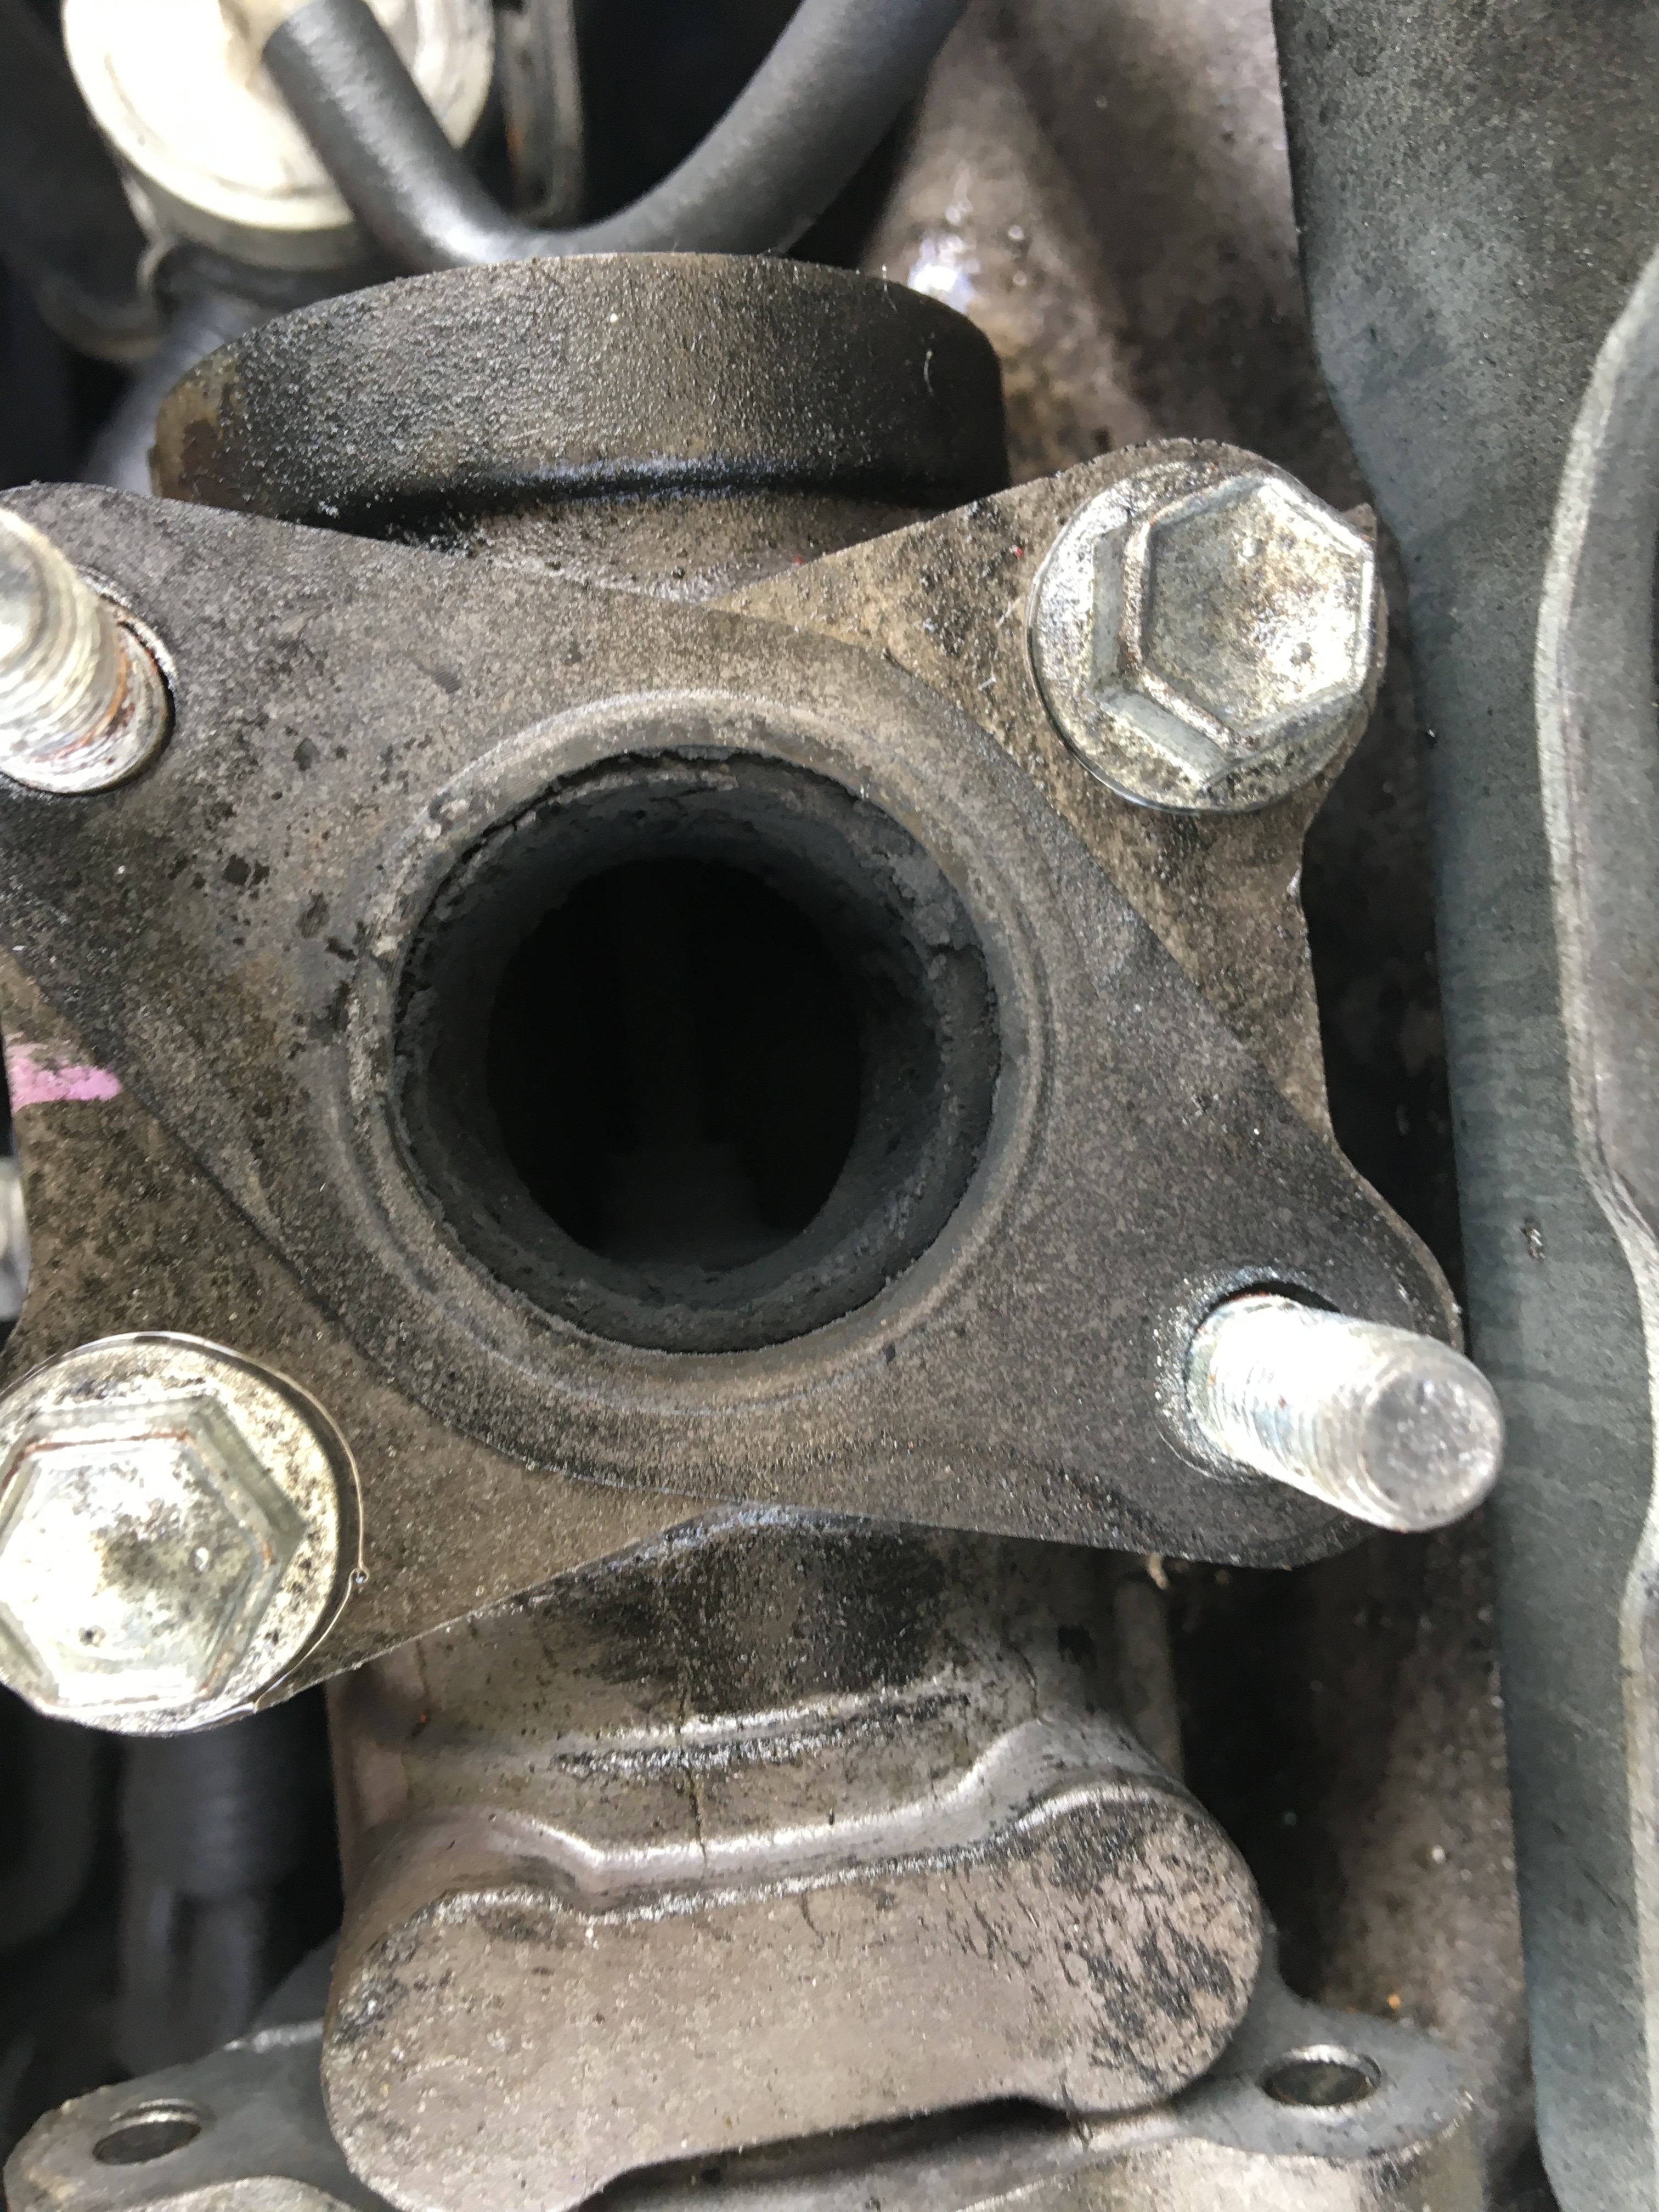
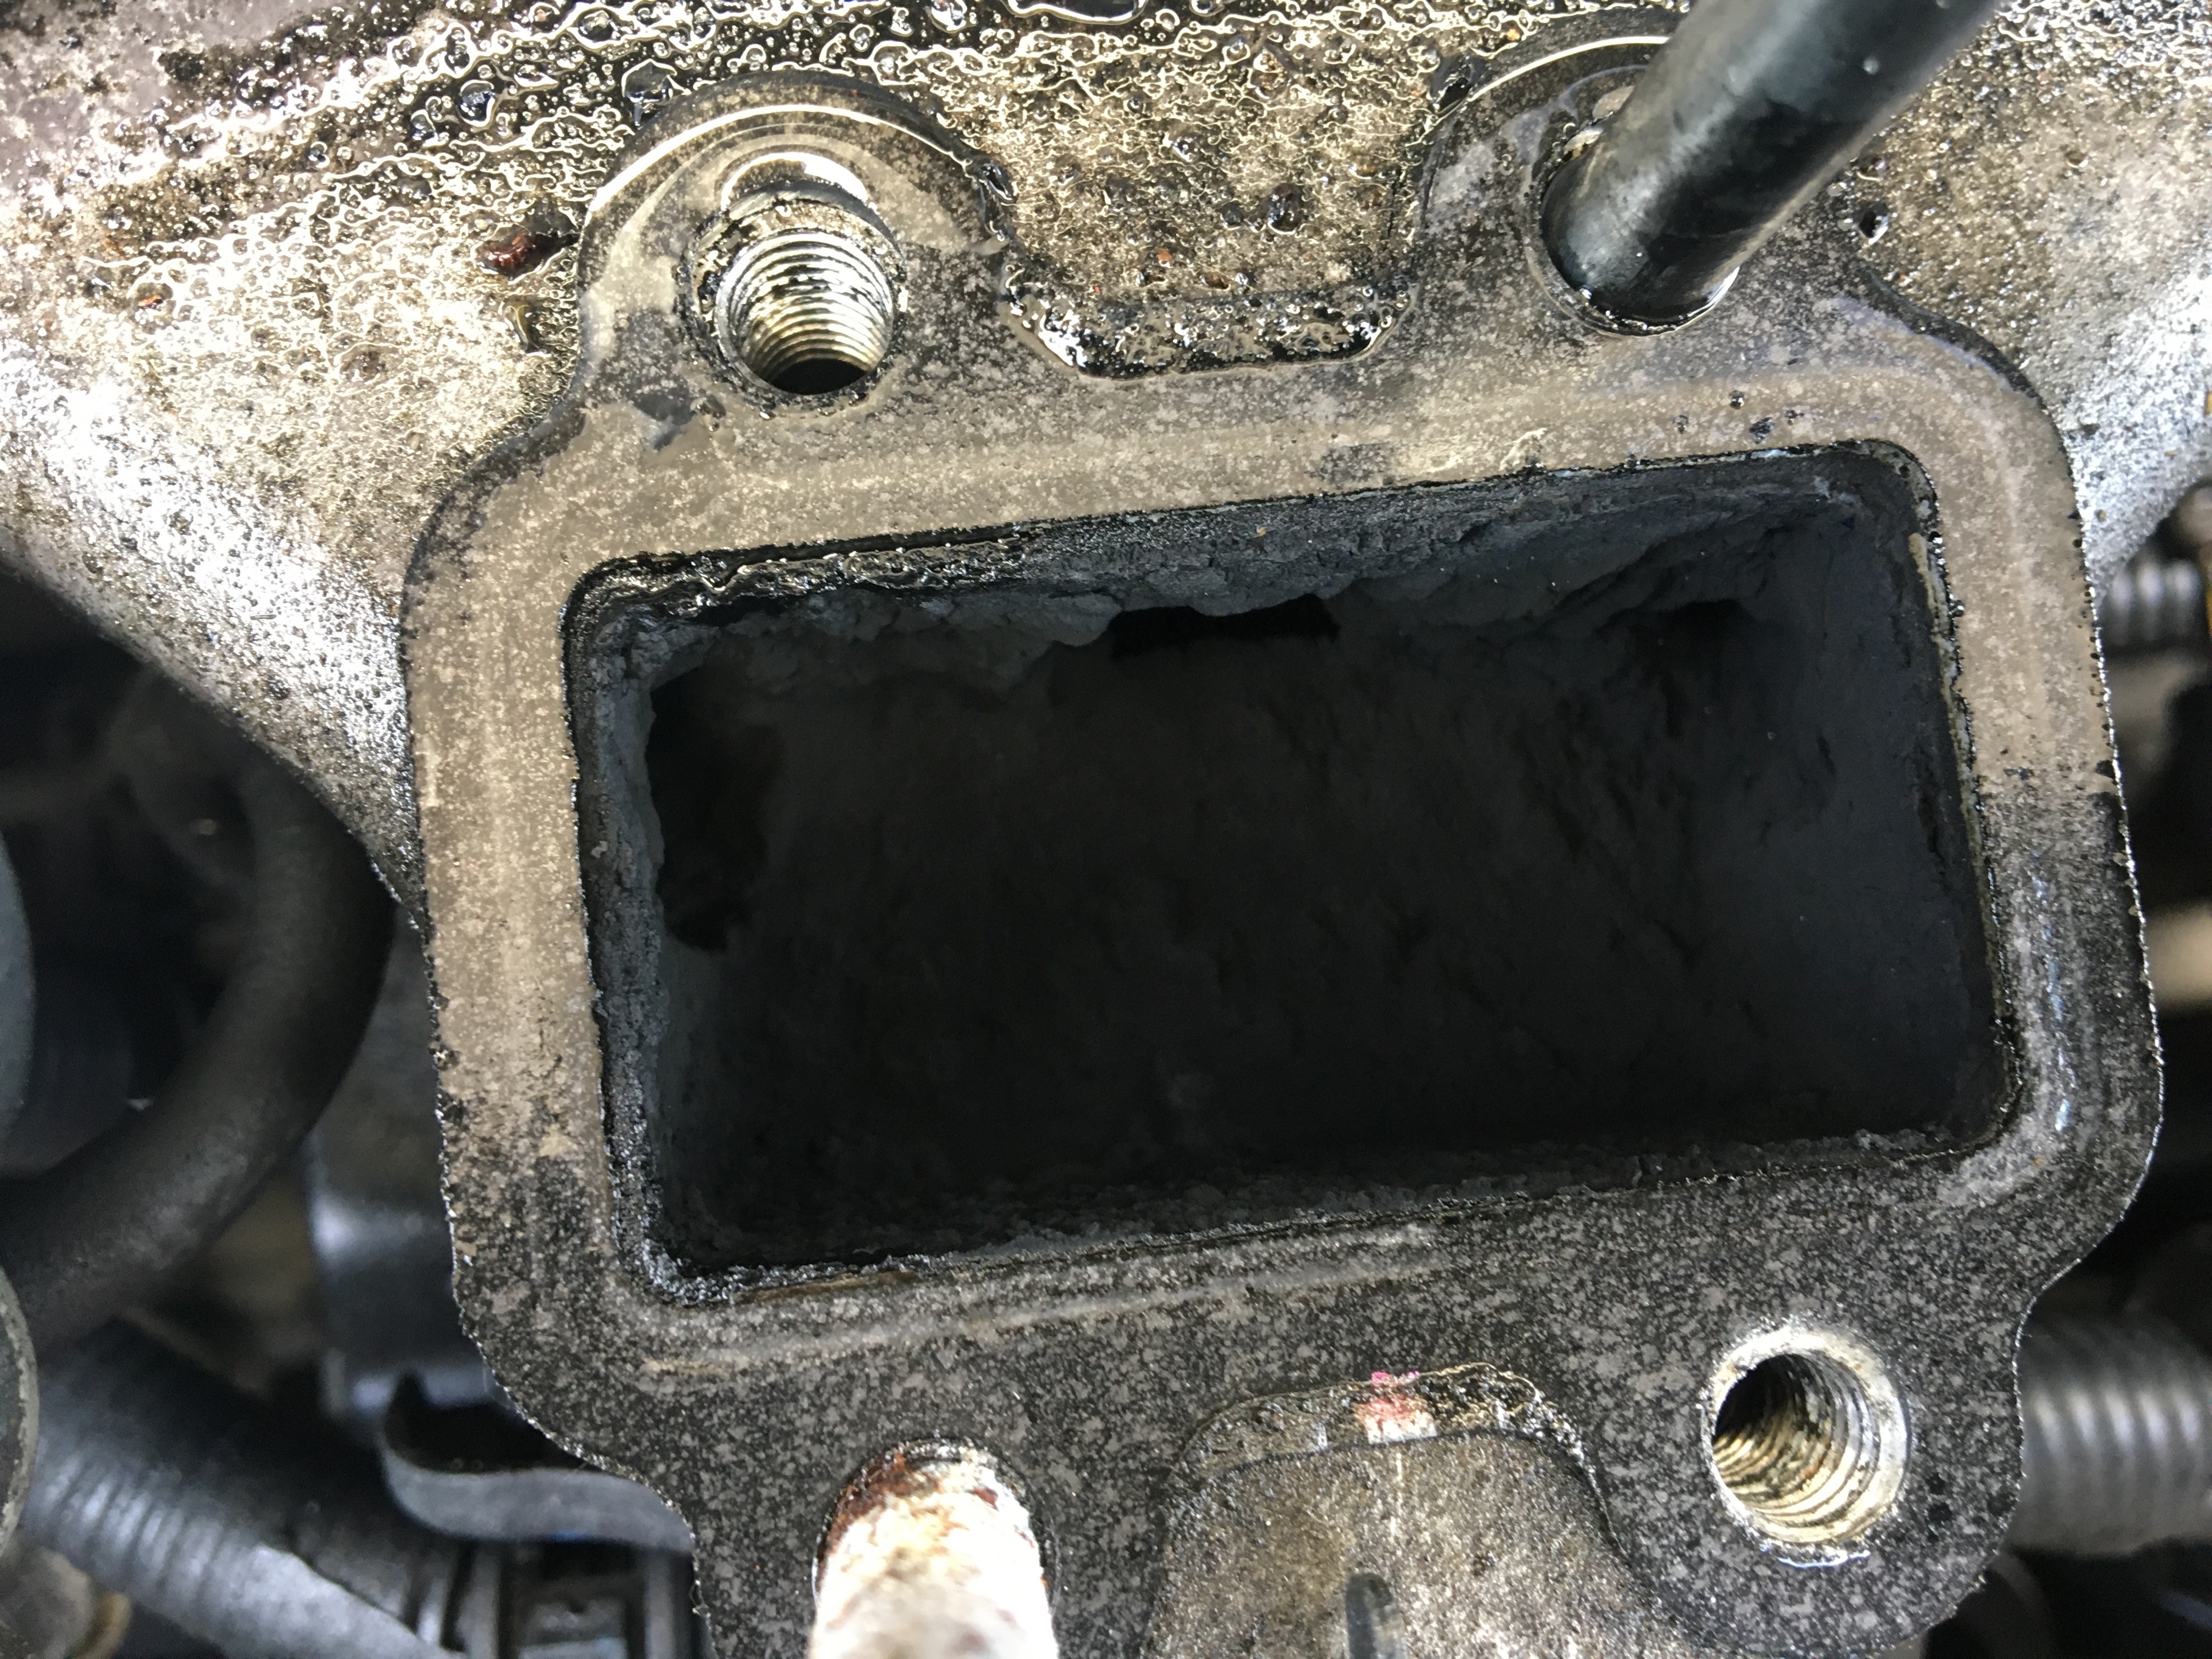
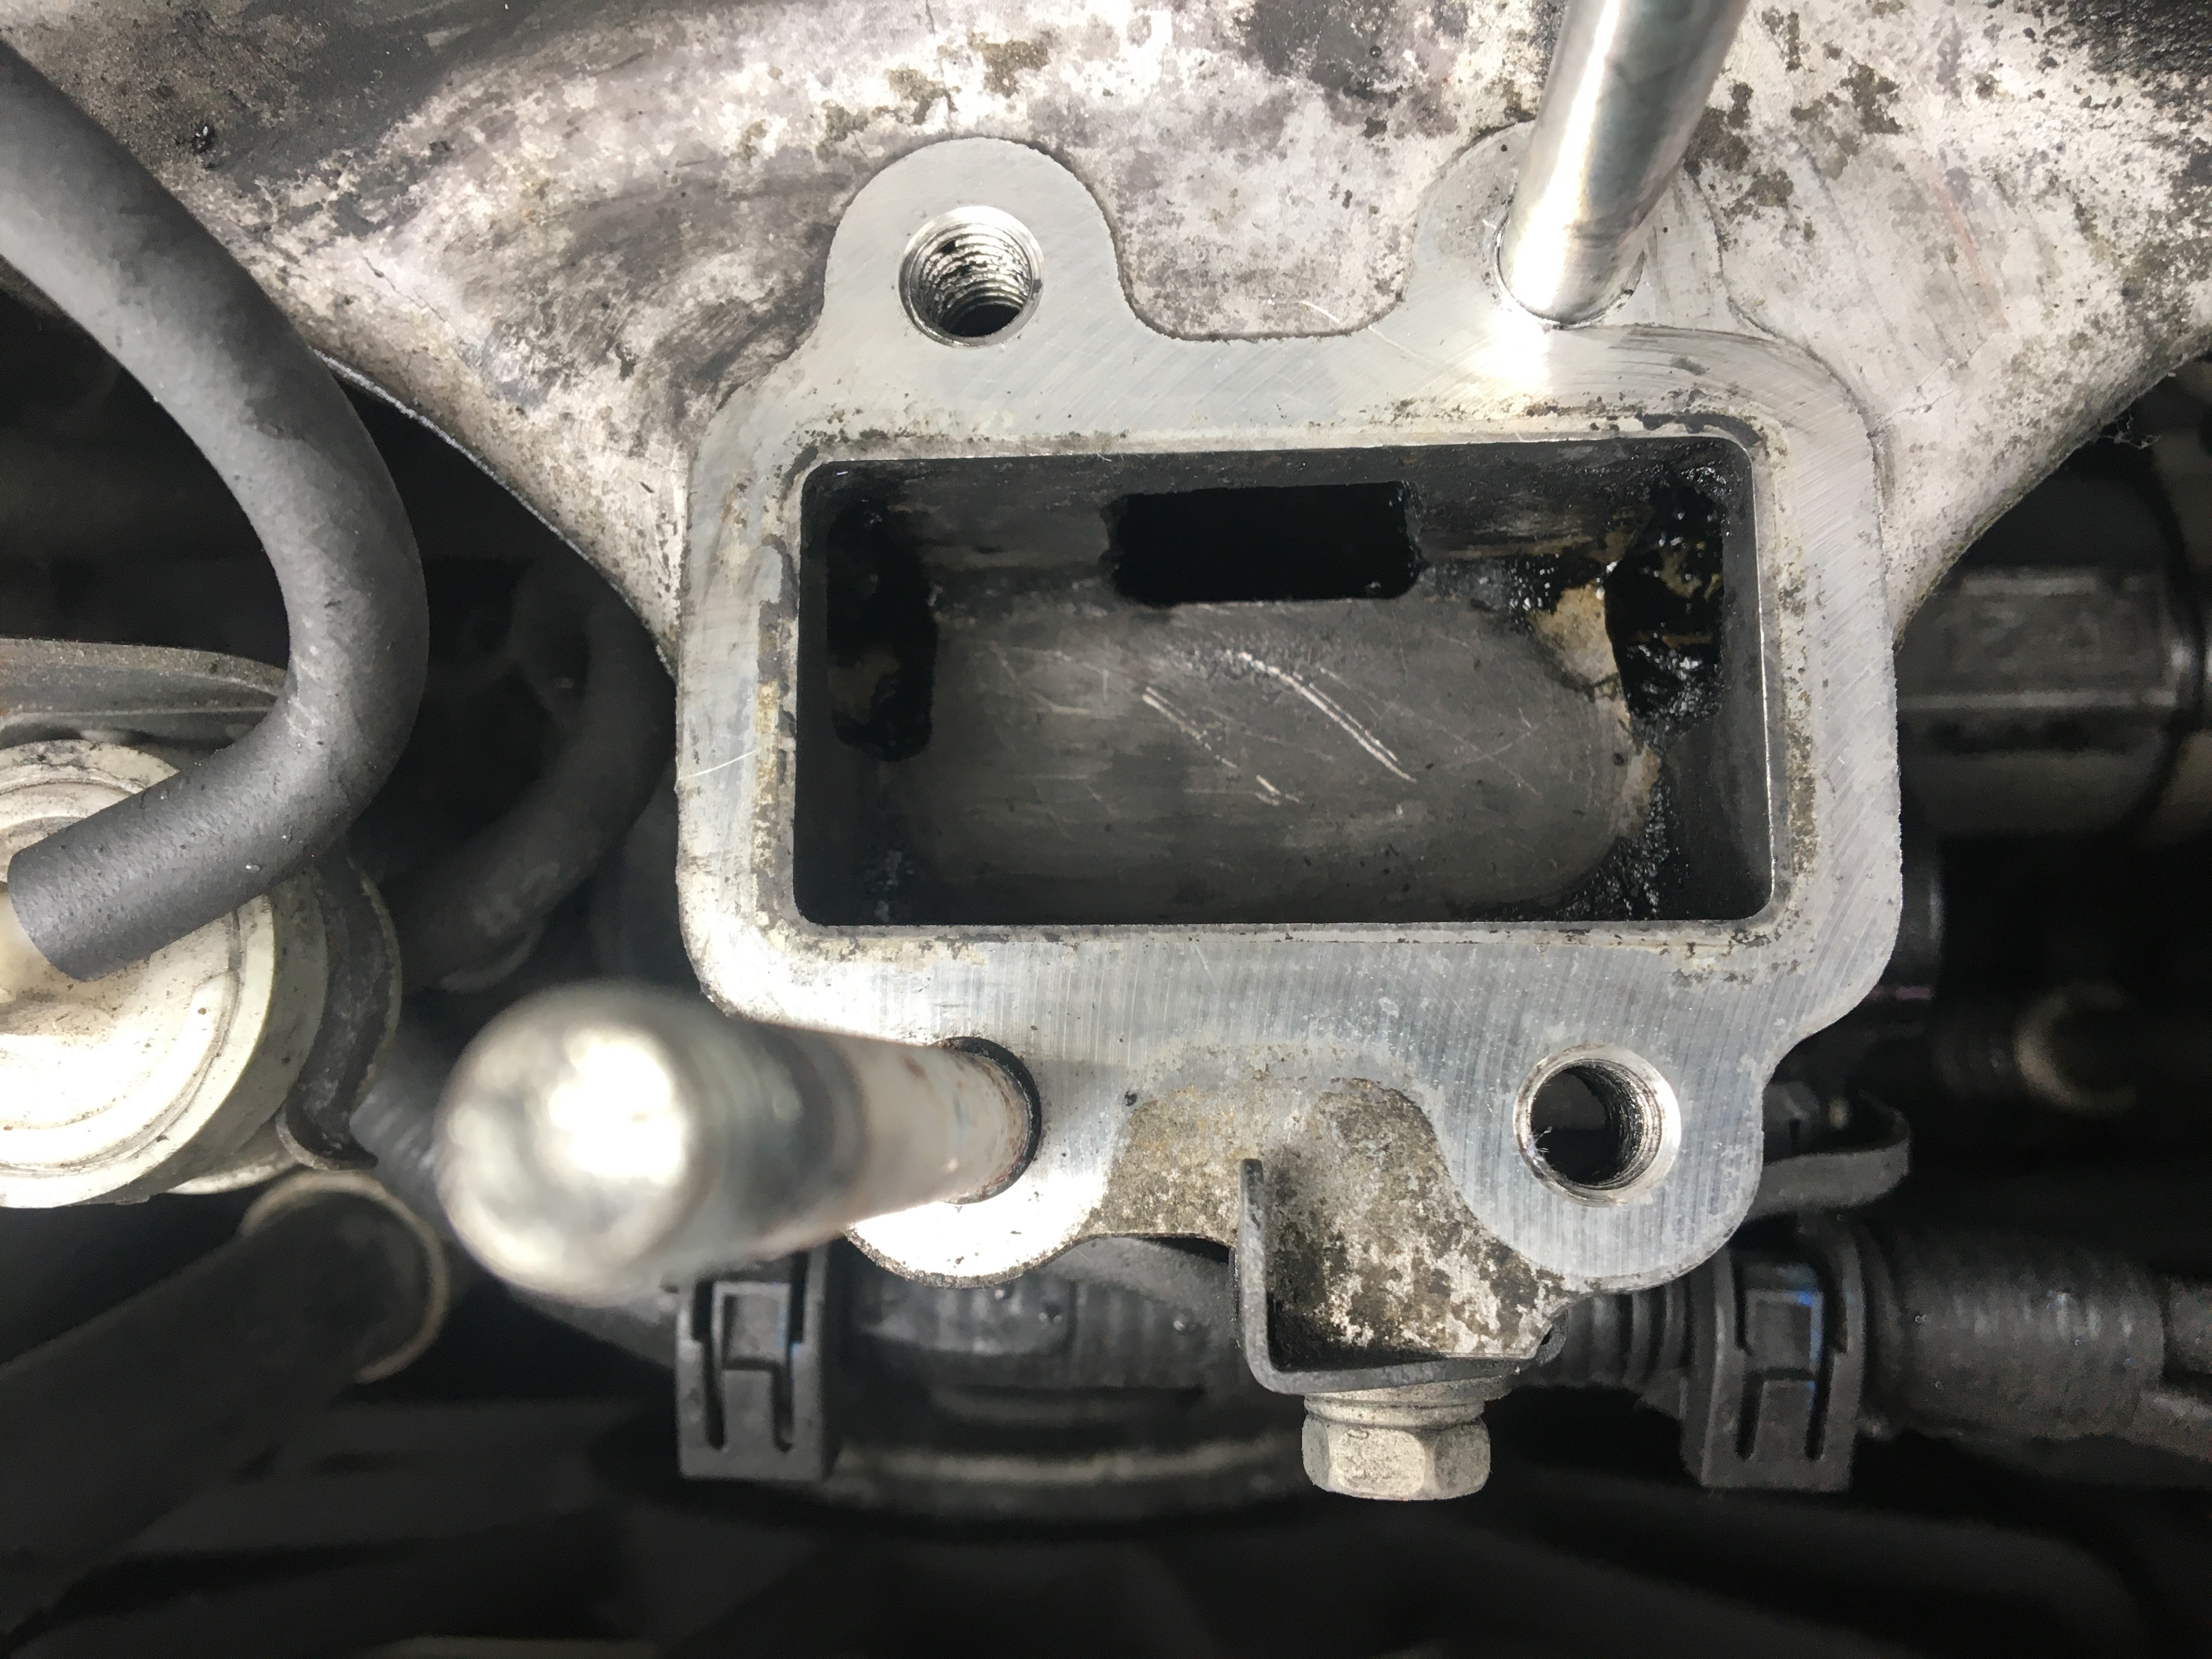
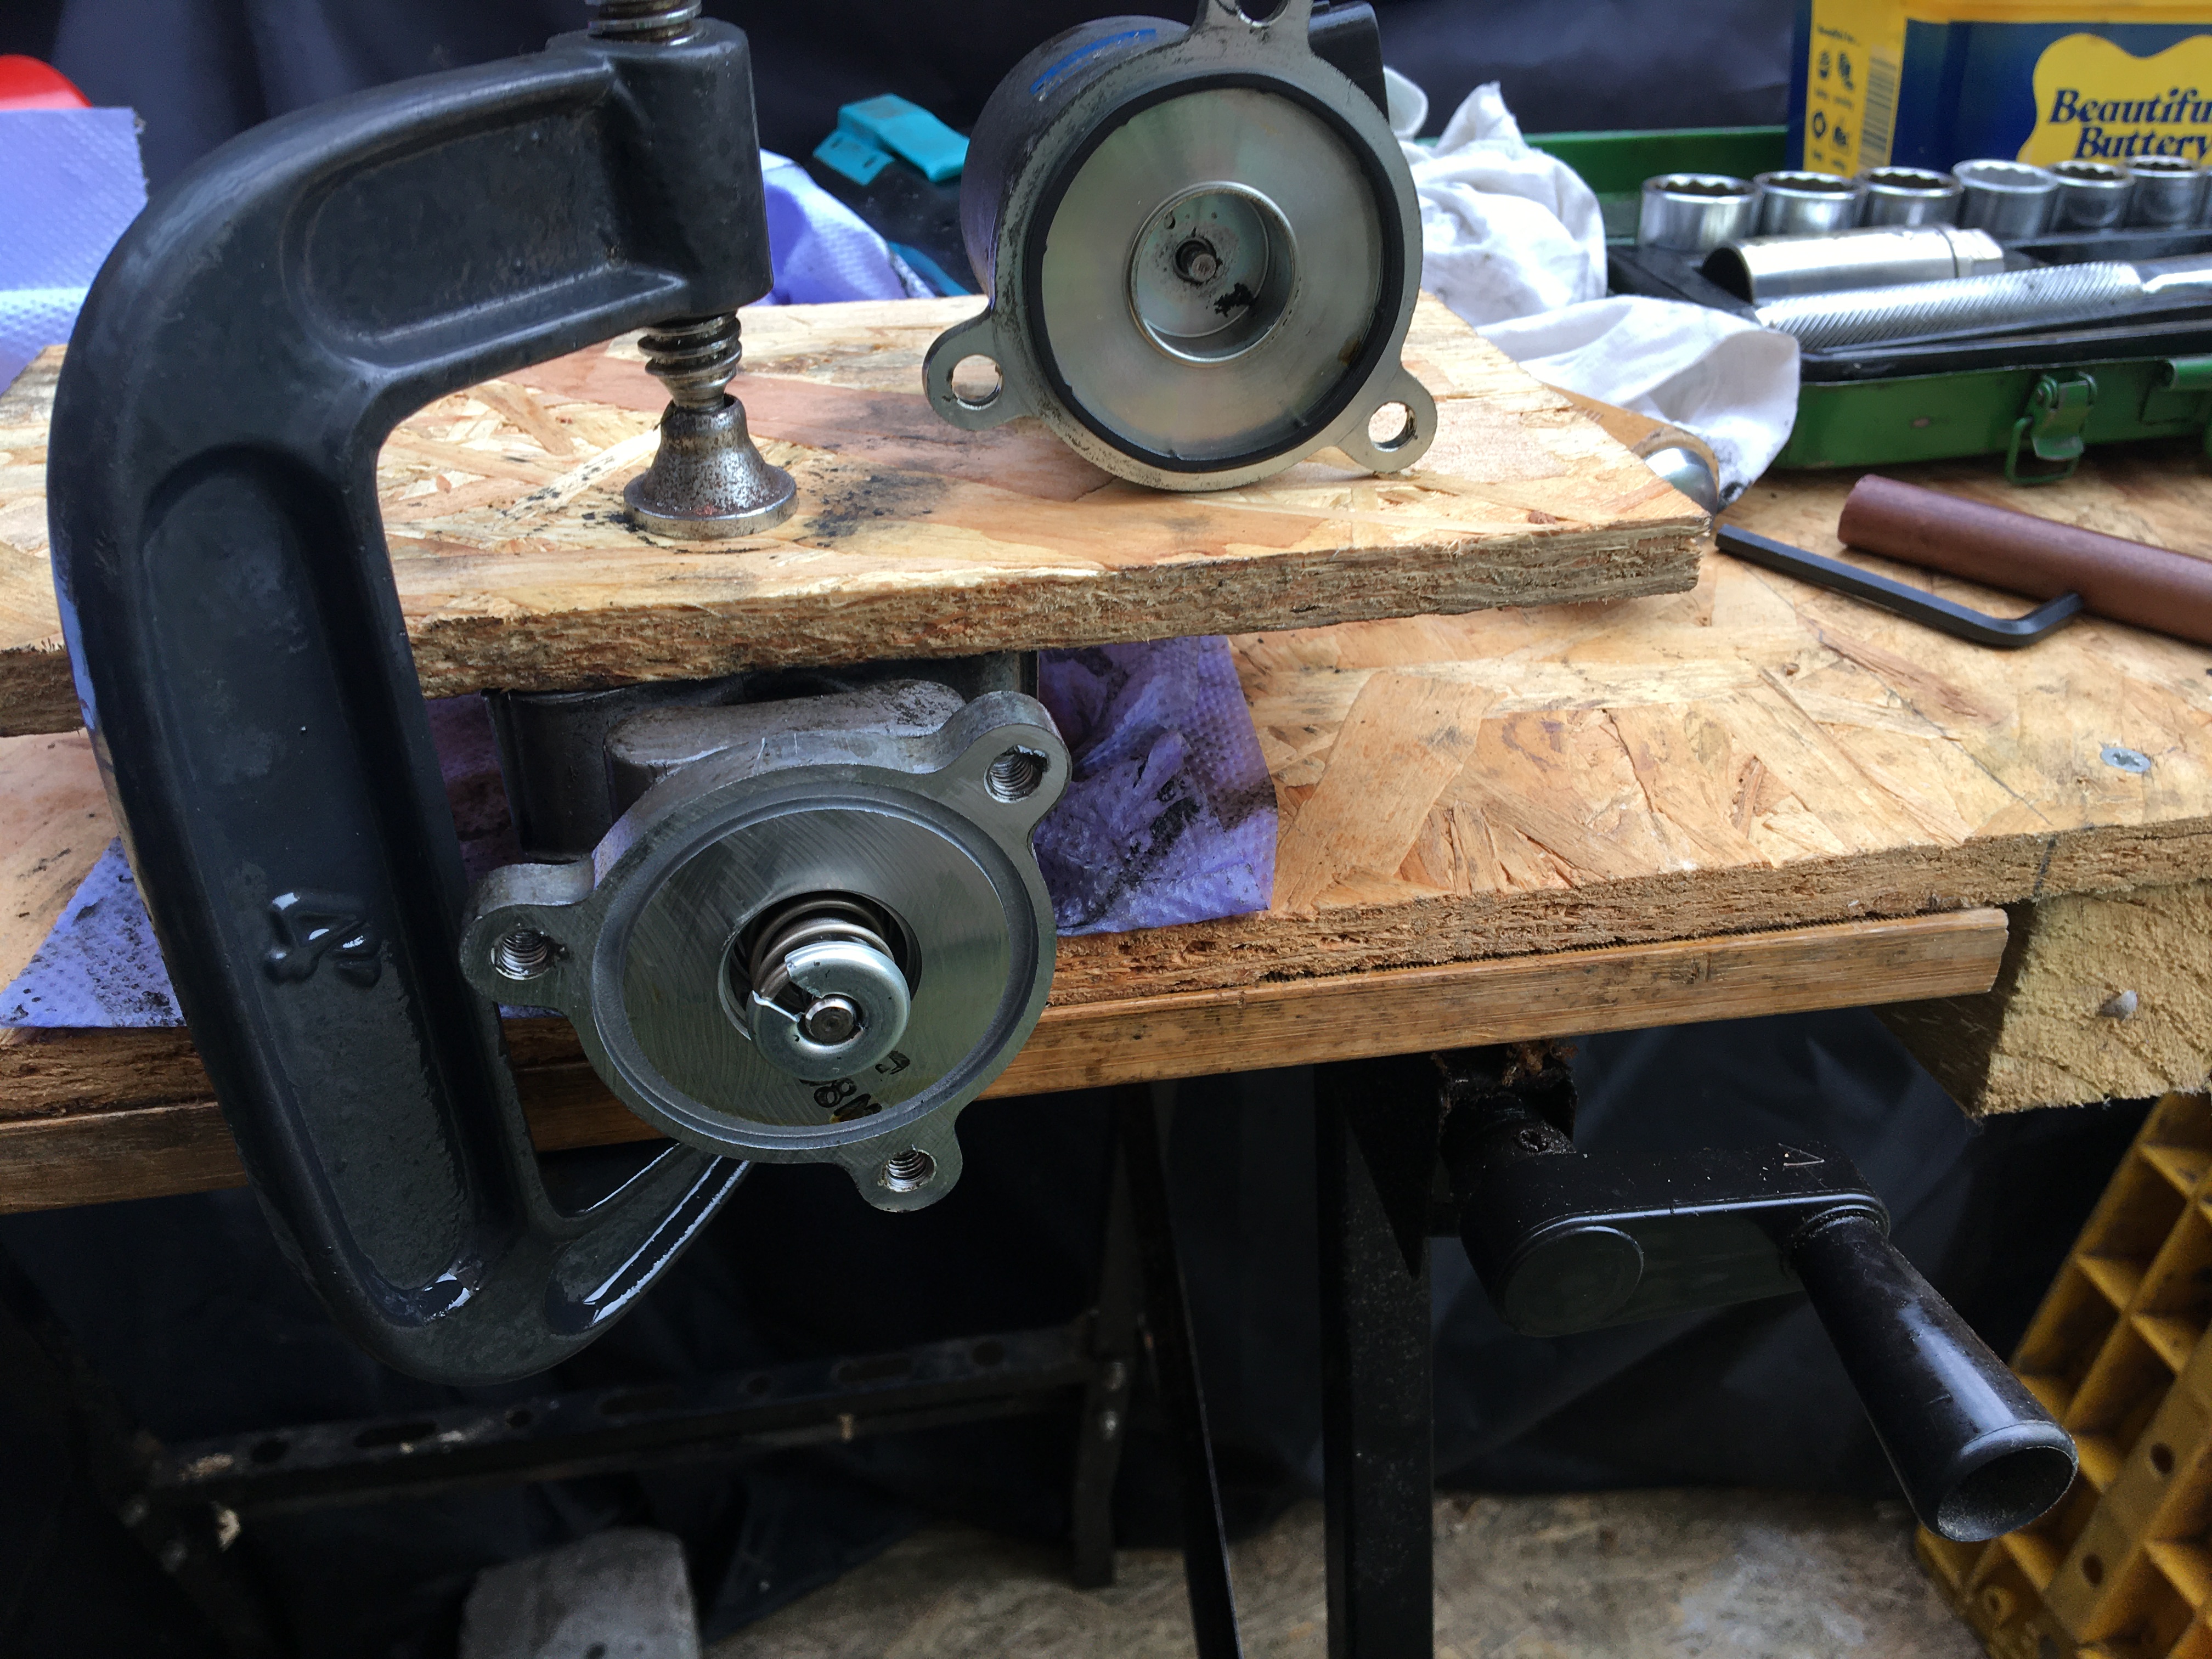
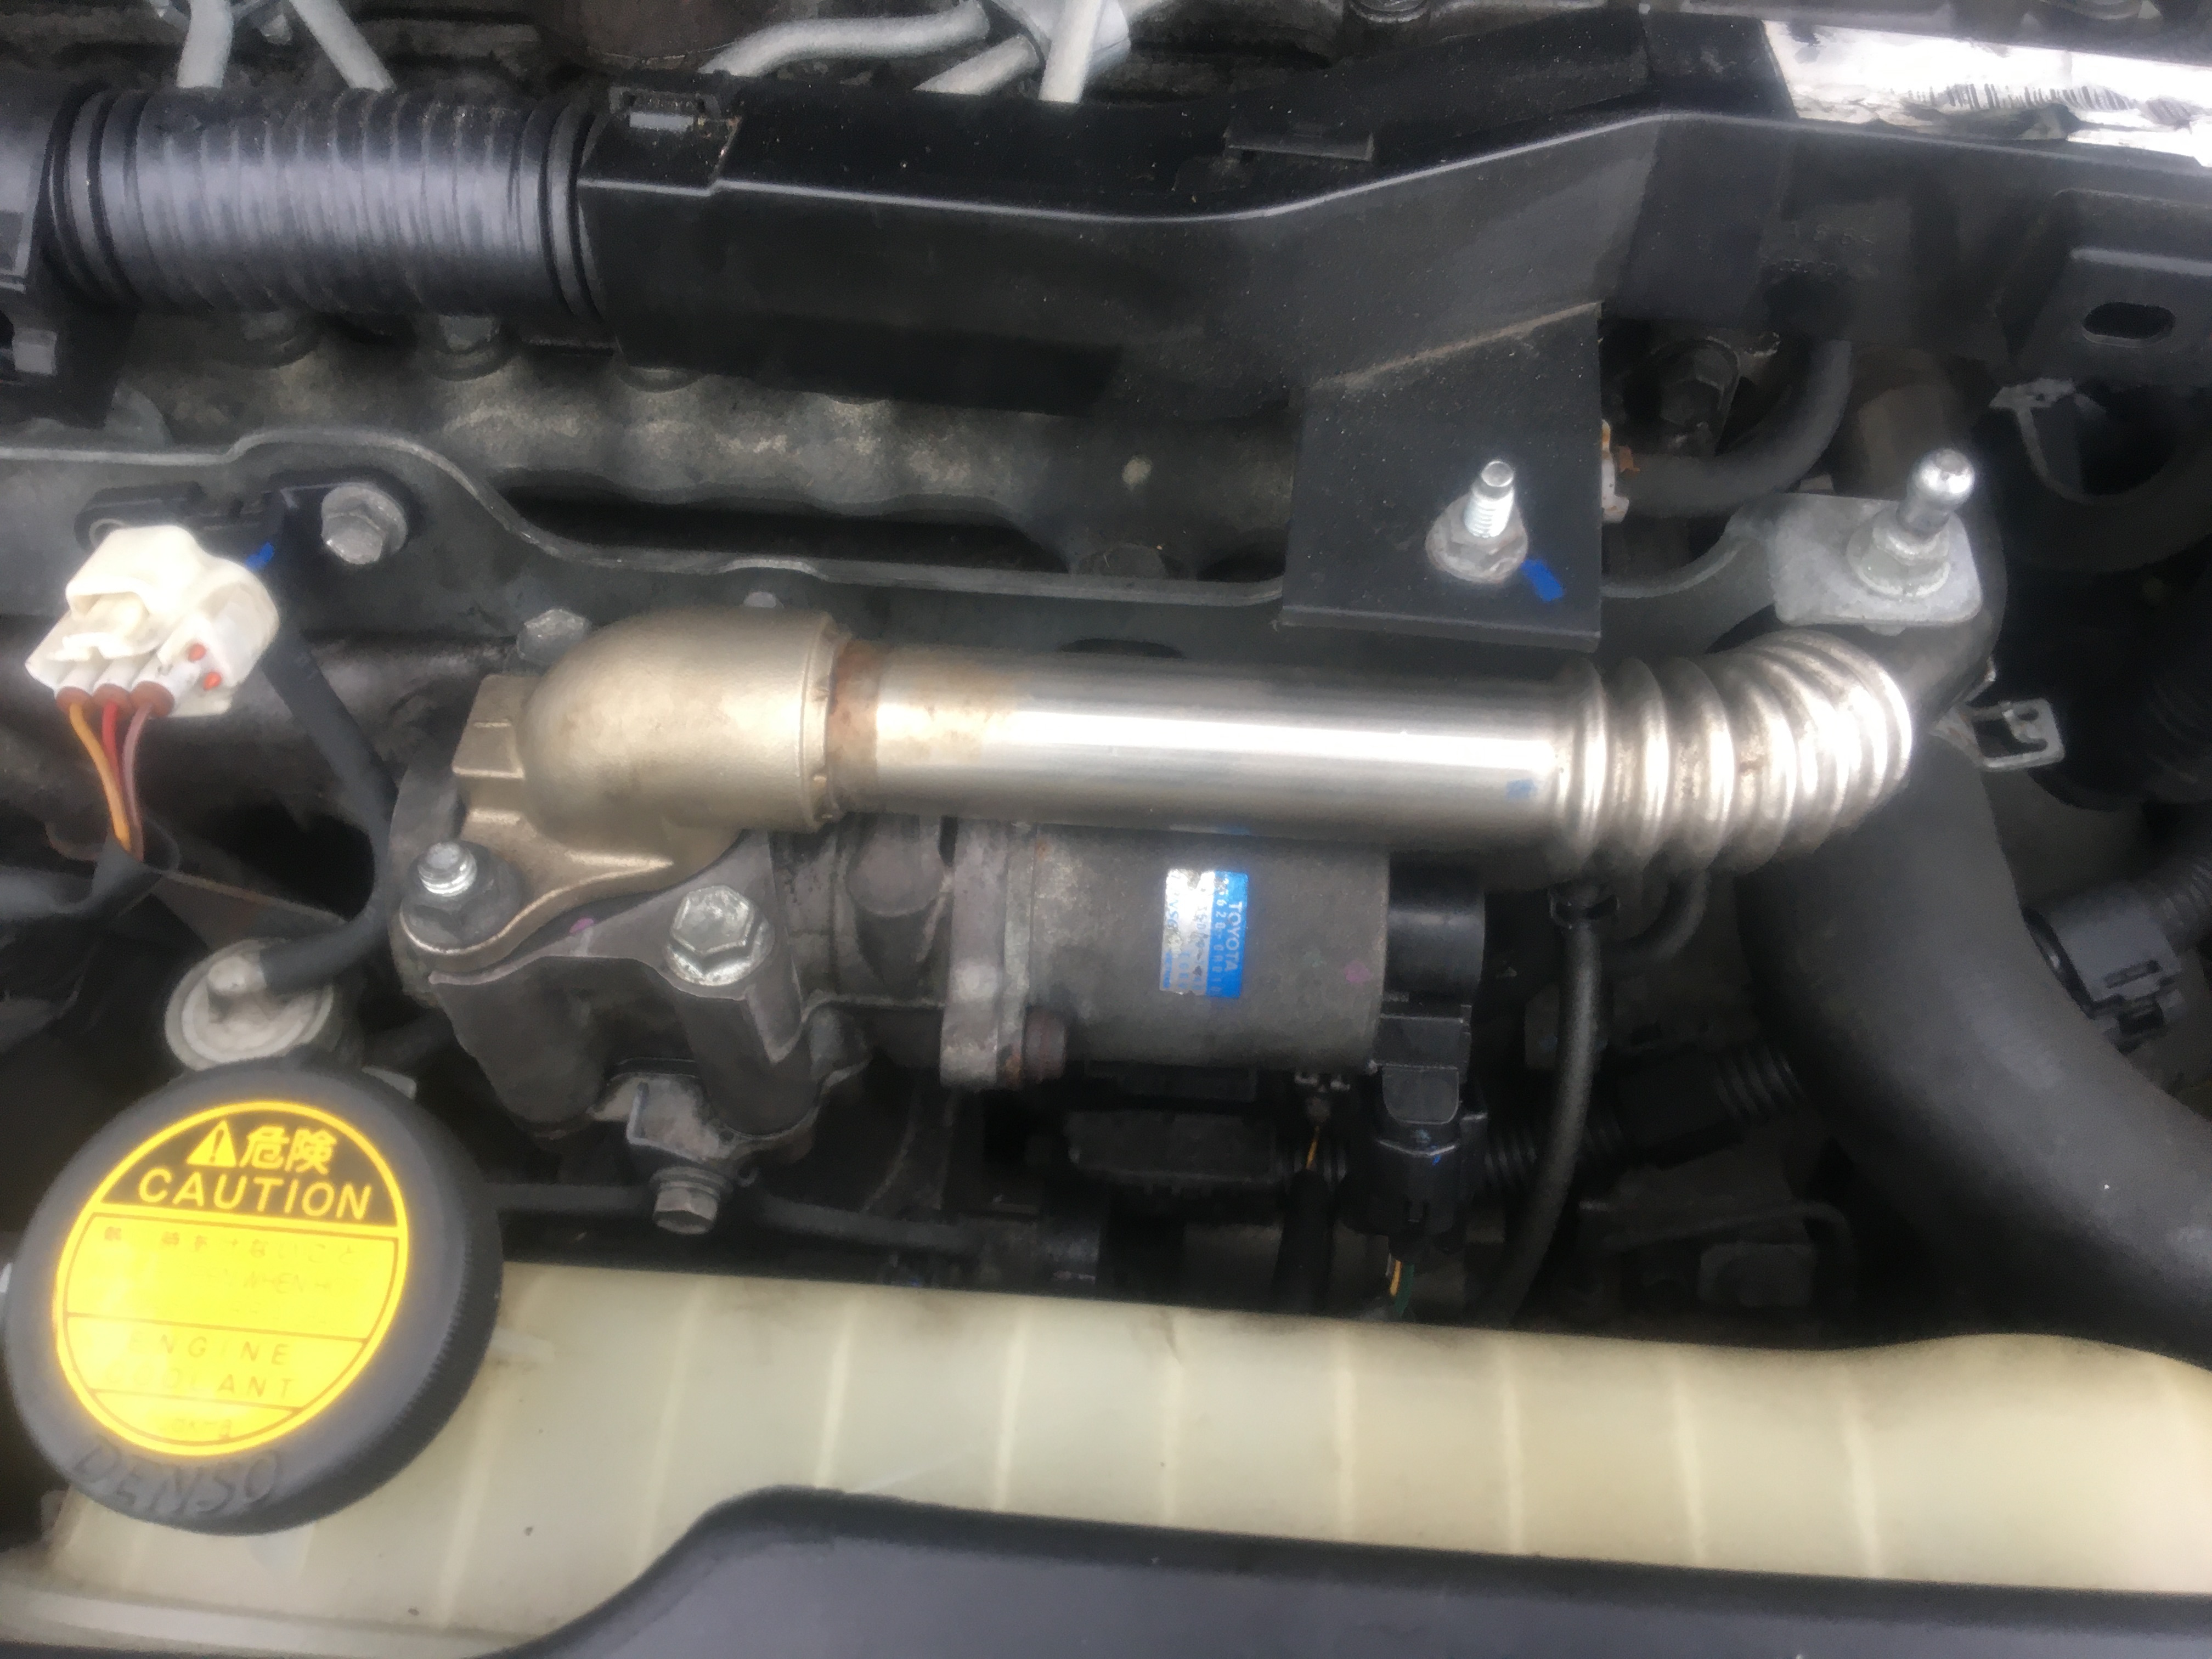
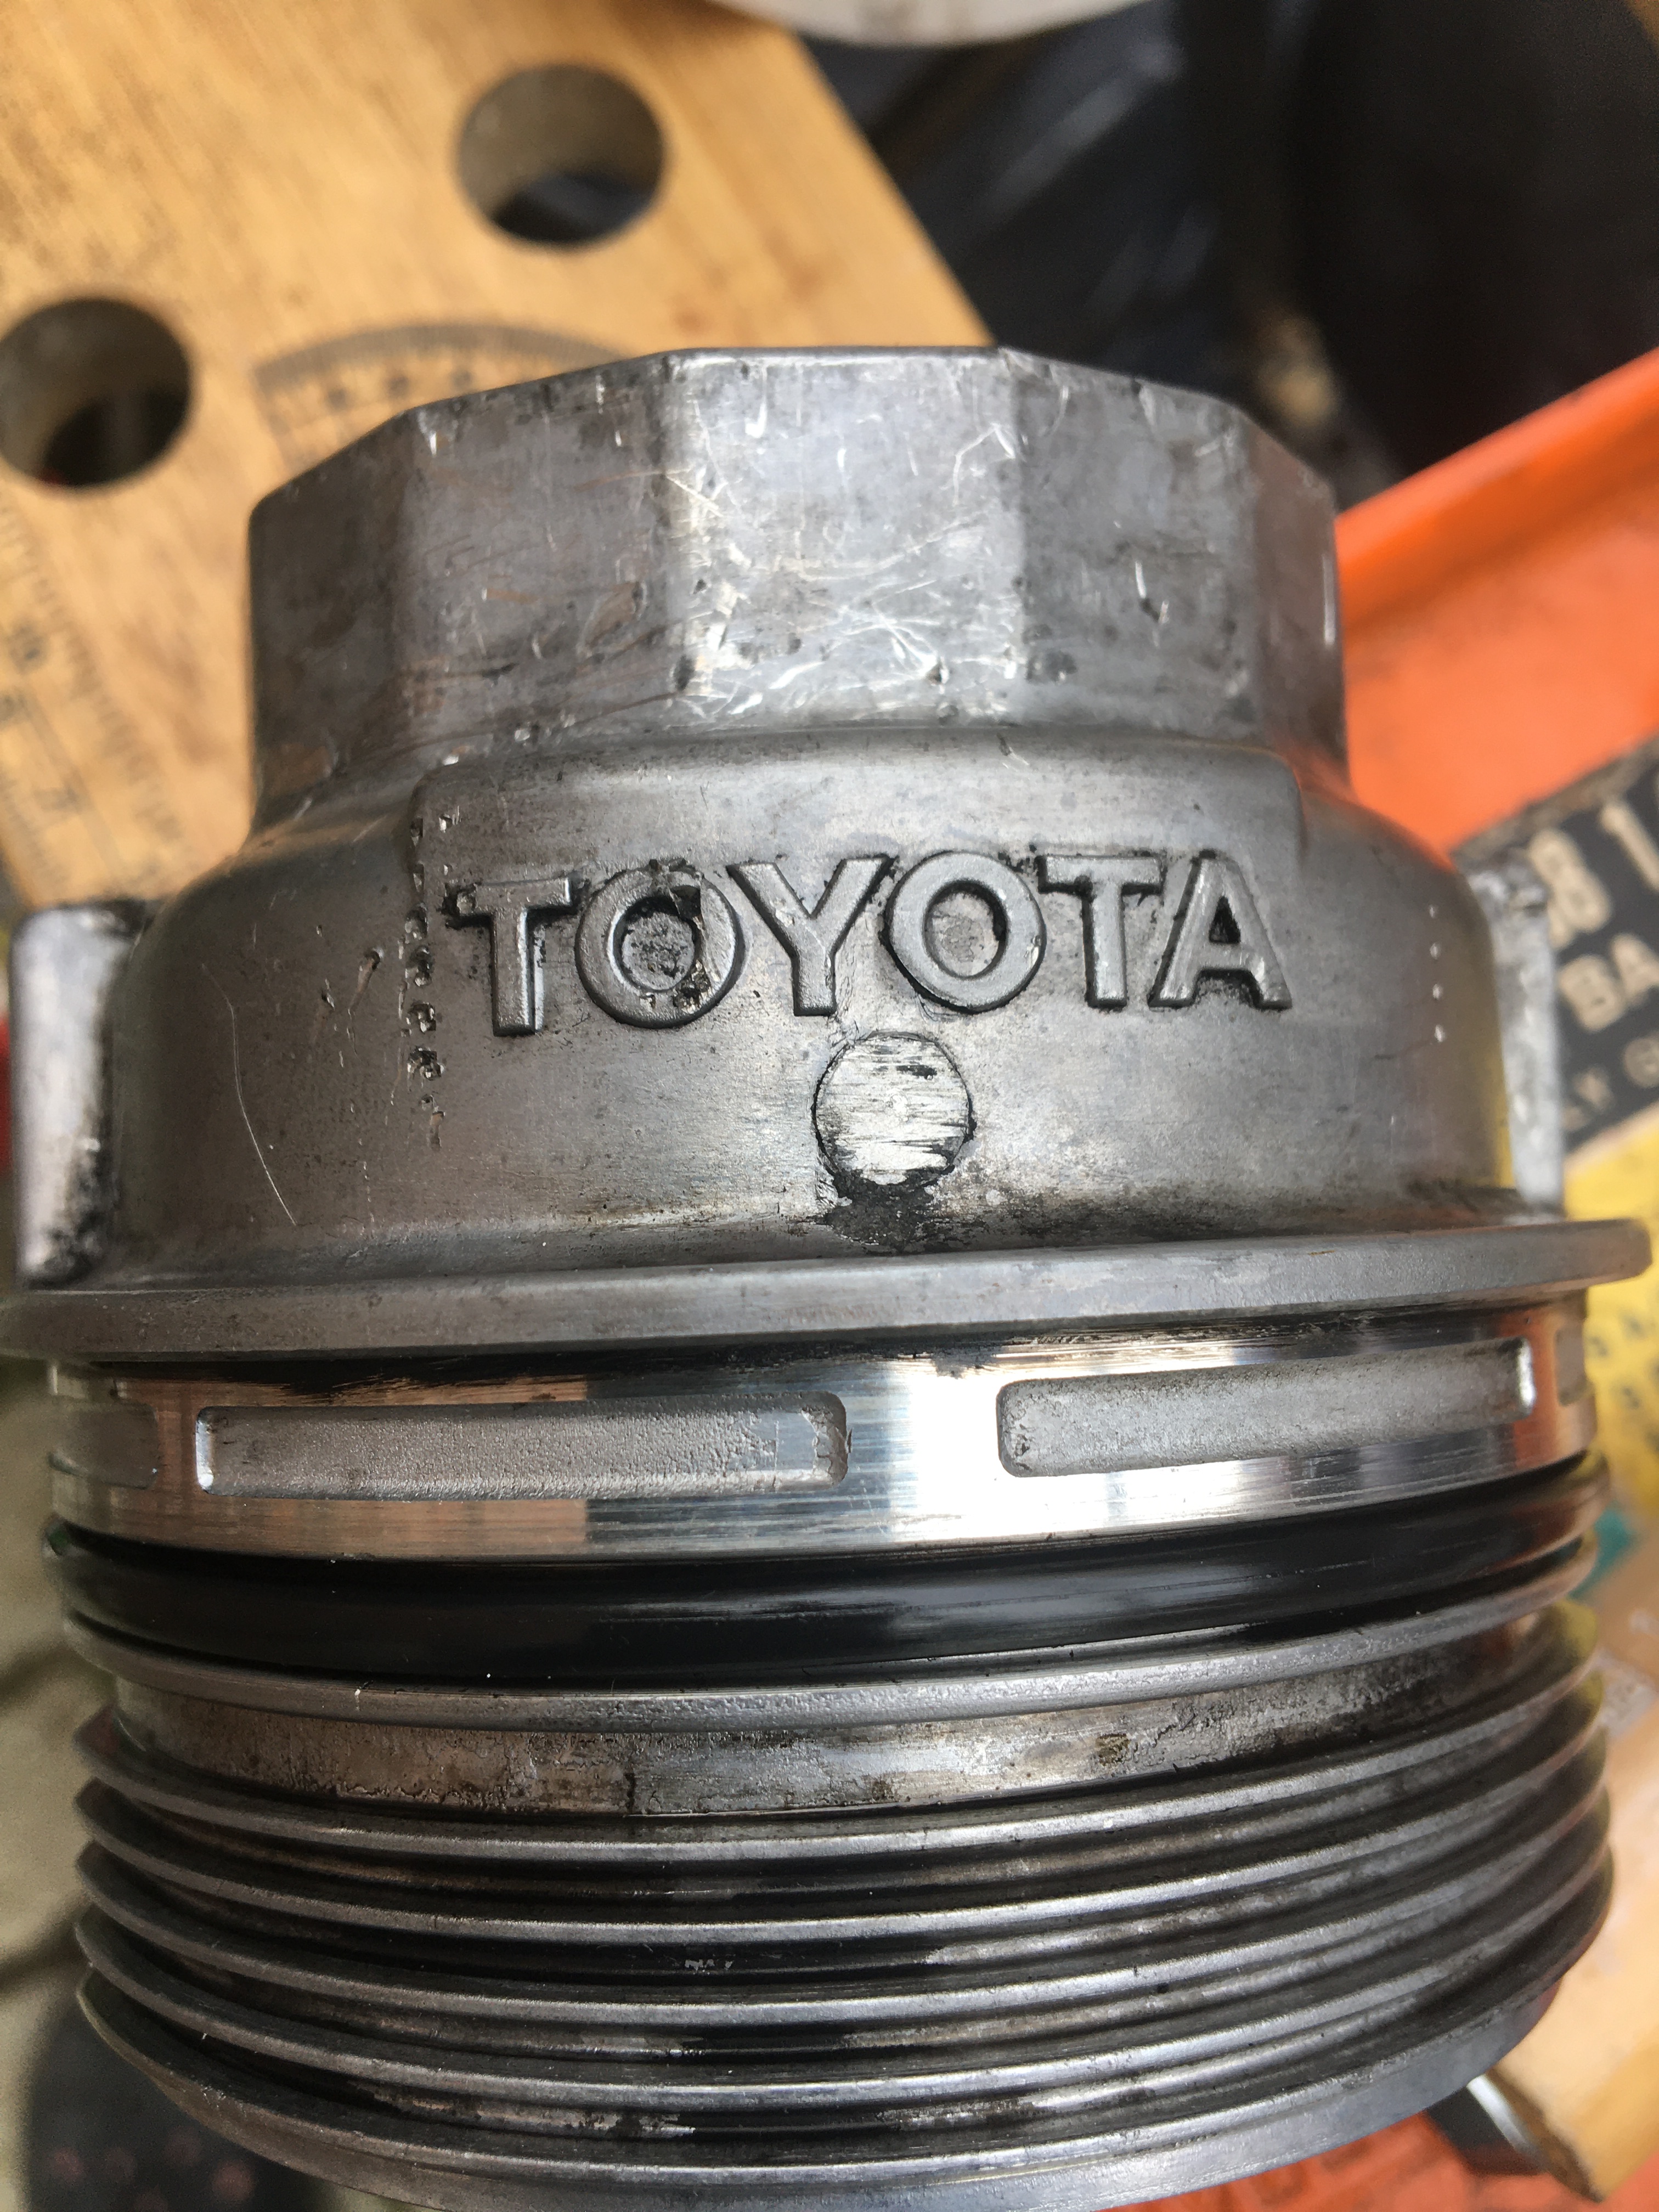
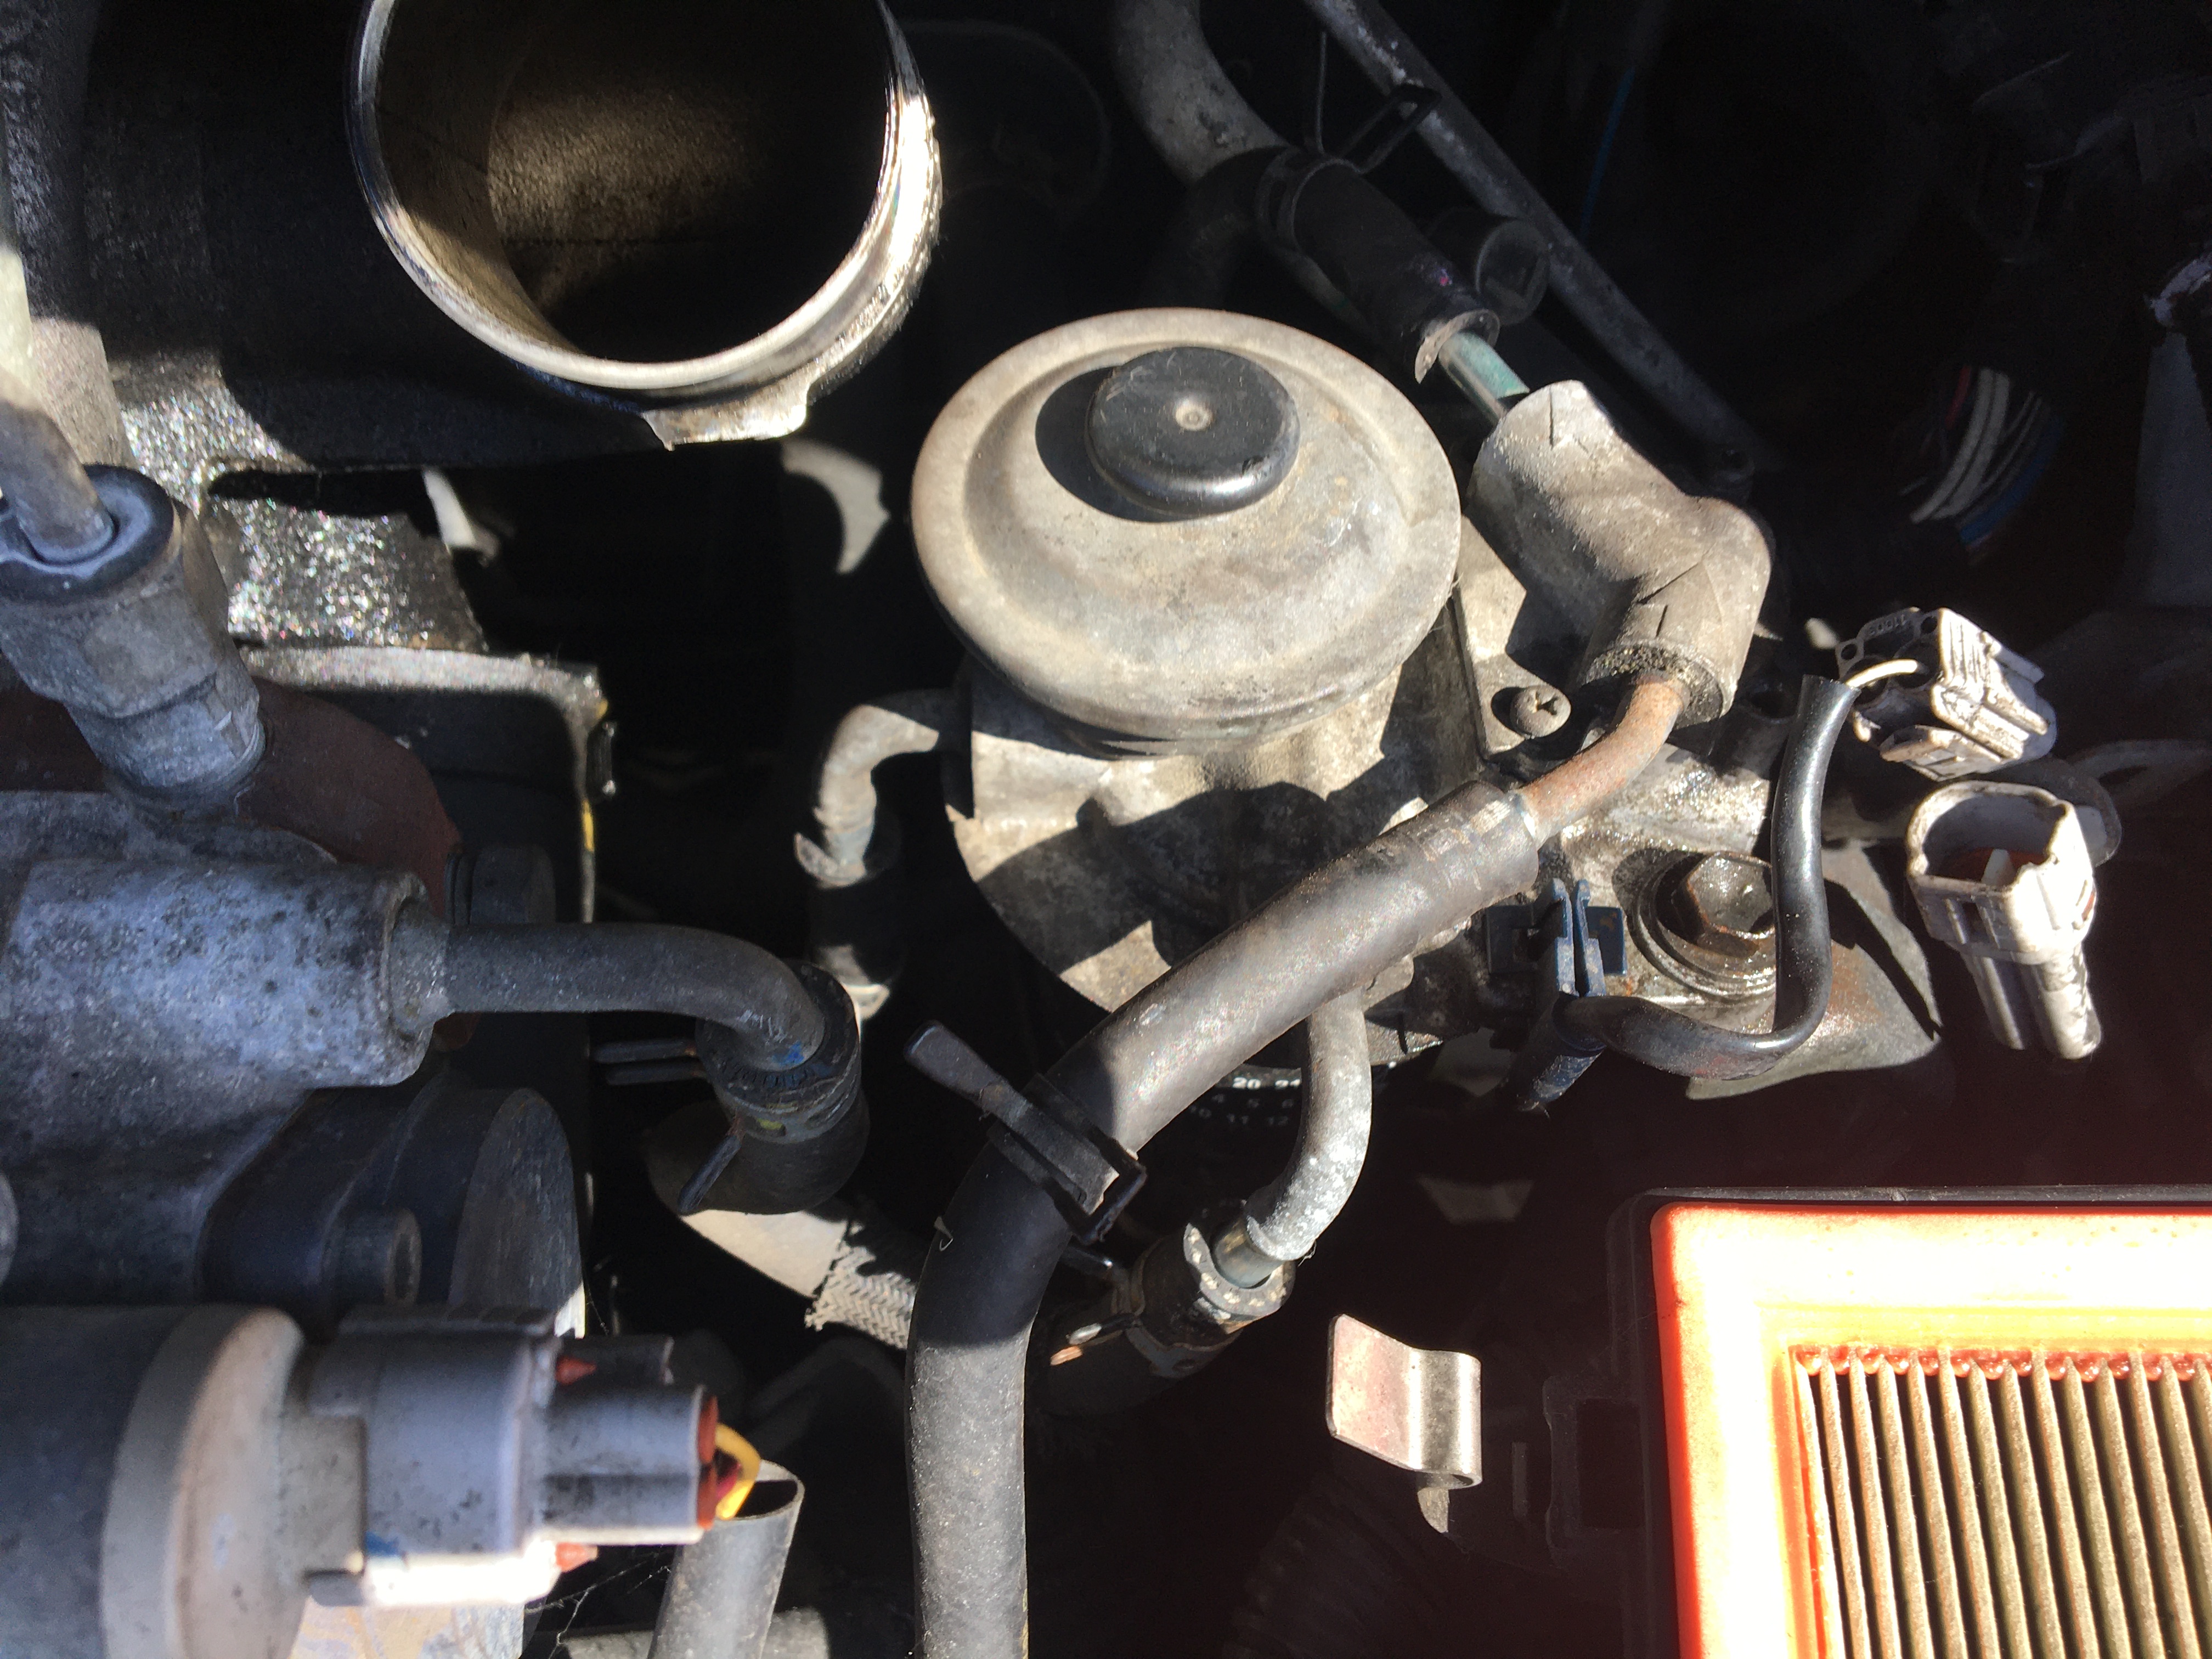
This is the ‘EGR Valve Assembly’ with solenoid on the right.The only tools required are a 12mm socket & extension plus screwdriver & rag/kitchen towel (see later) 1st step is remove the ‘L’ shaped pipe that connects the valve to the engine block.The 2 bolts here are the trickiest to get to, obviously care is needed not to drop the bolts as they are removed. Also take care not to loose the gasket (What Gasket?!?) as the 2nd of the 2 bolts is removed. Here is the pipe removedAbout now is a good time to unplug the multi terminal electrical plug/connector from the solenoid part of the EGR Valve.NO GASKET! – And evidence of gas escape everywhere but adjacent to the bolts. So much for ‘professional’ mechanics eh? As mentioned earlier, I have previously paid a garage who claim to be ‘Motor Engineers’ to do this work … Sigh.View down into the black clogged port that is the top of the EGR Valve. Remove the two remaining bolts above and …… Lift the whole unit up off the 2 studs that remain. A little fiddly but not at all difficult.Here is the view into the choked underside of the EGR valve – there should be 3 ports visible (see below)… The 3 ports now visible and clear after copious amounts of Carb Cleaner, poking with screwdriver and soaking/removal using kitchen towel (I have that blue workshop equivalent)Maybe not absolutely necessary but I wanted to remove the solenoid so that I could check the actual moving parts of the valve. The solenoid is held on with 3 Cap Head Allen screws 5 or 6mm (Sorry I didn’t check size) – I improvised a clamp using a G-Clamp and protective wood sheet scraps to hold the valve body securely while unscrewing the allen screws. (Note: Good idea to mark the mating parts for re-assembly) – You can just see the 2 scribed lines I made in the aluminium with a screwdriver. Once loosened the 3 screws can be removed without the restriction of the clamping arrangement.Here is the EGR valve body with the solenoid removed. The movement of the valve (Bottom protruding plunger/spring) and the solenoid (Top protruding rod) can be checked by hand. In this case both were moving freely and full stroke after cleaning out the muck. Re-assembly is reverse of disassembly, here is the EGR Valve assembly replaced in the engine bay with the now clean port and clean operating rod visible.All back in place and bolted securely, electrical multi connector refitted. Moment of truth! – Engine restart, and NO Engine Fault light! Phew!
I was going to say here that ‘Cost Of Repair’ = £0.00, however I guess I have to factor in 1/2 can of Carb Cleaner + £9.99 for a replacement gasket the ‘Professionals’ left out! But still …
£Priceless sense of achievement, reward and Mindful Wellbeing.
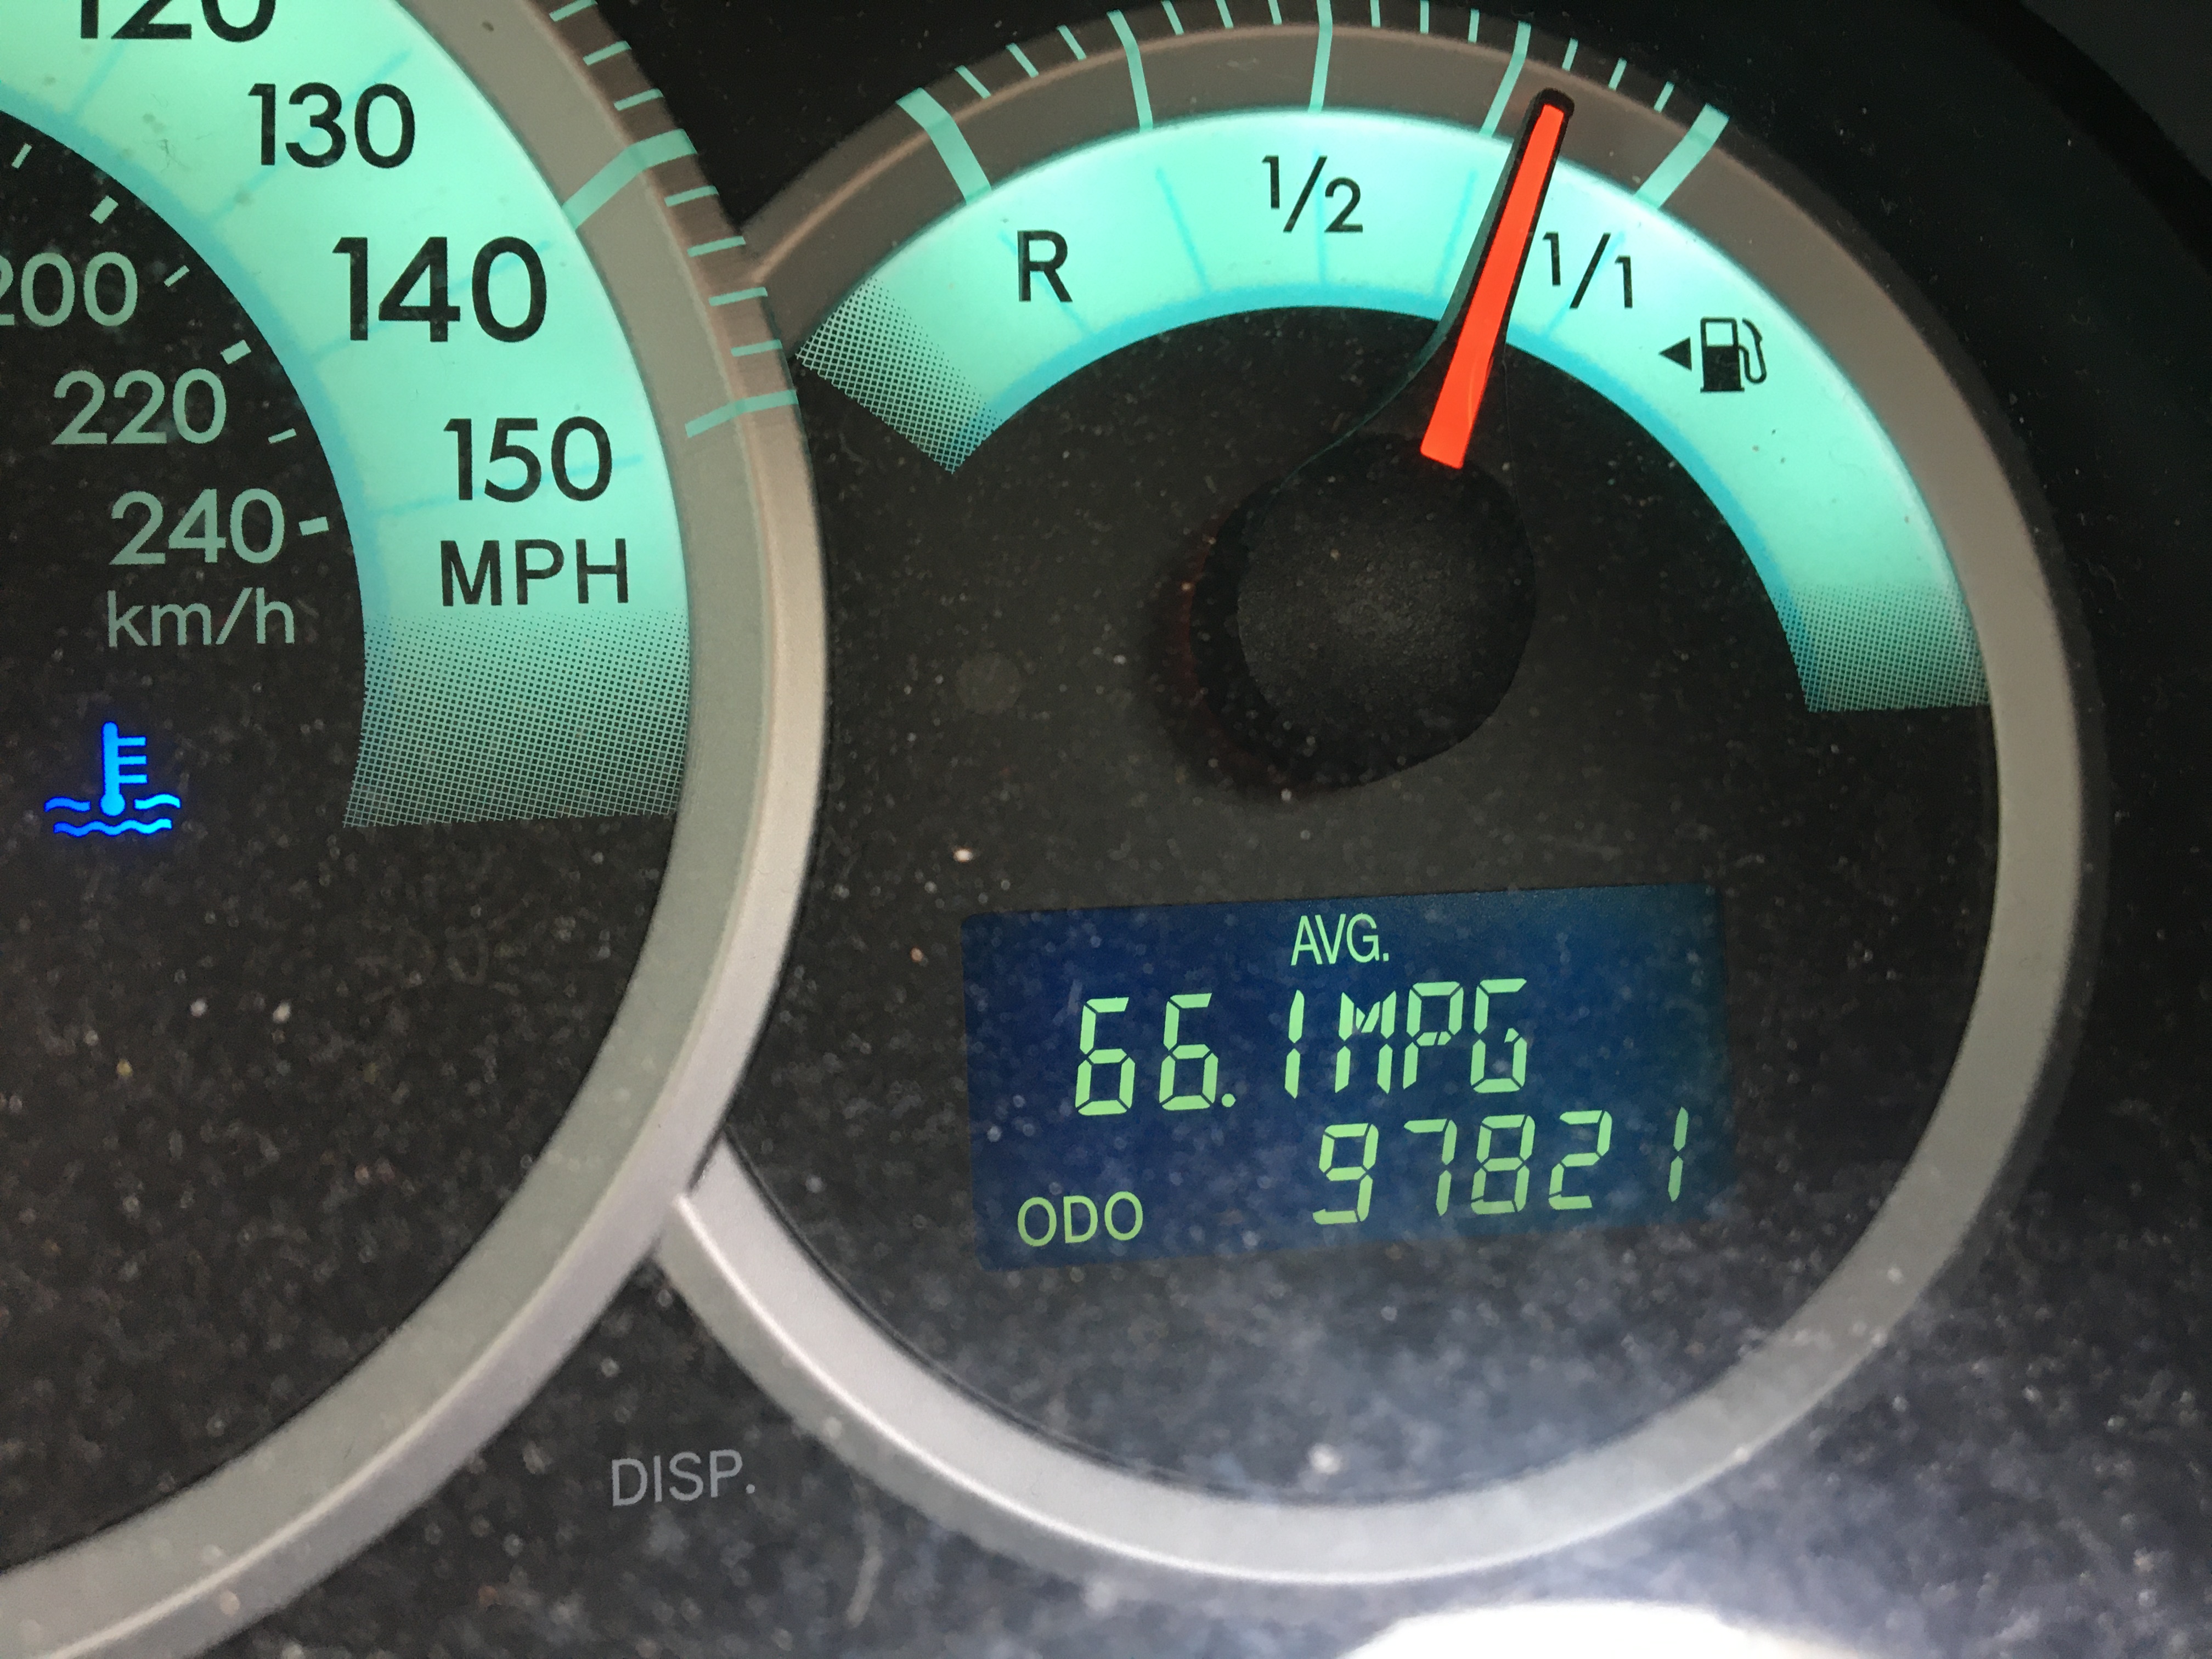
In my family we have 3 old cars. The newest is a 2007 model with over 100,000 miles, and after its recent DIY service returned 66.1 MPG on a long run;
66.1 MPG from a 2007 2.3Litre Diesel with (now) 100K Miles on the ODO – Not Bad!
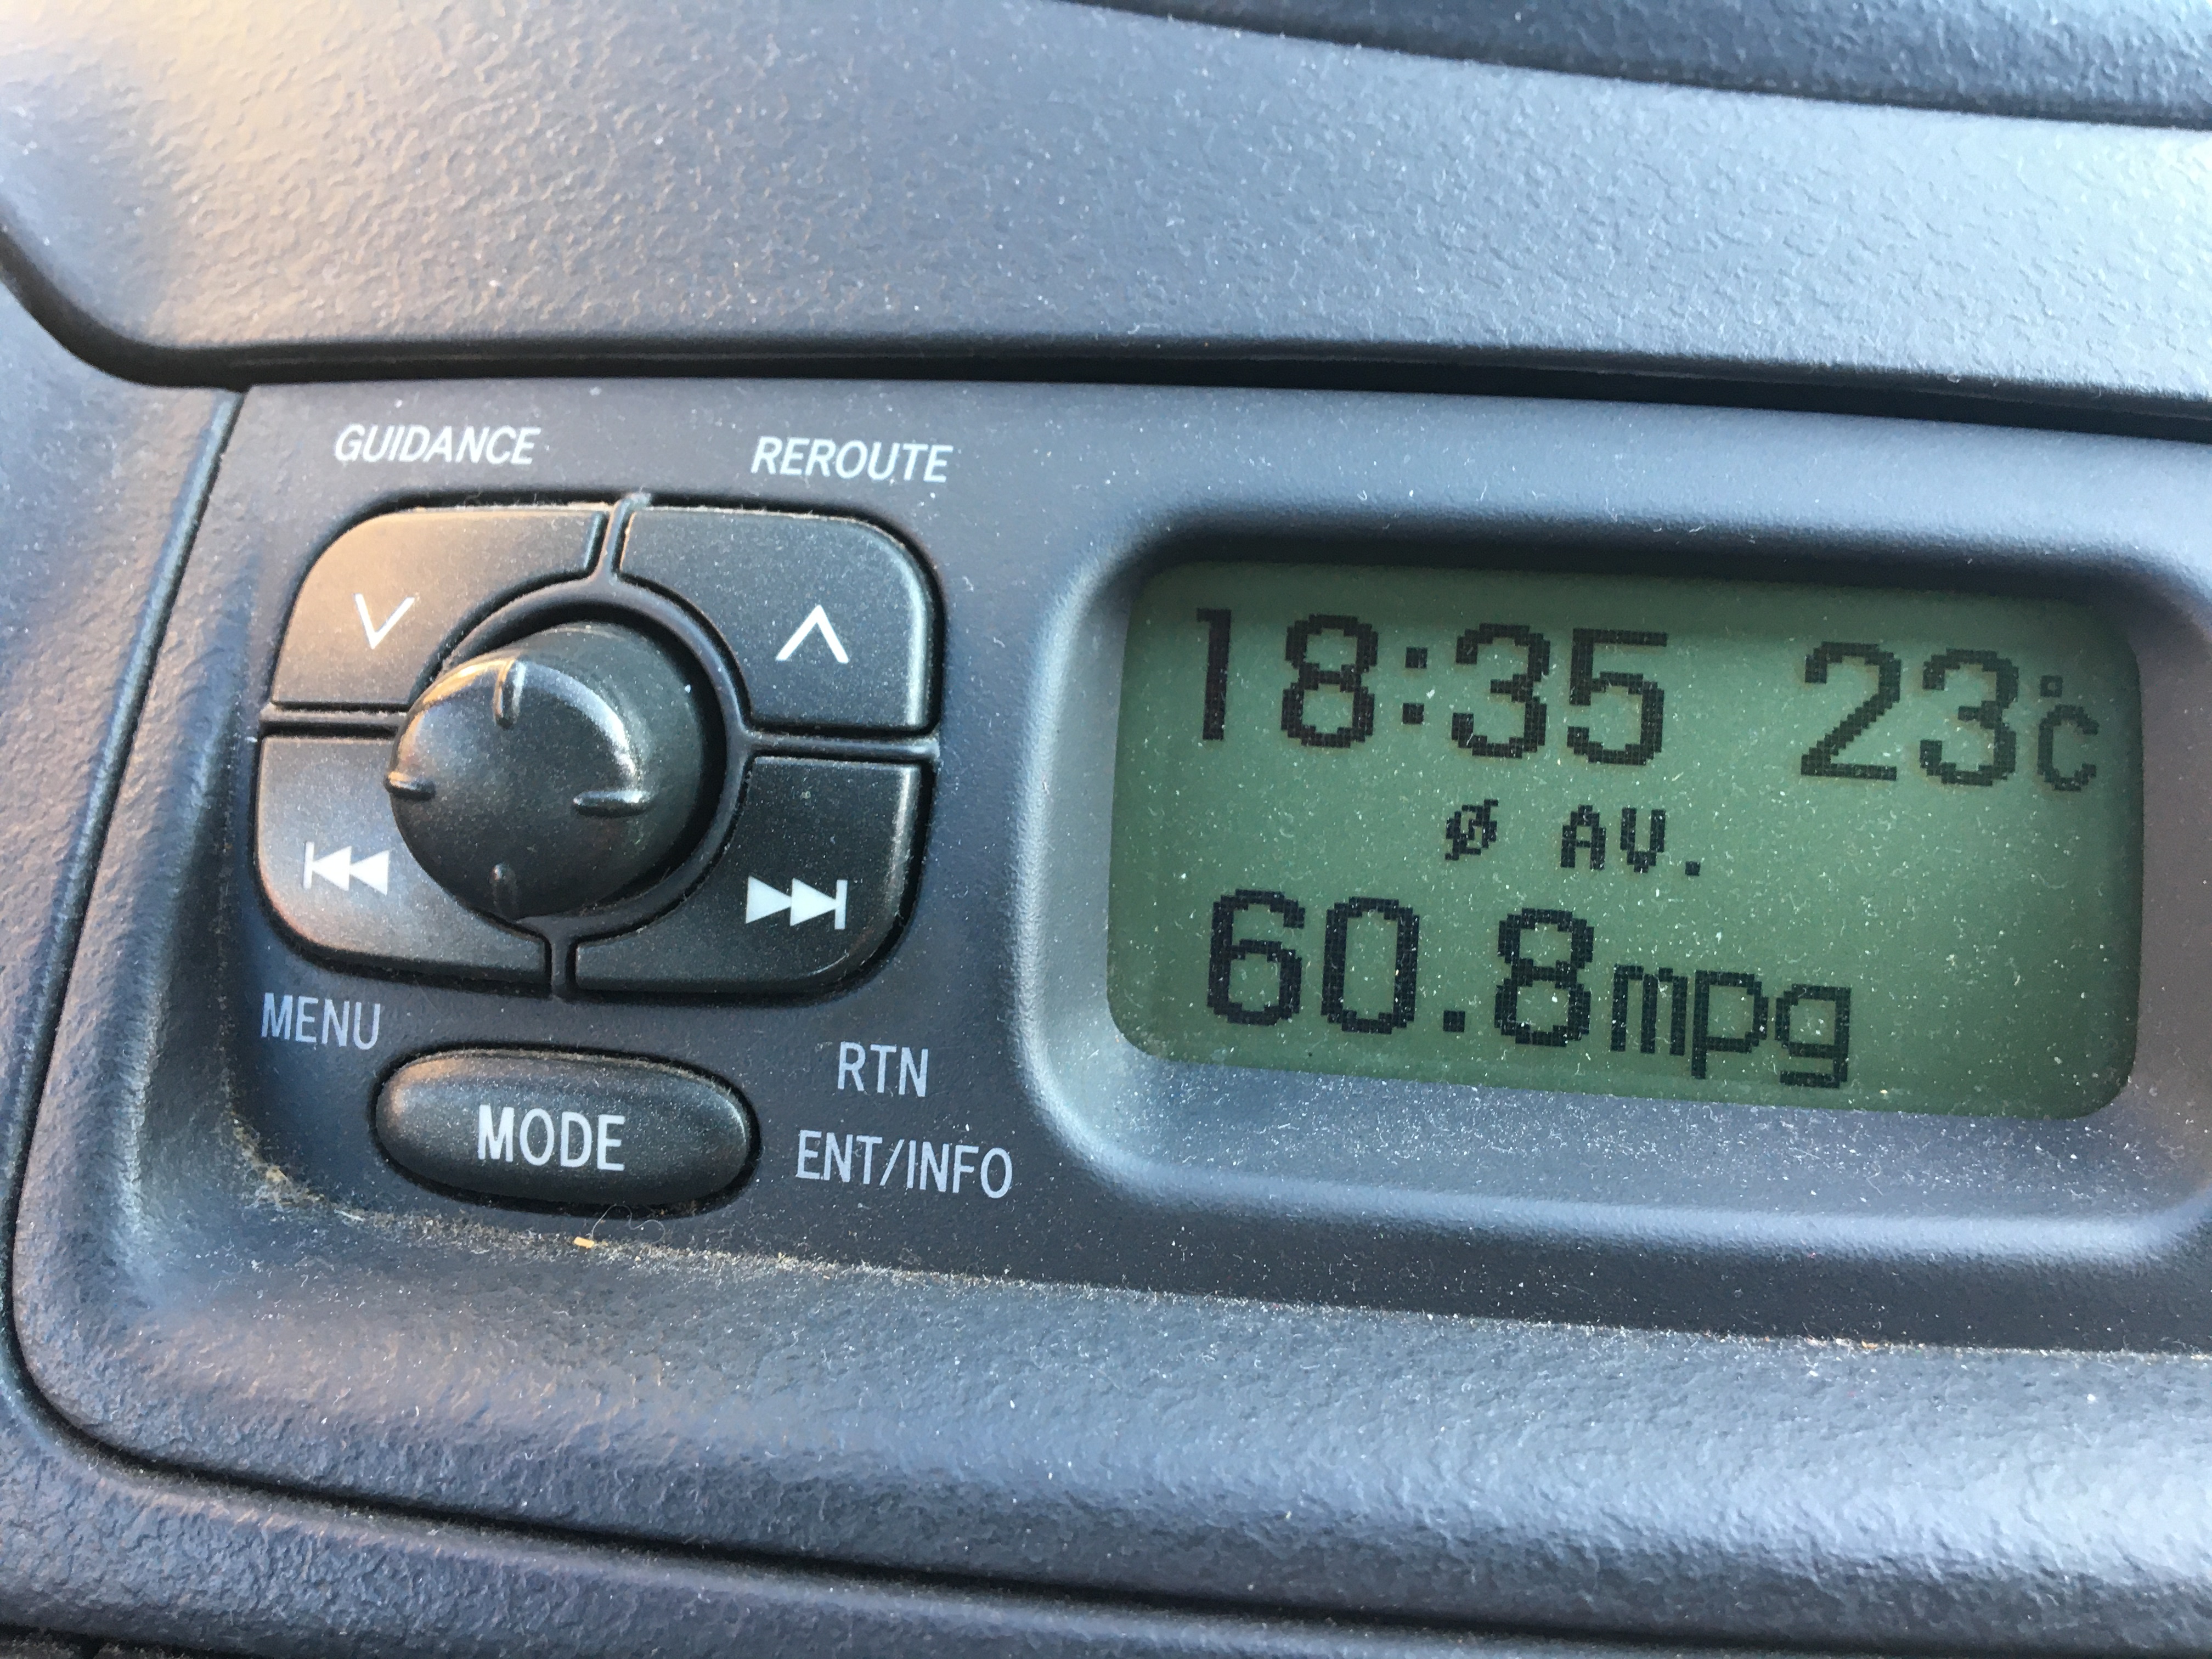
… the other 2 are 2003 models with 125,000 and 100,000 miles on their clocks respectively;
60.8 MPG, 2003 Toyota Yaris, 998cc Petrol over 100,000 miles on the clock and DIY serviced.
There is something very satisfying, rewarding (financially too) and I find ‘mindful’ about maintaining and repairing your own vehicle(s). I realise it is not for everyone, and care must be taken to do work properly and safely. I guess I’m fortunate to have a Mechanical Engineering background, I served a 6 year craft apprenticeship and worked with my hands ‘on the tools’ for many years. I was then promoted to a desk/computer and found myself organising the work for others to do.
Now, in my 60’s I have dug out the old tools, bought a couple of new ones, and primarily to save money on extortionate mechanics (with dubious skill levels and ability) labour fees, but then discovering the mindful benefits of ‘doing a good job yourself’, getting stuck in … I discovered an almost meditative experience, losing myself in the task at hand, rediscovering and re-applying those old skills and enjoying the benefits of wellbeing possibly more than the substantial financial savings.
Here are a few images taken while practicing ‘Zen and the art of DIY Car Maintenance‘.
Removed, pistons freed off, cleaned and re-assembled – Cost £0.00 just some mindful effort A seized rear brake (slave) cylinder on my Daughters car.
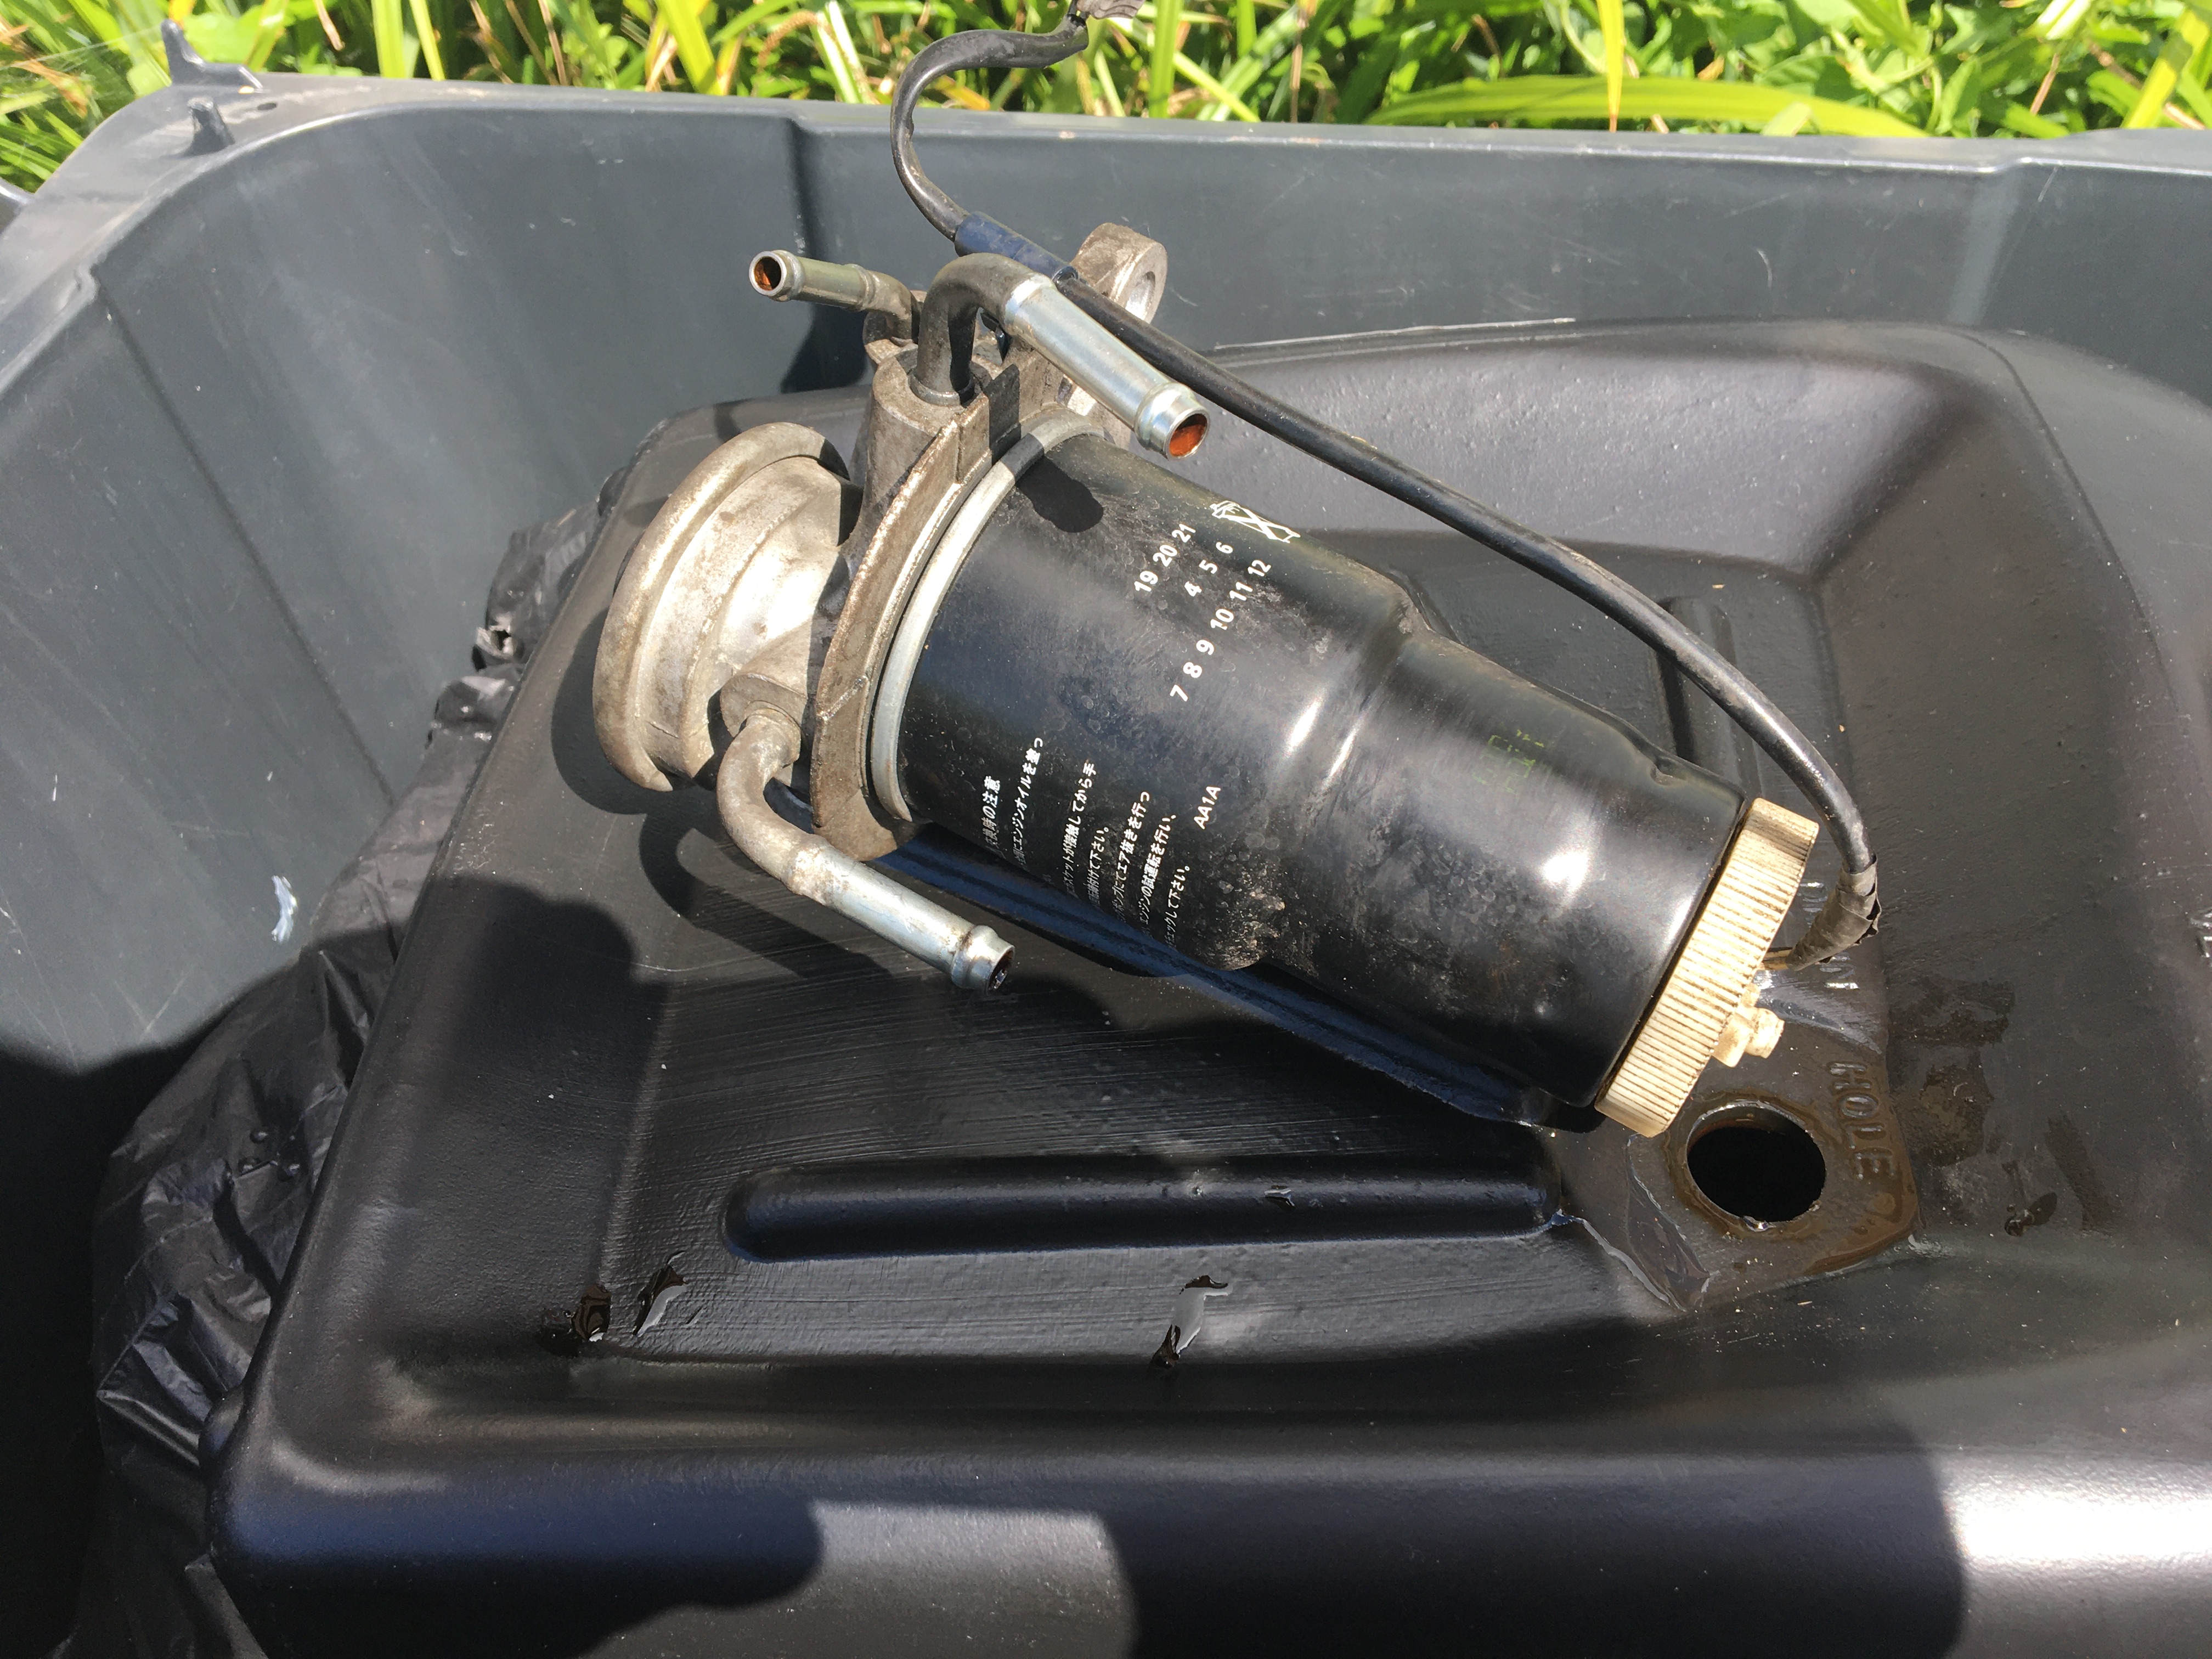
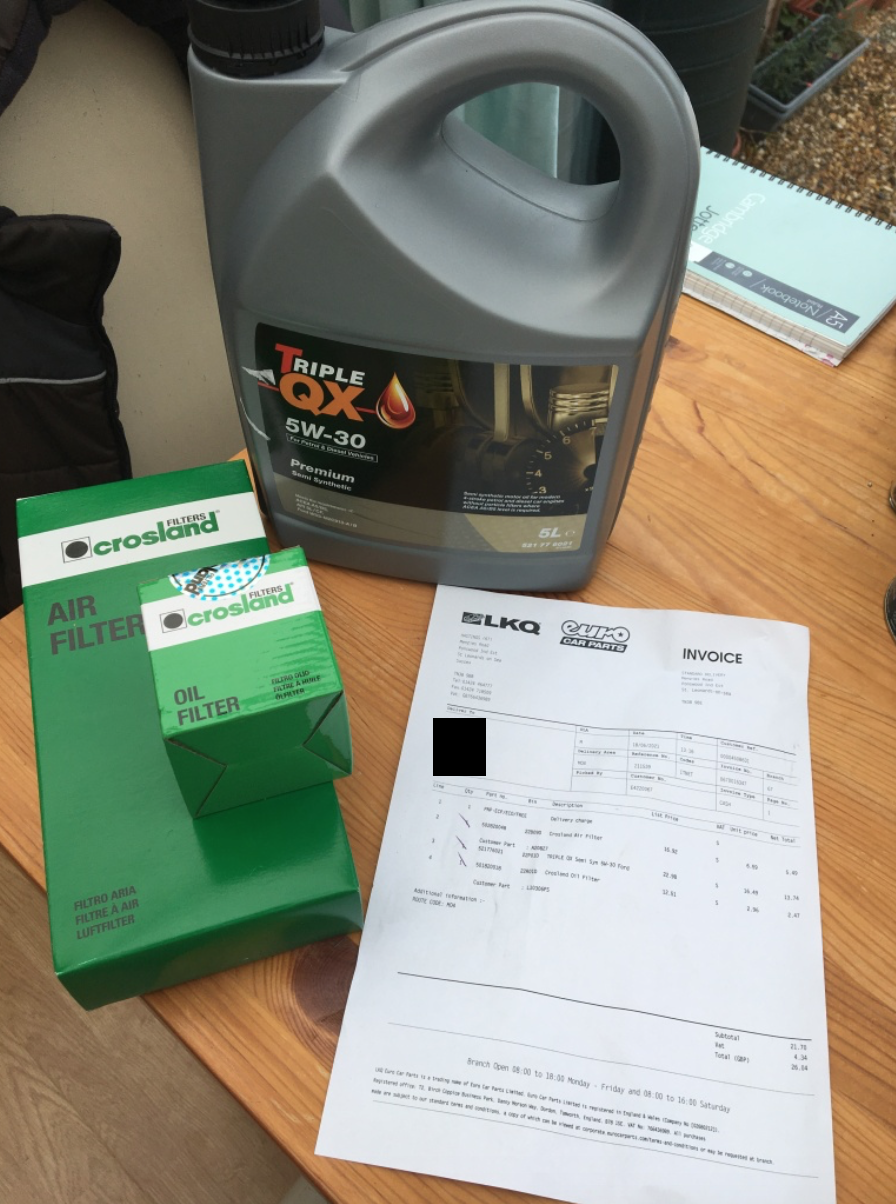
The pictures below are of my DIY annual service of our family car. Engine Oil, Oil Filter, Fuel Filter and Air Filter;
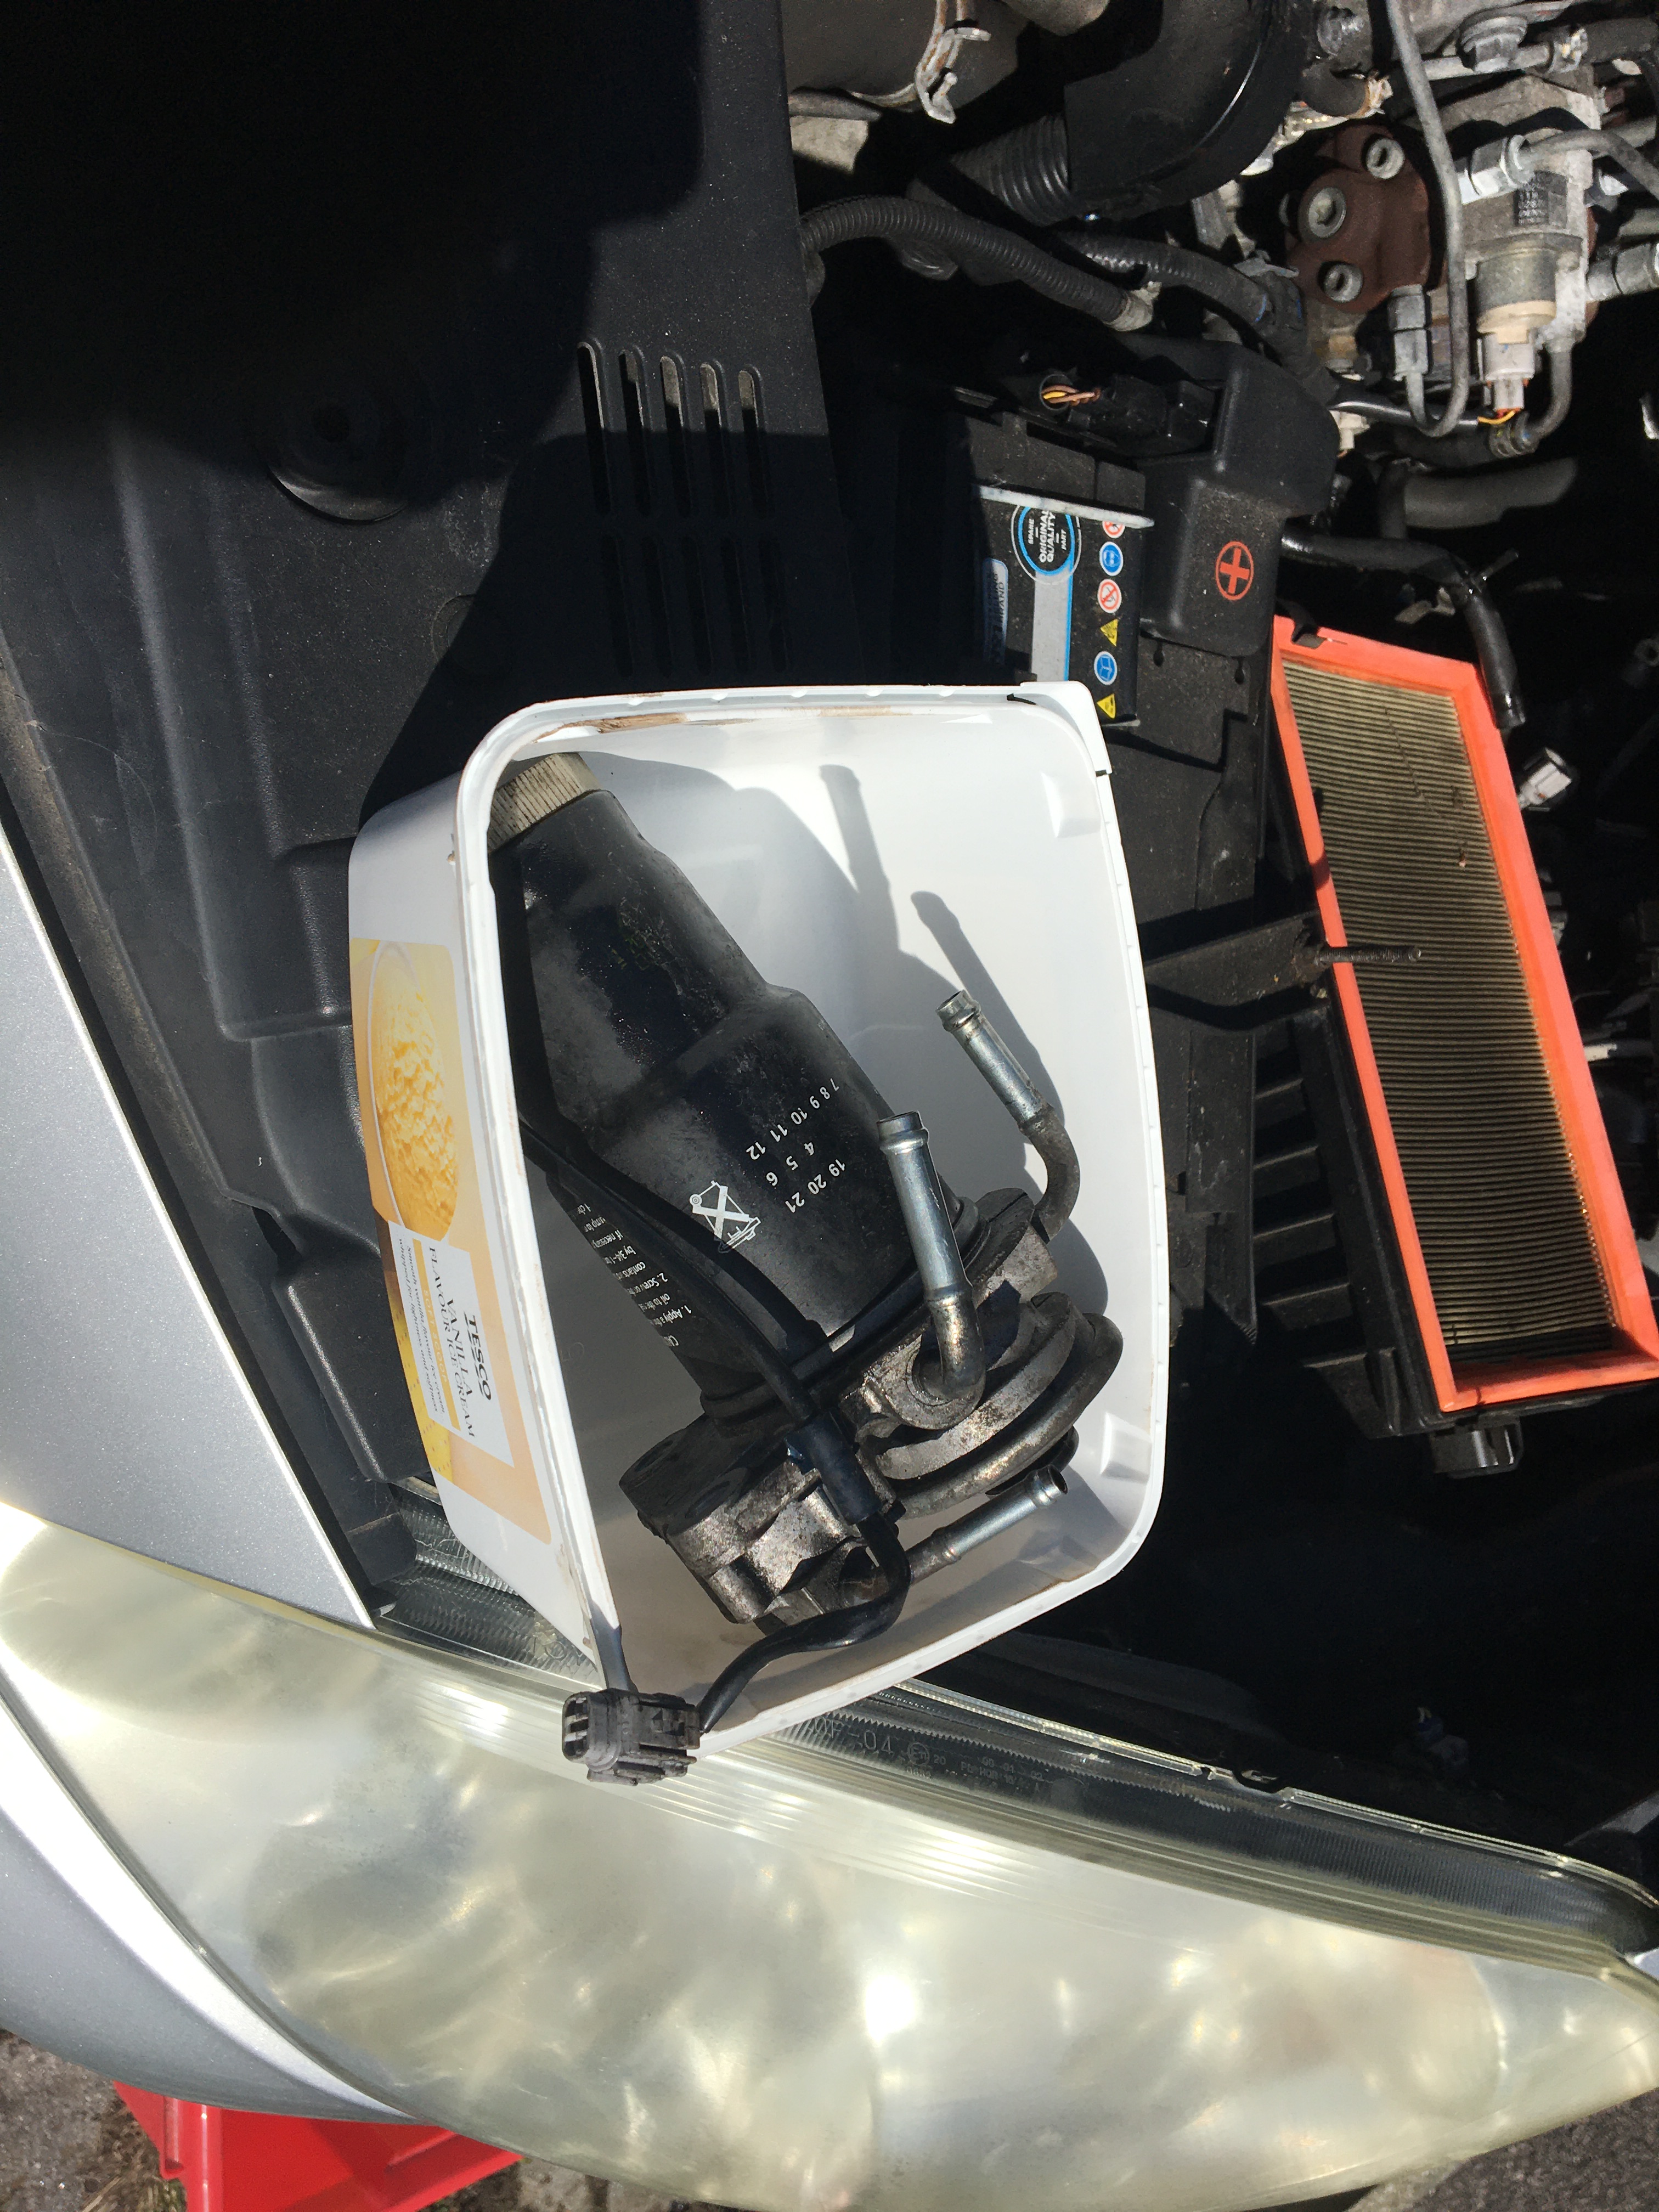
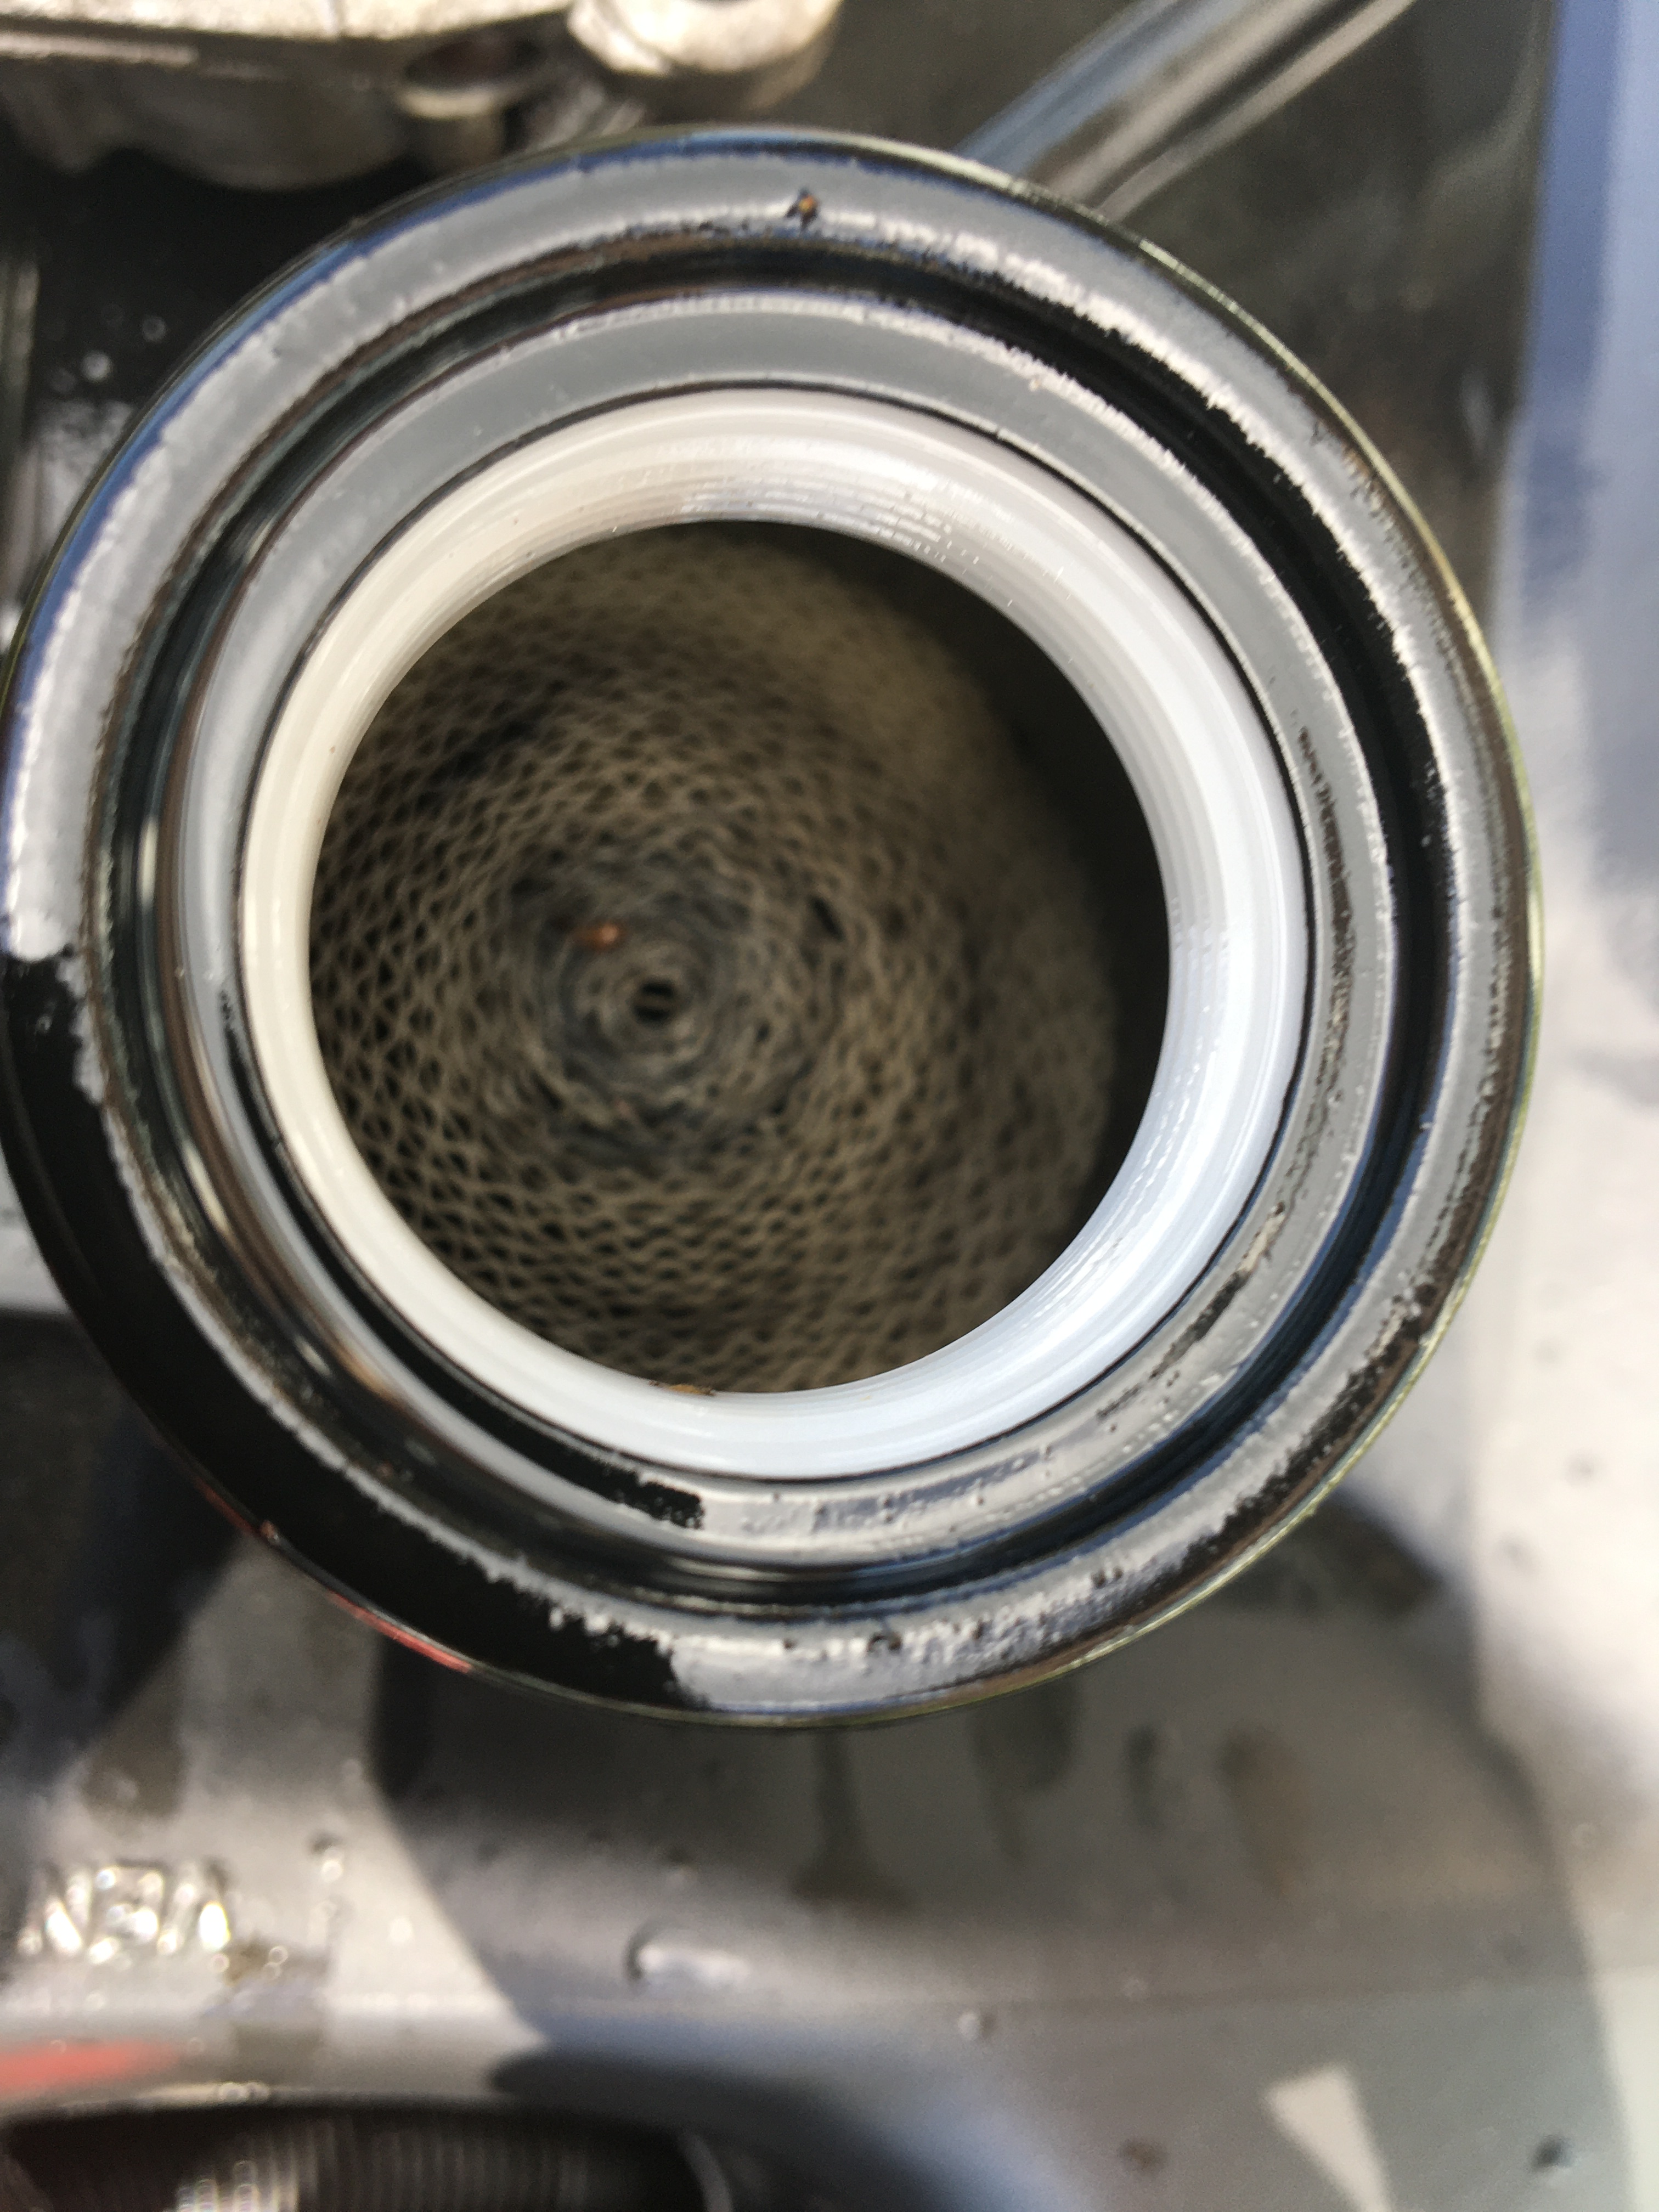
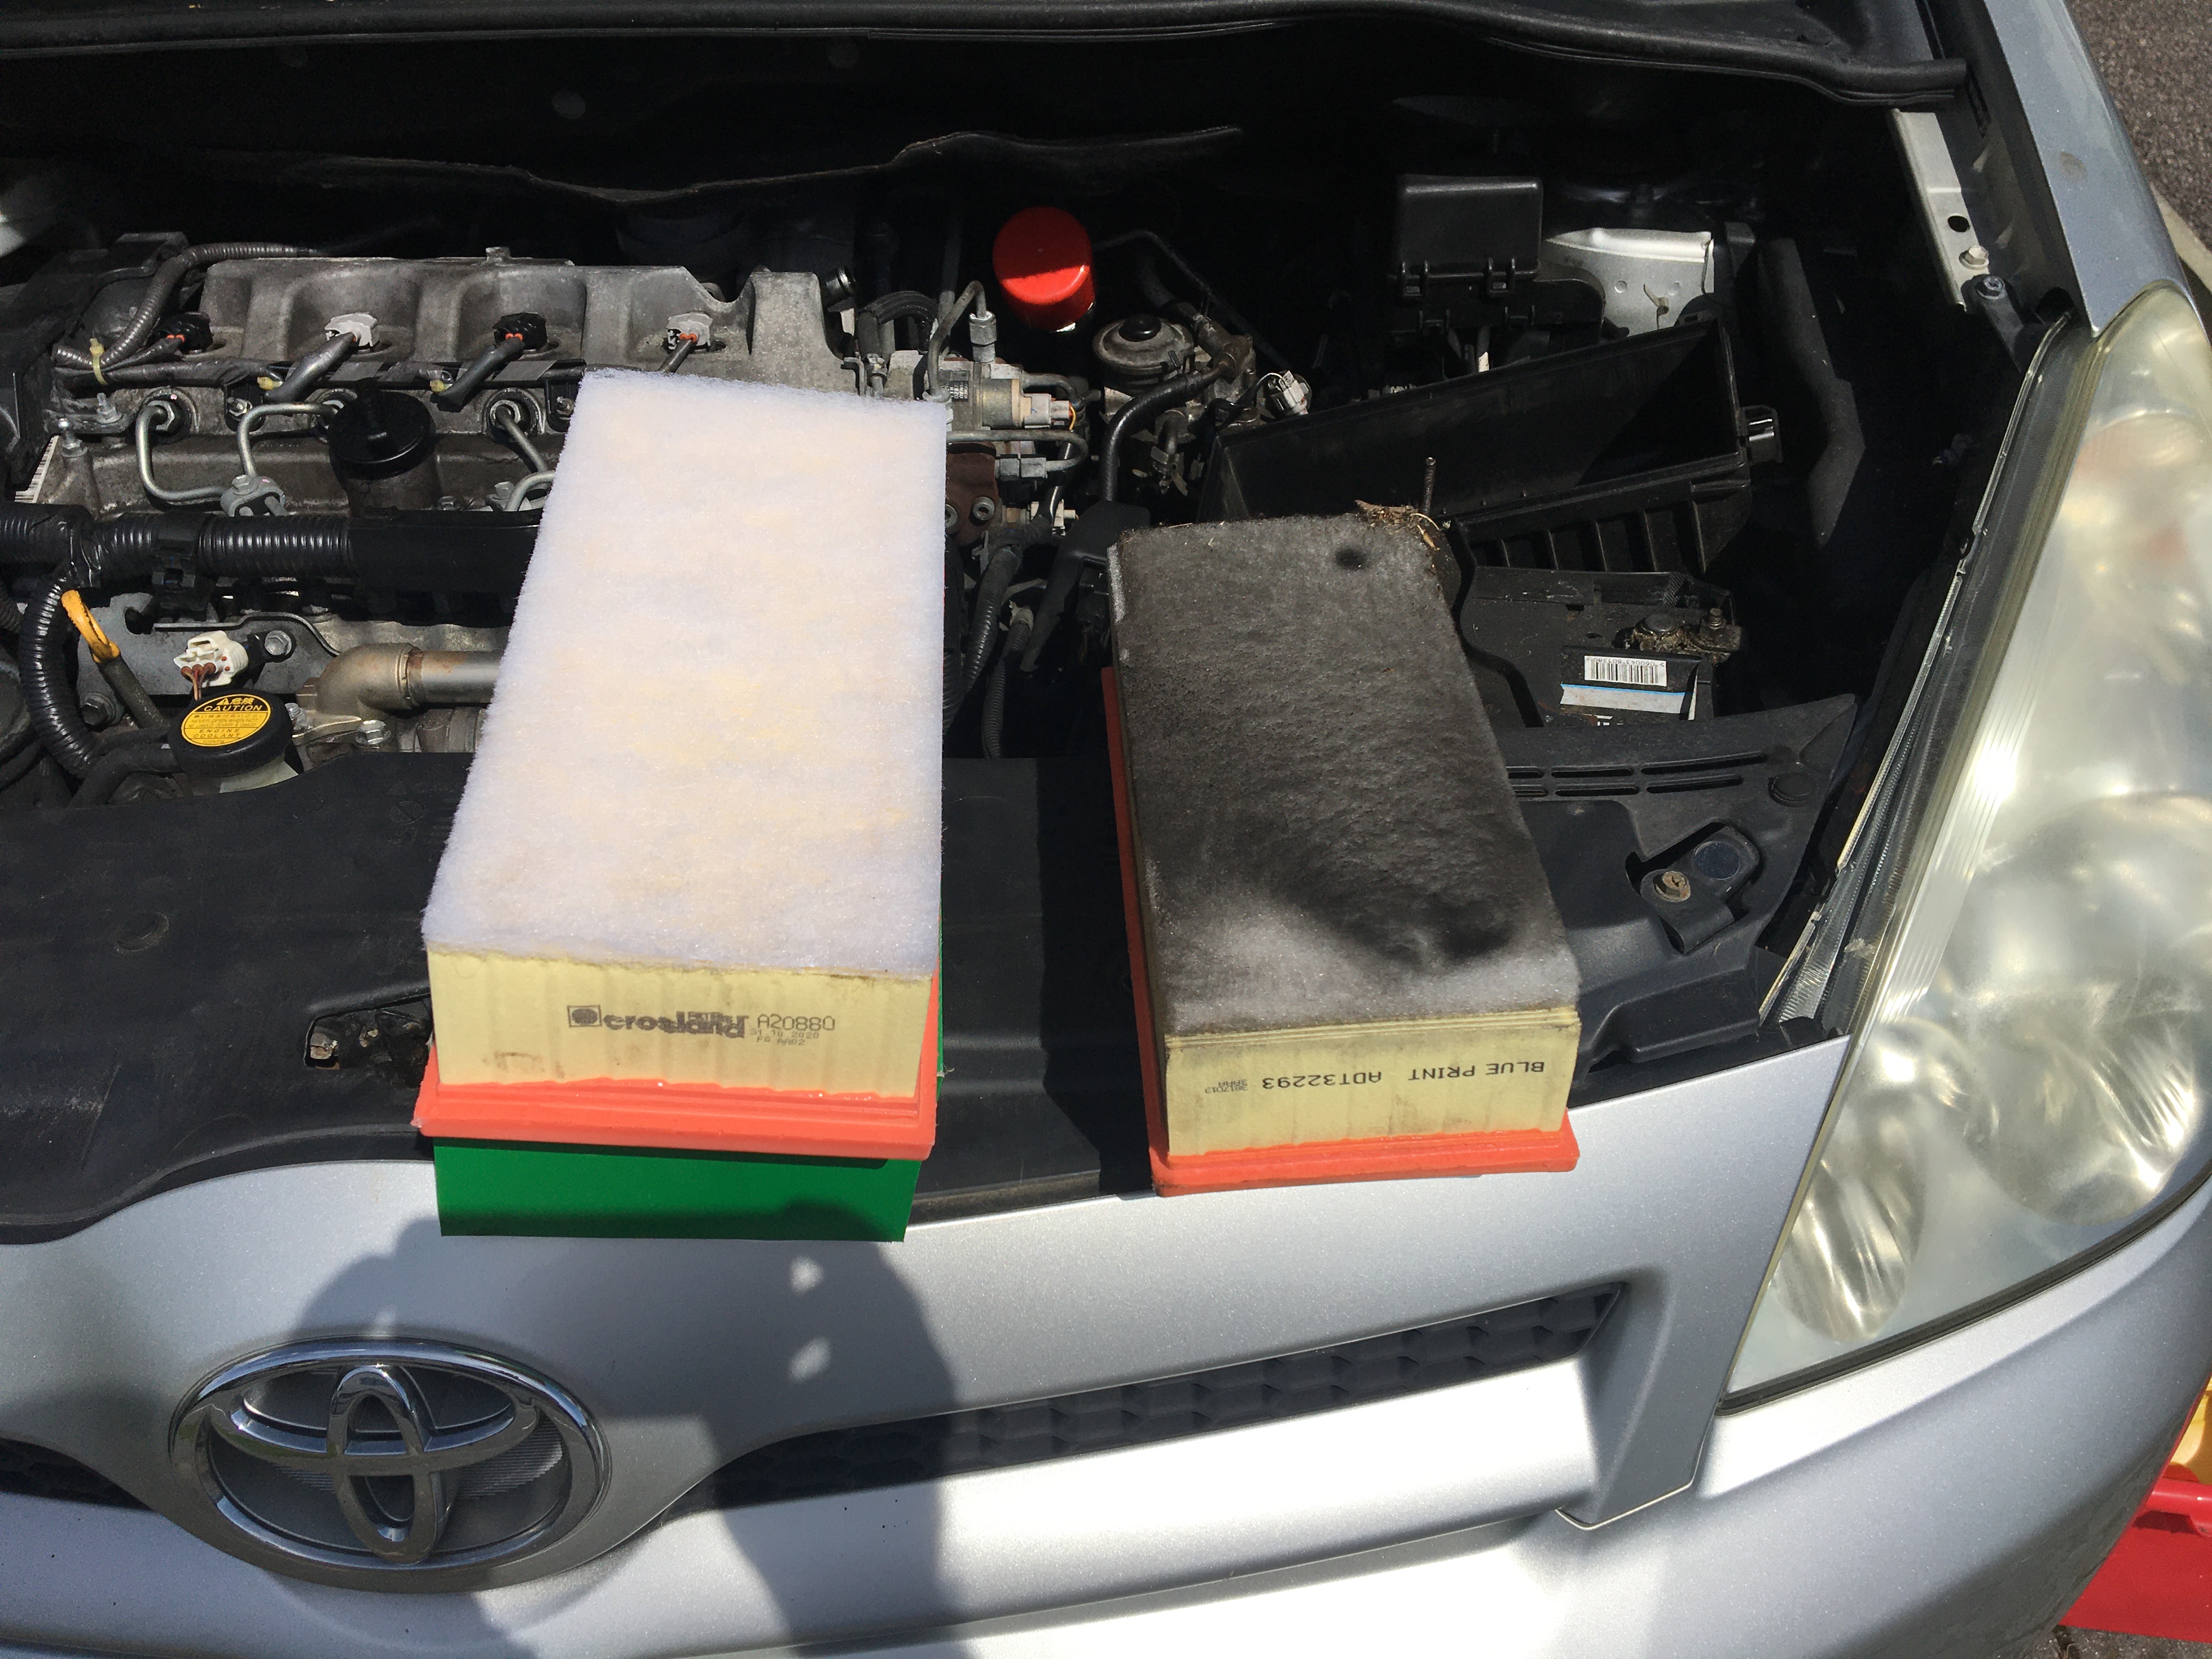
Oil Filter HousingFuel Filter is under there somewhere …… Get this fella out of the way and …… There it is, disconnect a few pipes and electrics and …… the fuel filter housing is out, now to strip it down… drain the remaining fuel, in this case diesel …Remove the water warning float …Remove the filter cartridgeInside the old filter fitted for less than a year … compared to the new filter internalAll re-assembled and ready to refit… And of course while I was there I replaced the Air Filter, again slightly less than one year old!Cost of parts £26.04 (Local Garage Quoted £140.00) Mindful value, sense of achievement and job satisfaction = £Priceless 🙂
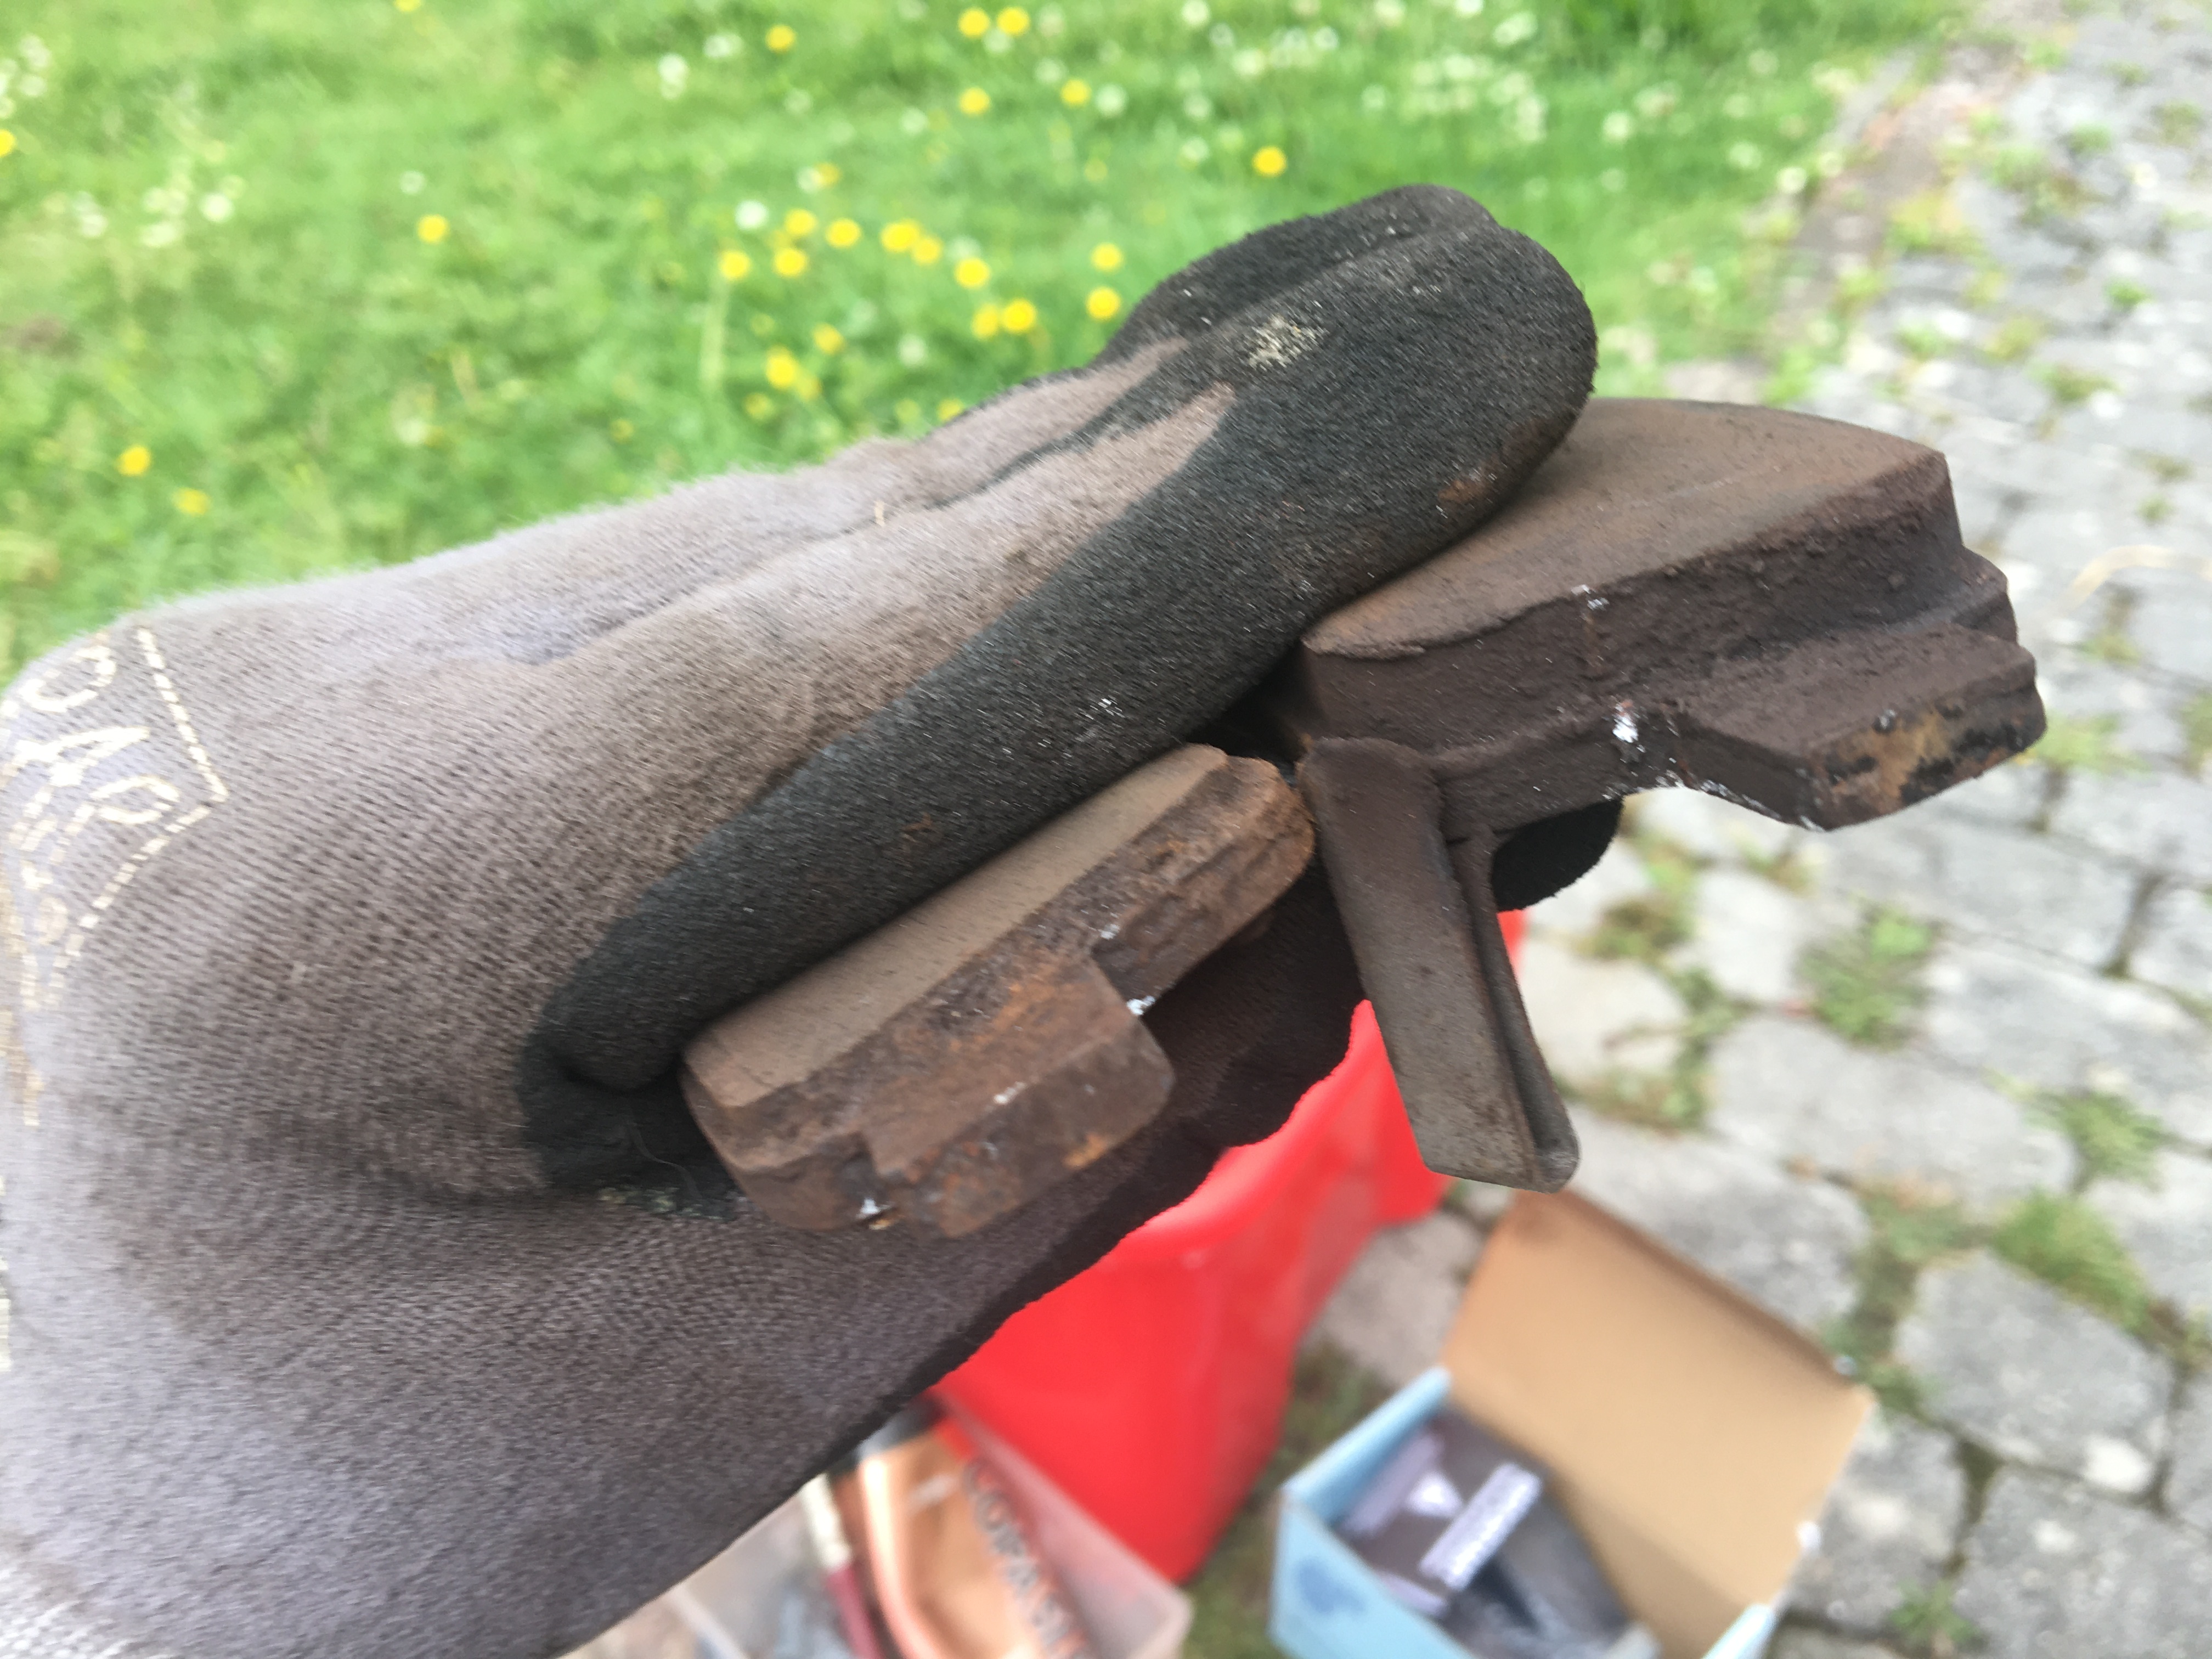
Same car as above, Toyota Corolla Verso 2.3 Diesel, inspecting and replacing rear brake pads;
Wheel off, and car well supported …Caliper swung clear, g-clamp used to push piston back ready for new thicker pads …Old pad (left) against new pad showing ‘tell tale’ wear indicator spring strip calliper/pads sliding surfaces thoroughly cleaned and lightly coated with ‘copper slip’ compound, new pads installed.
Same car front brake pad replacement;
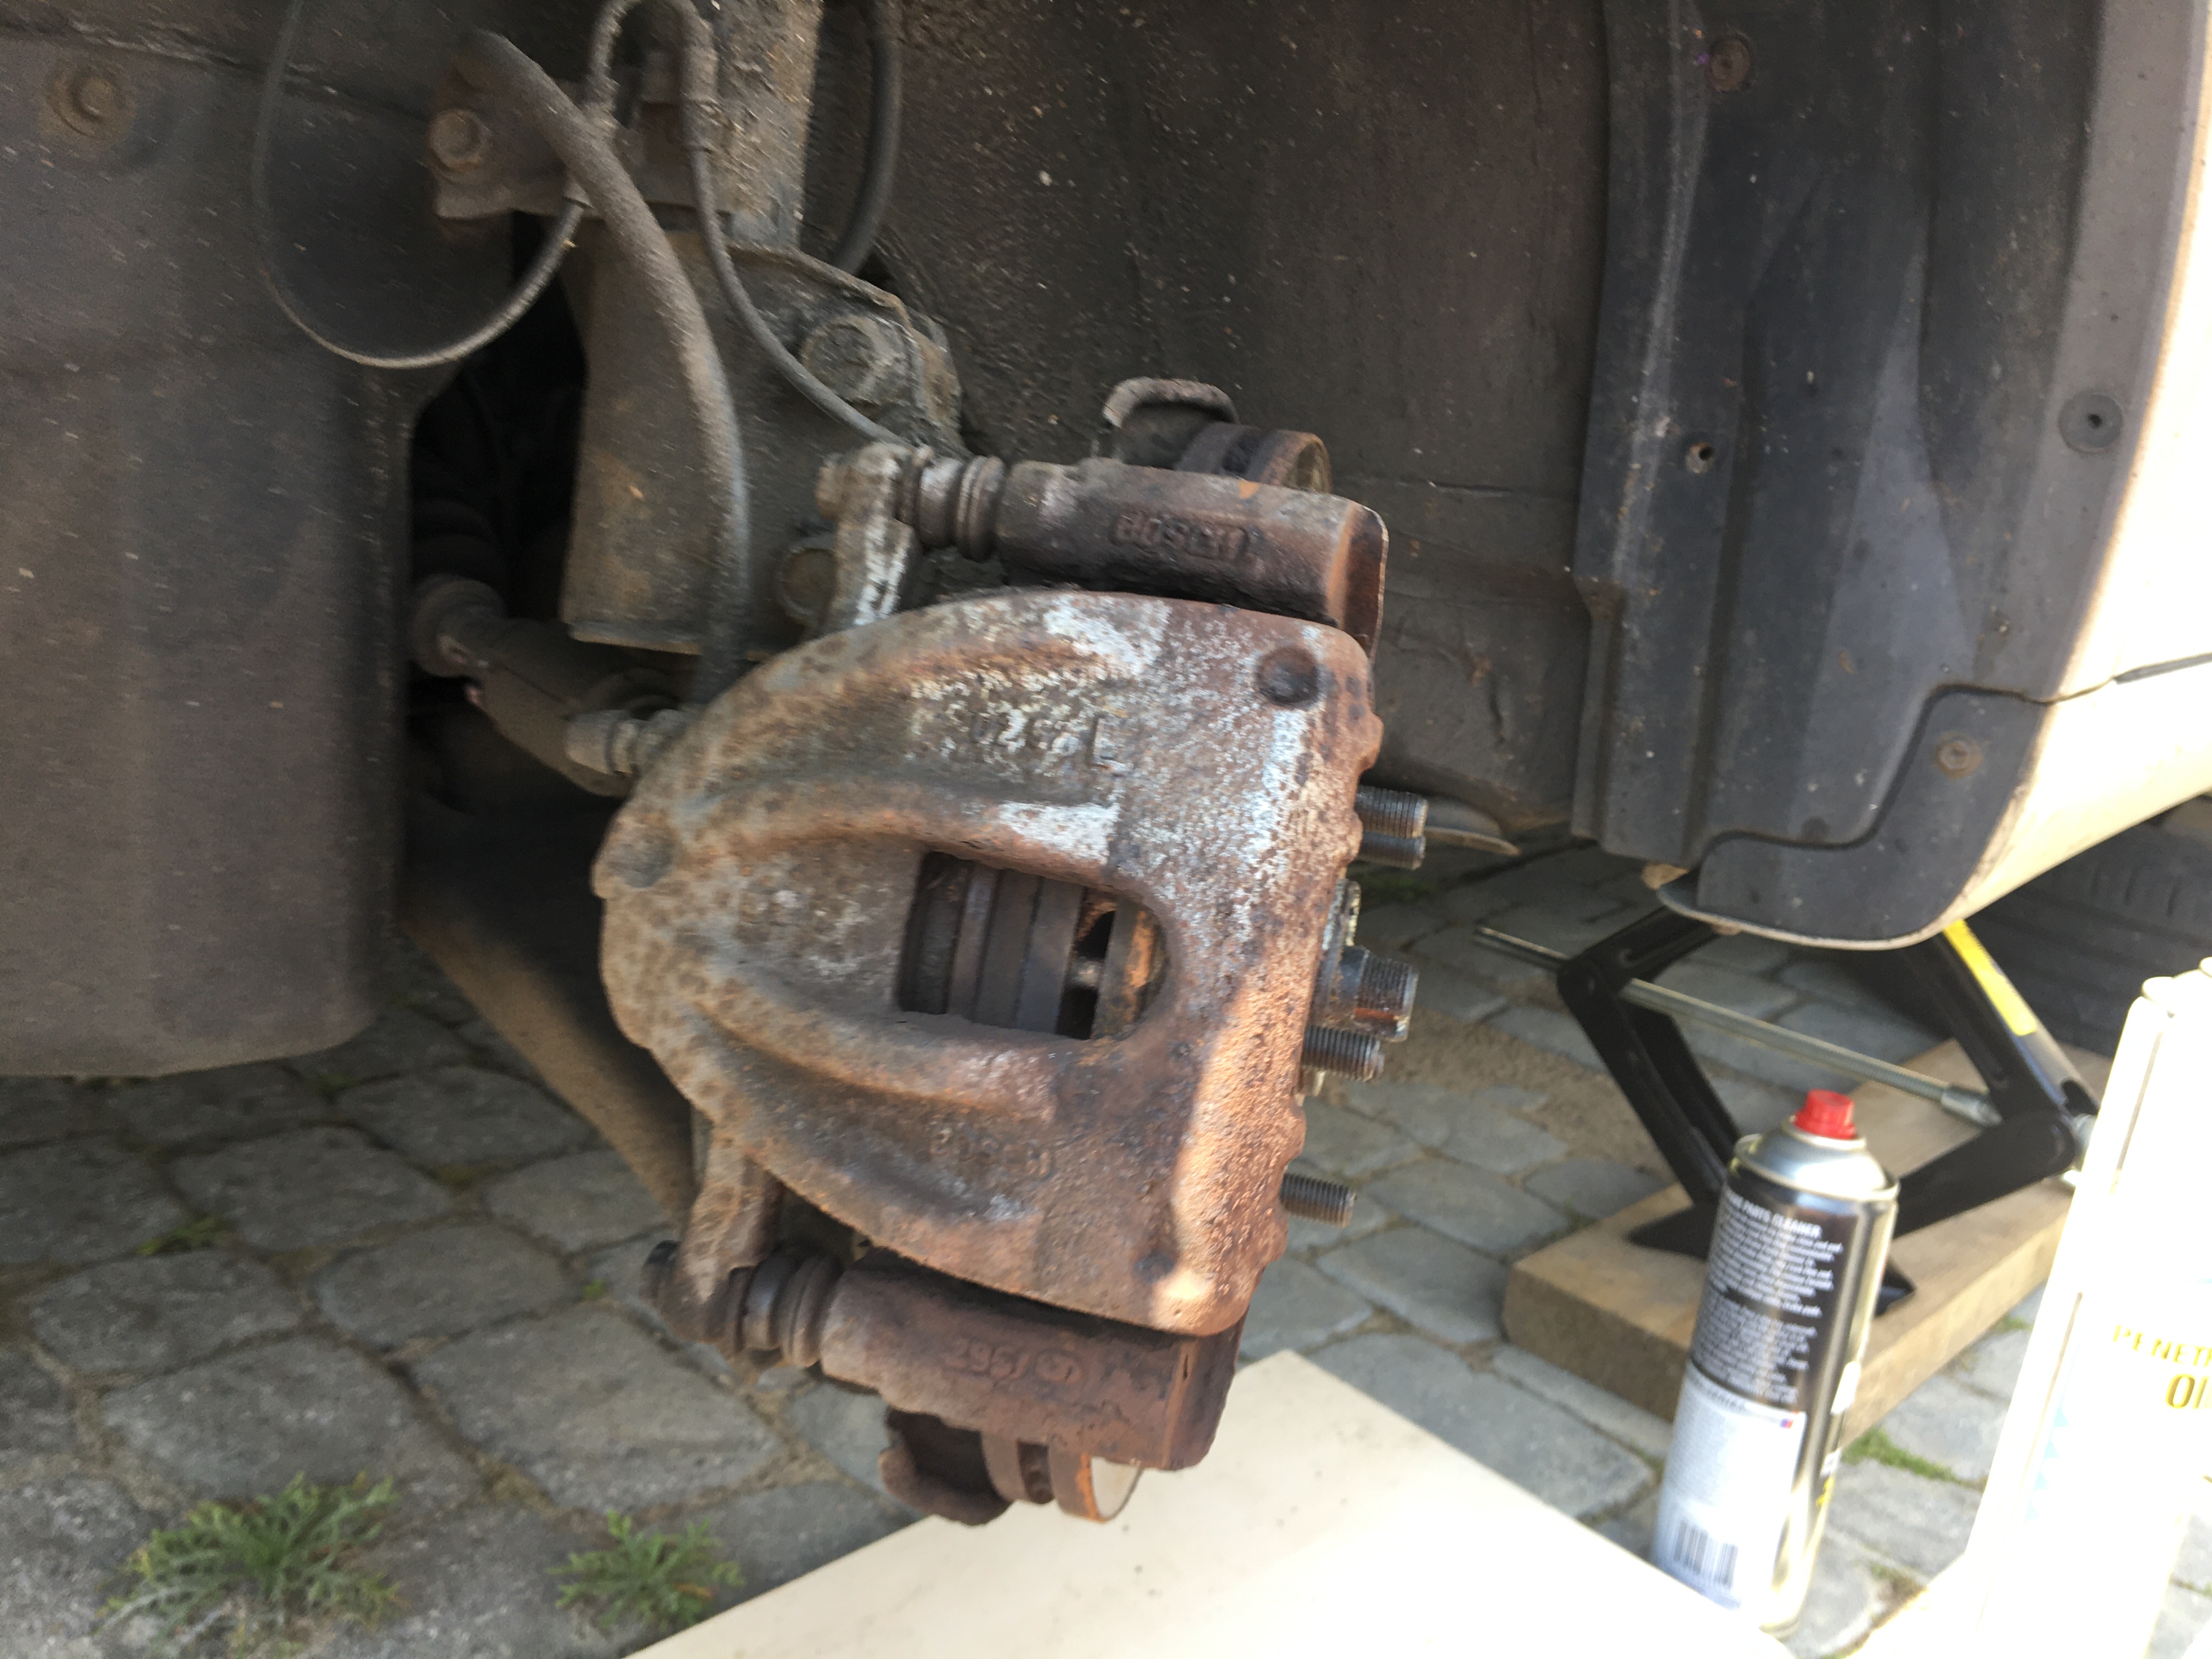
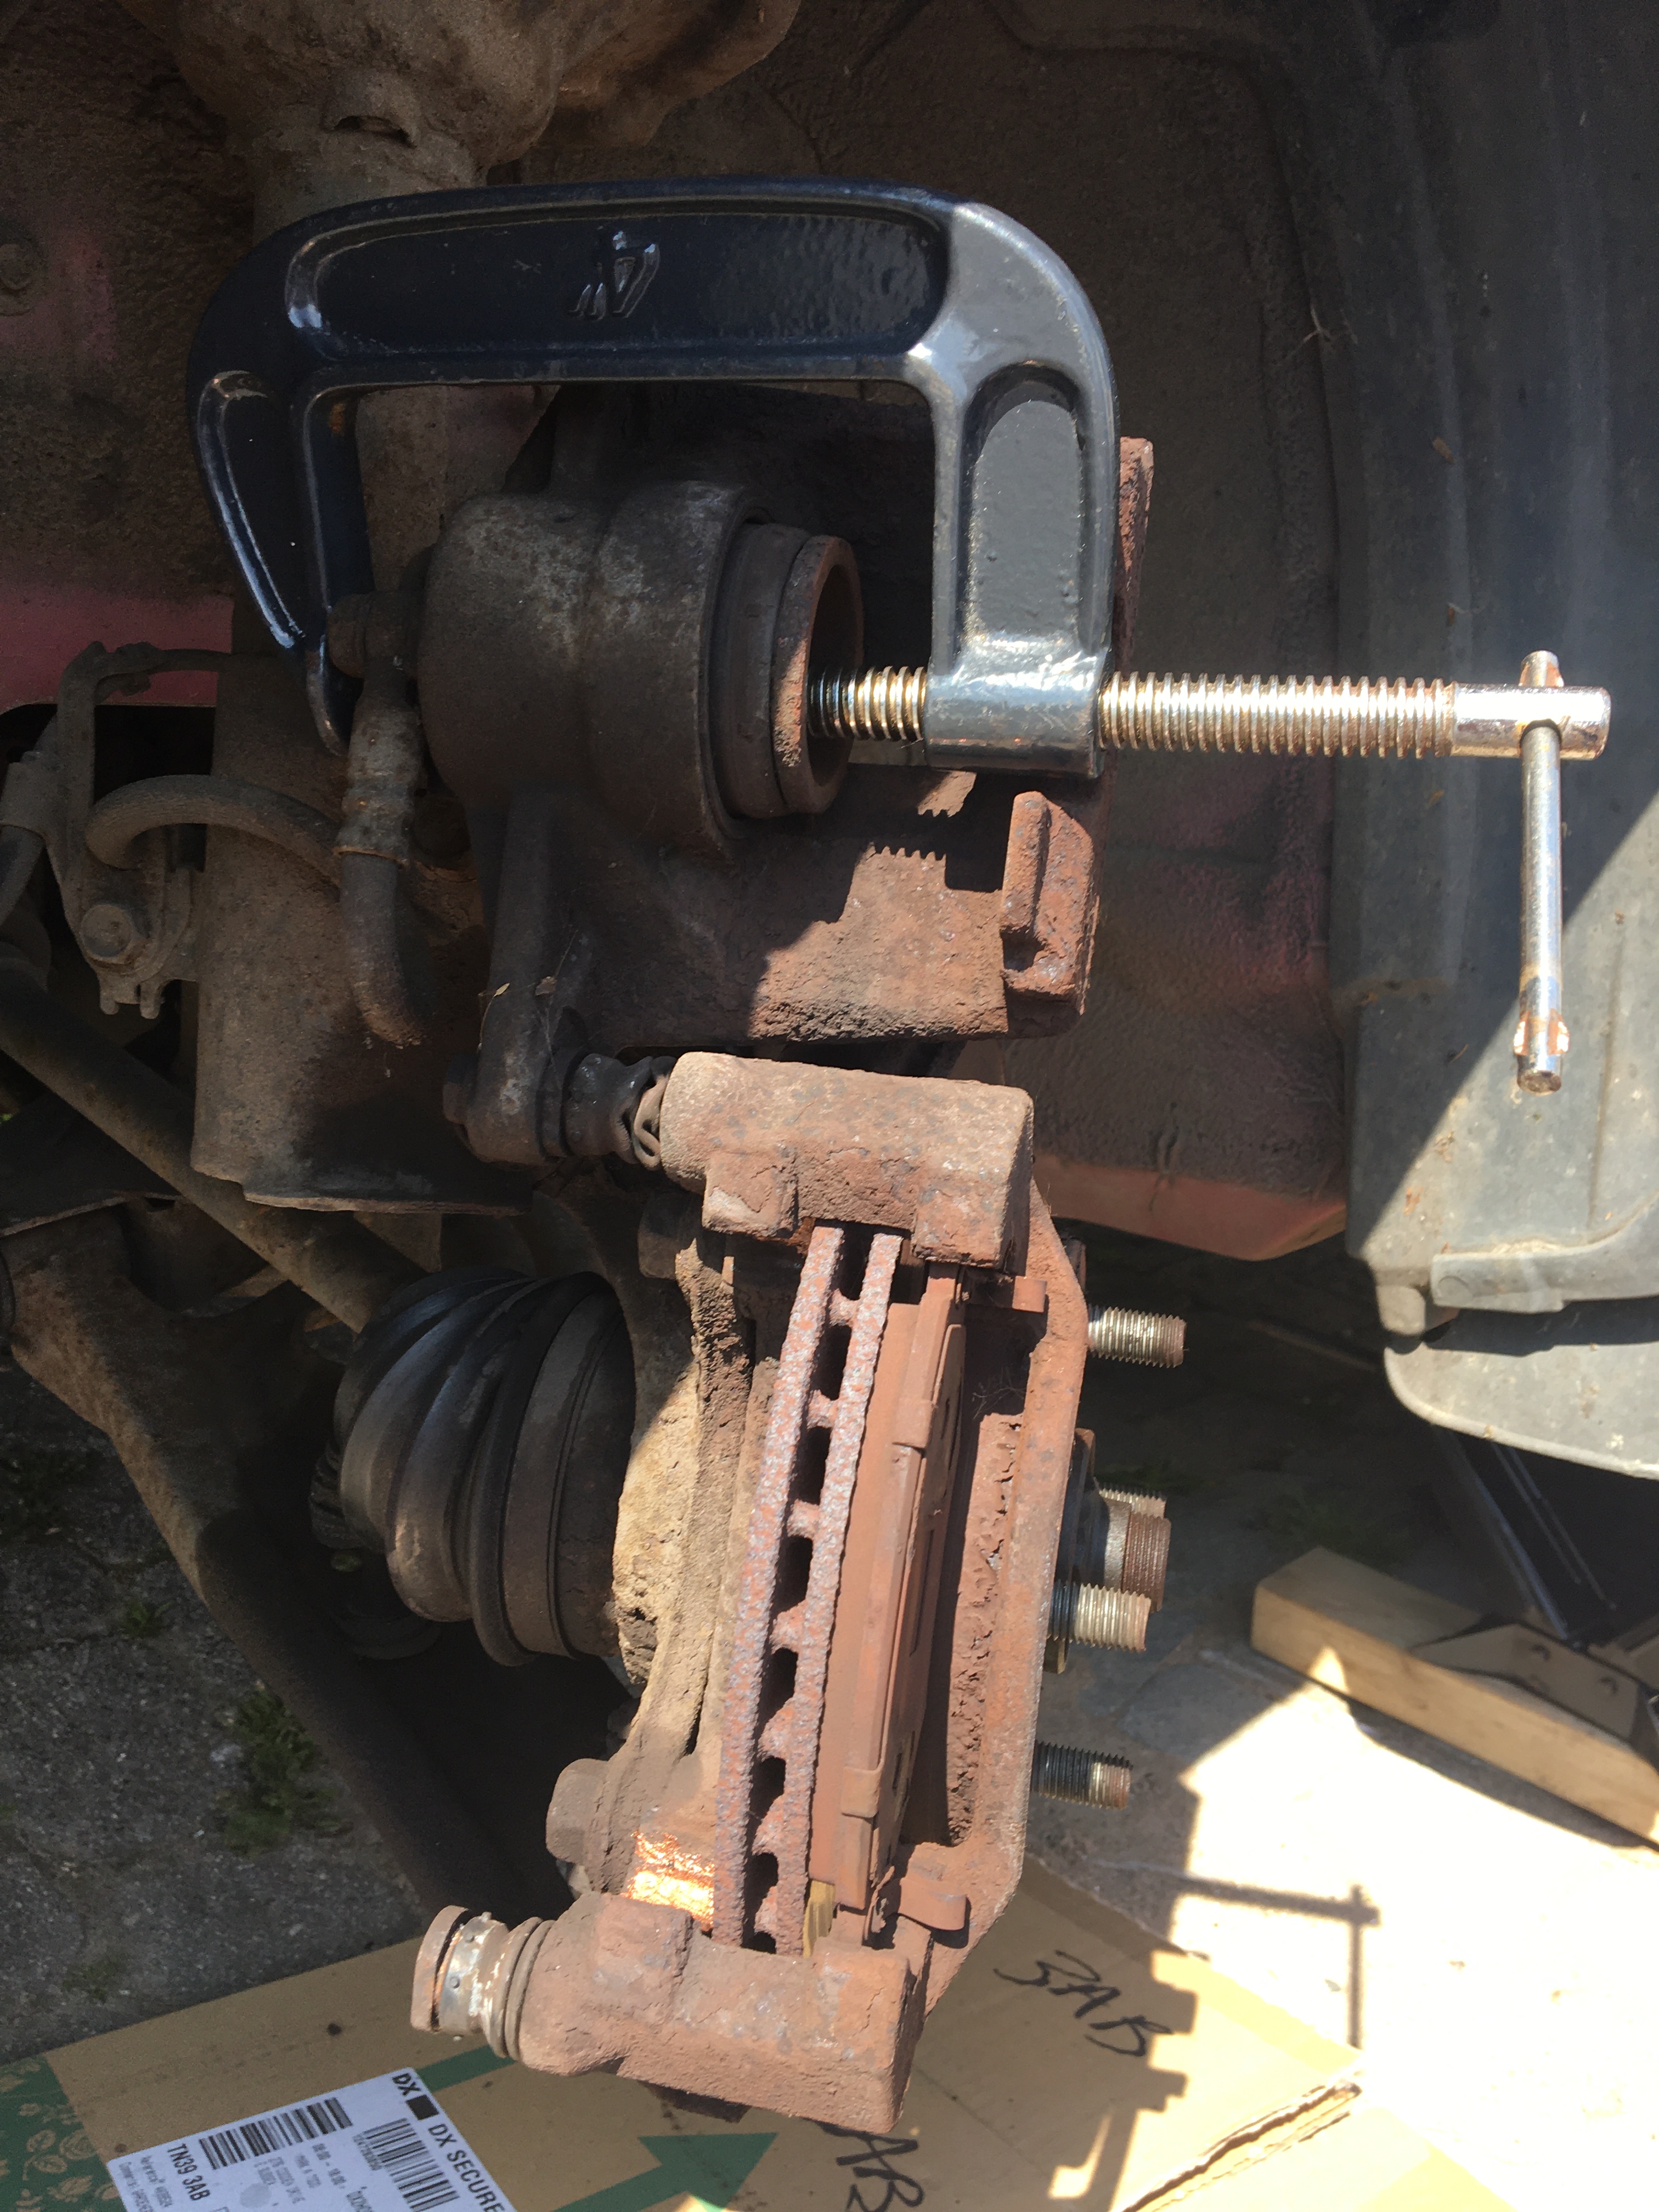
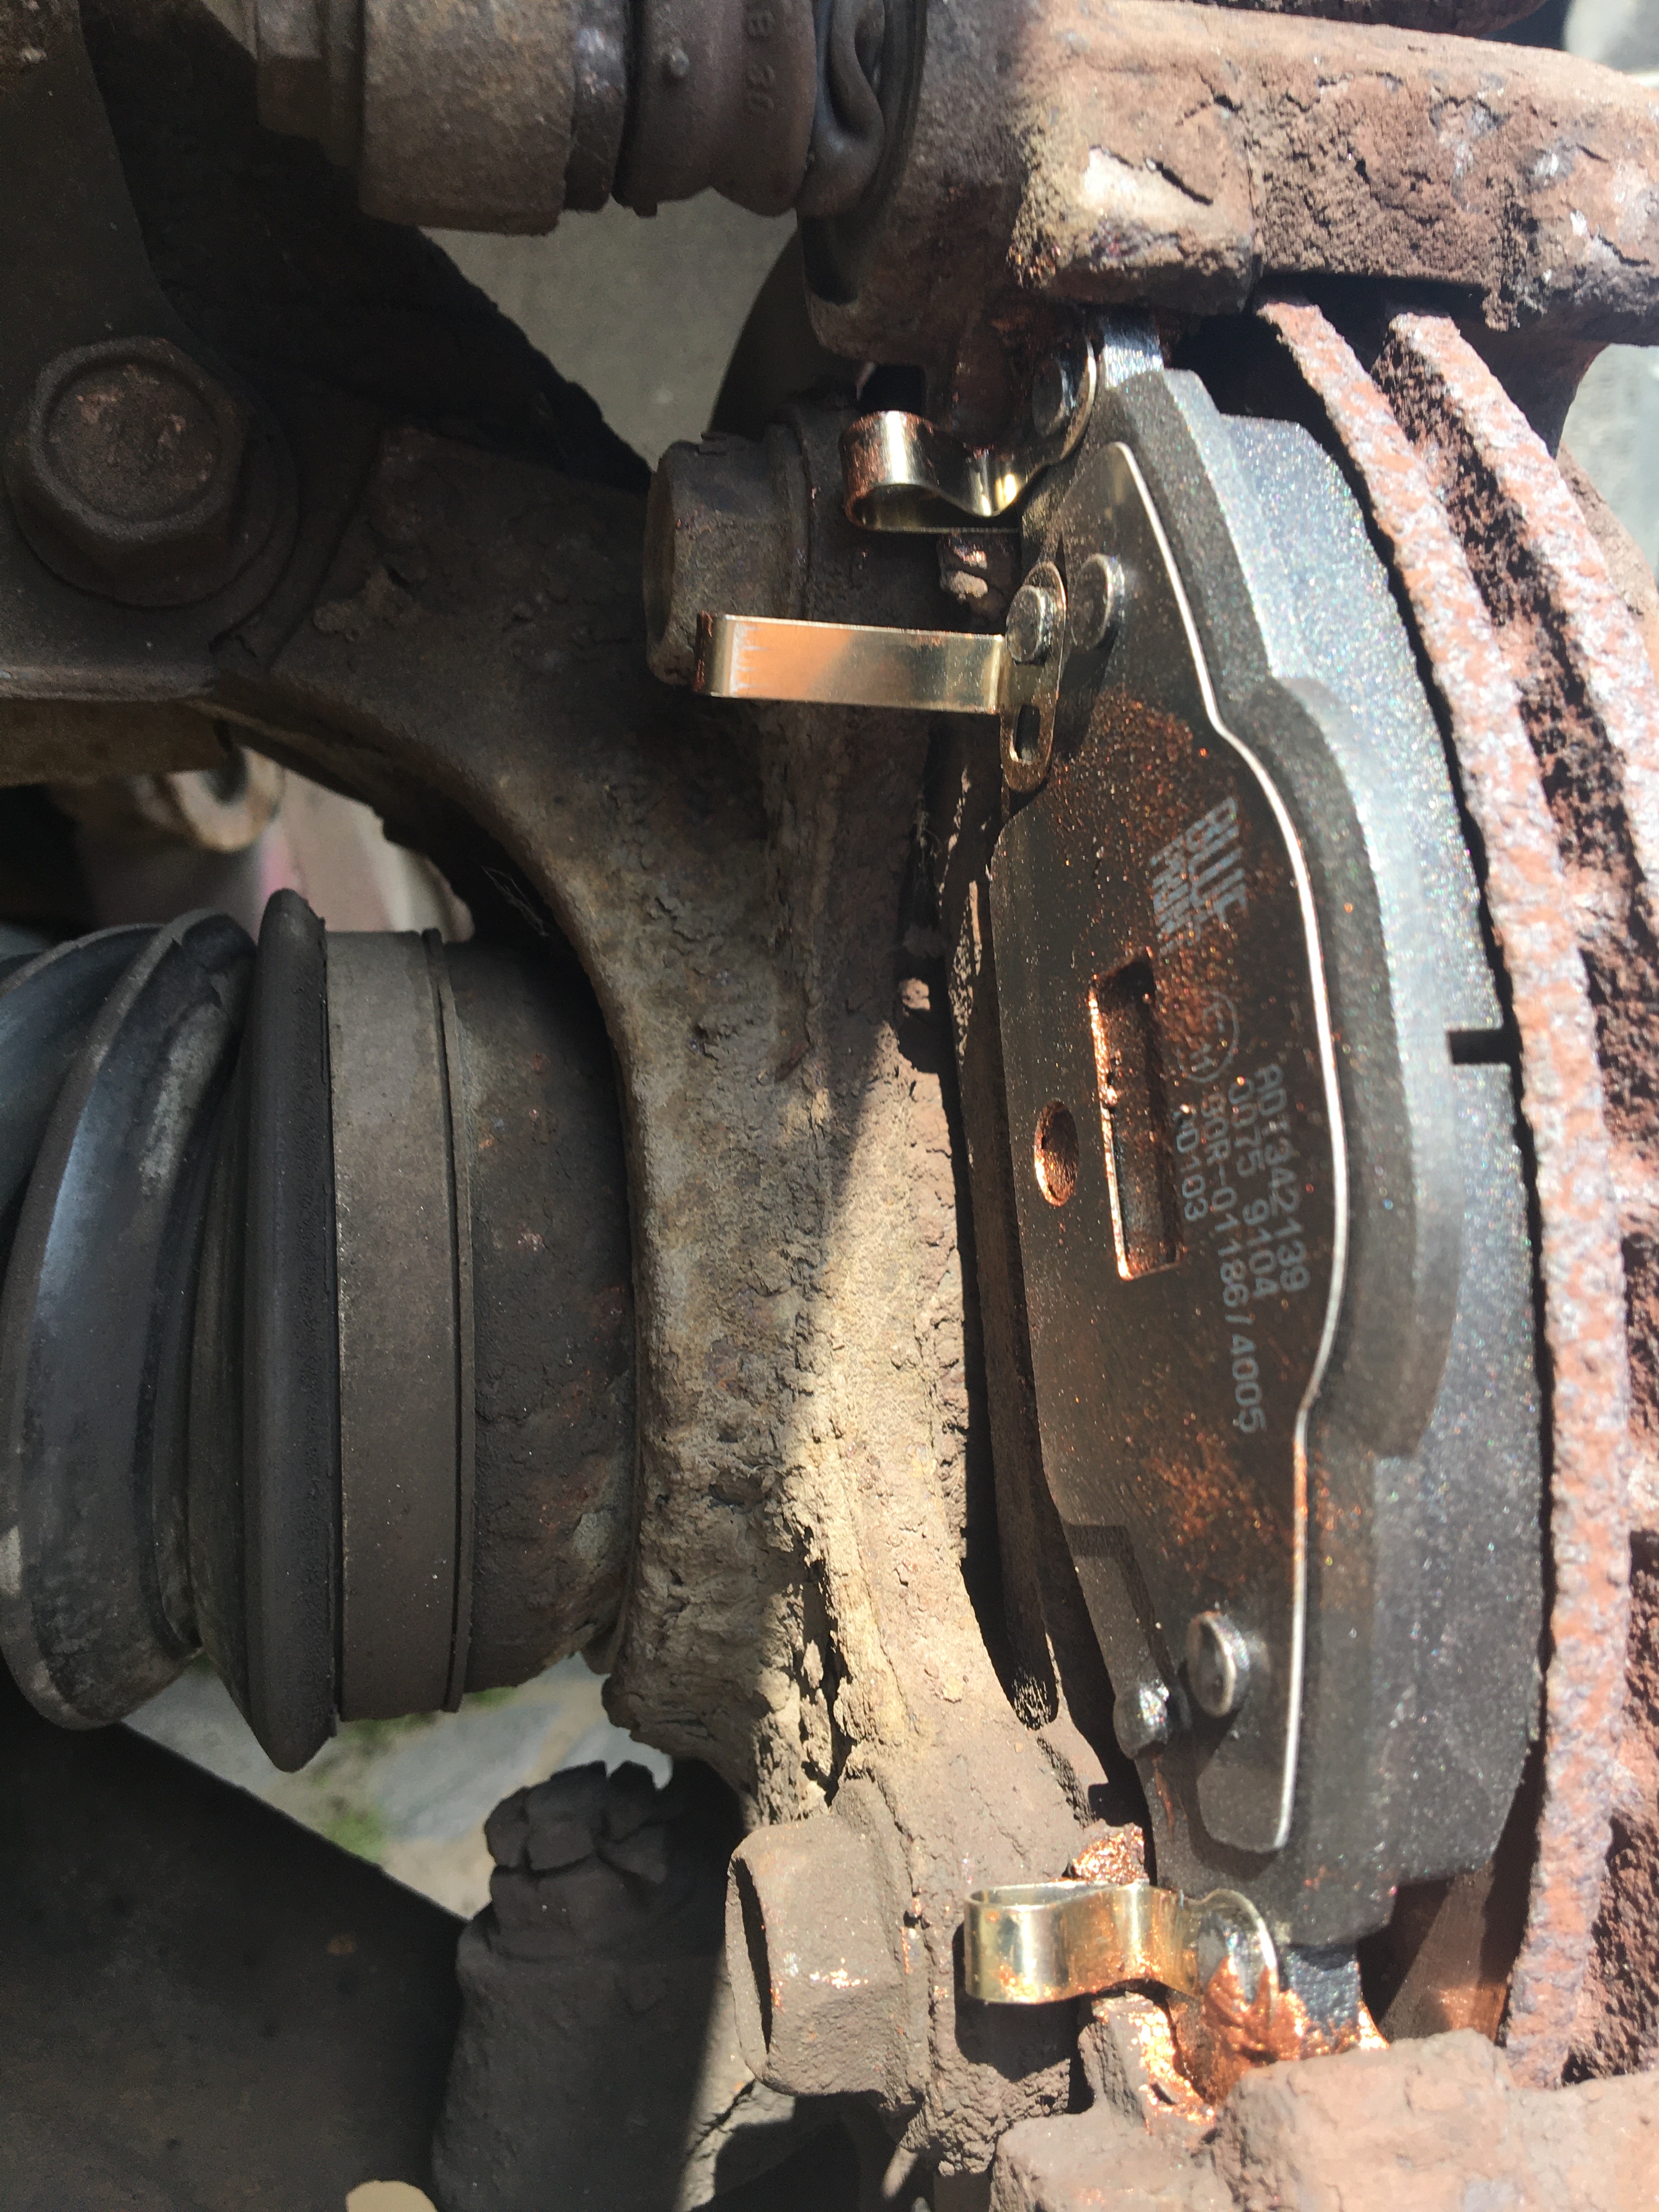
Car jacked, wheel off and steering turned full lock for easier access to calliper …Calliper swung clear and trusty g-clamp used to push piston back … New pad installed on driveshaft side …Both new pads installed in cleaned and ‘copper slipped’ guides
My Daughter’s 2003 Toyota Yaris with over 125,000 miles on the clock developed an idle problem. It would hunt and stall at tickover, in traffic, at traffic lights etc. Perfectly fine starting and driving, but at idle something wasn’t right.
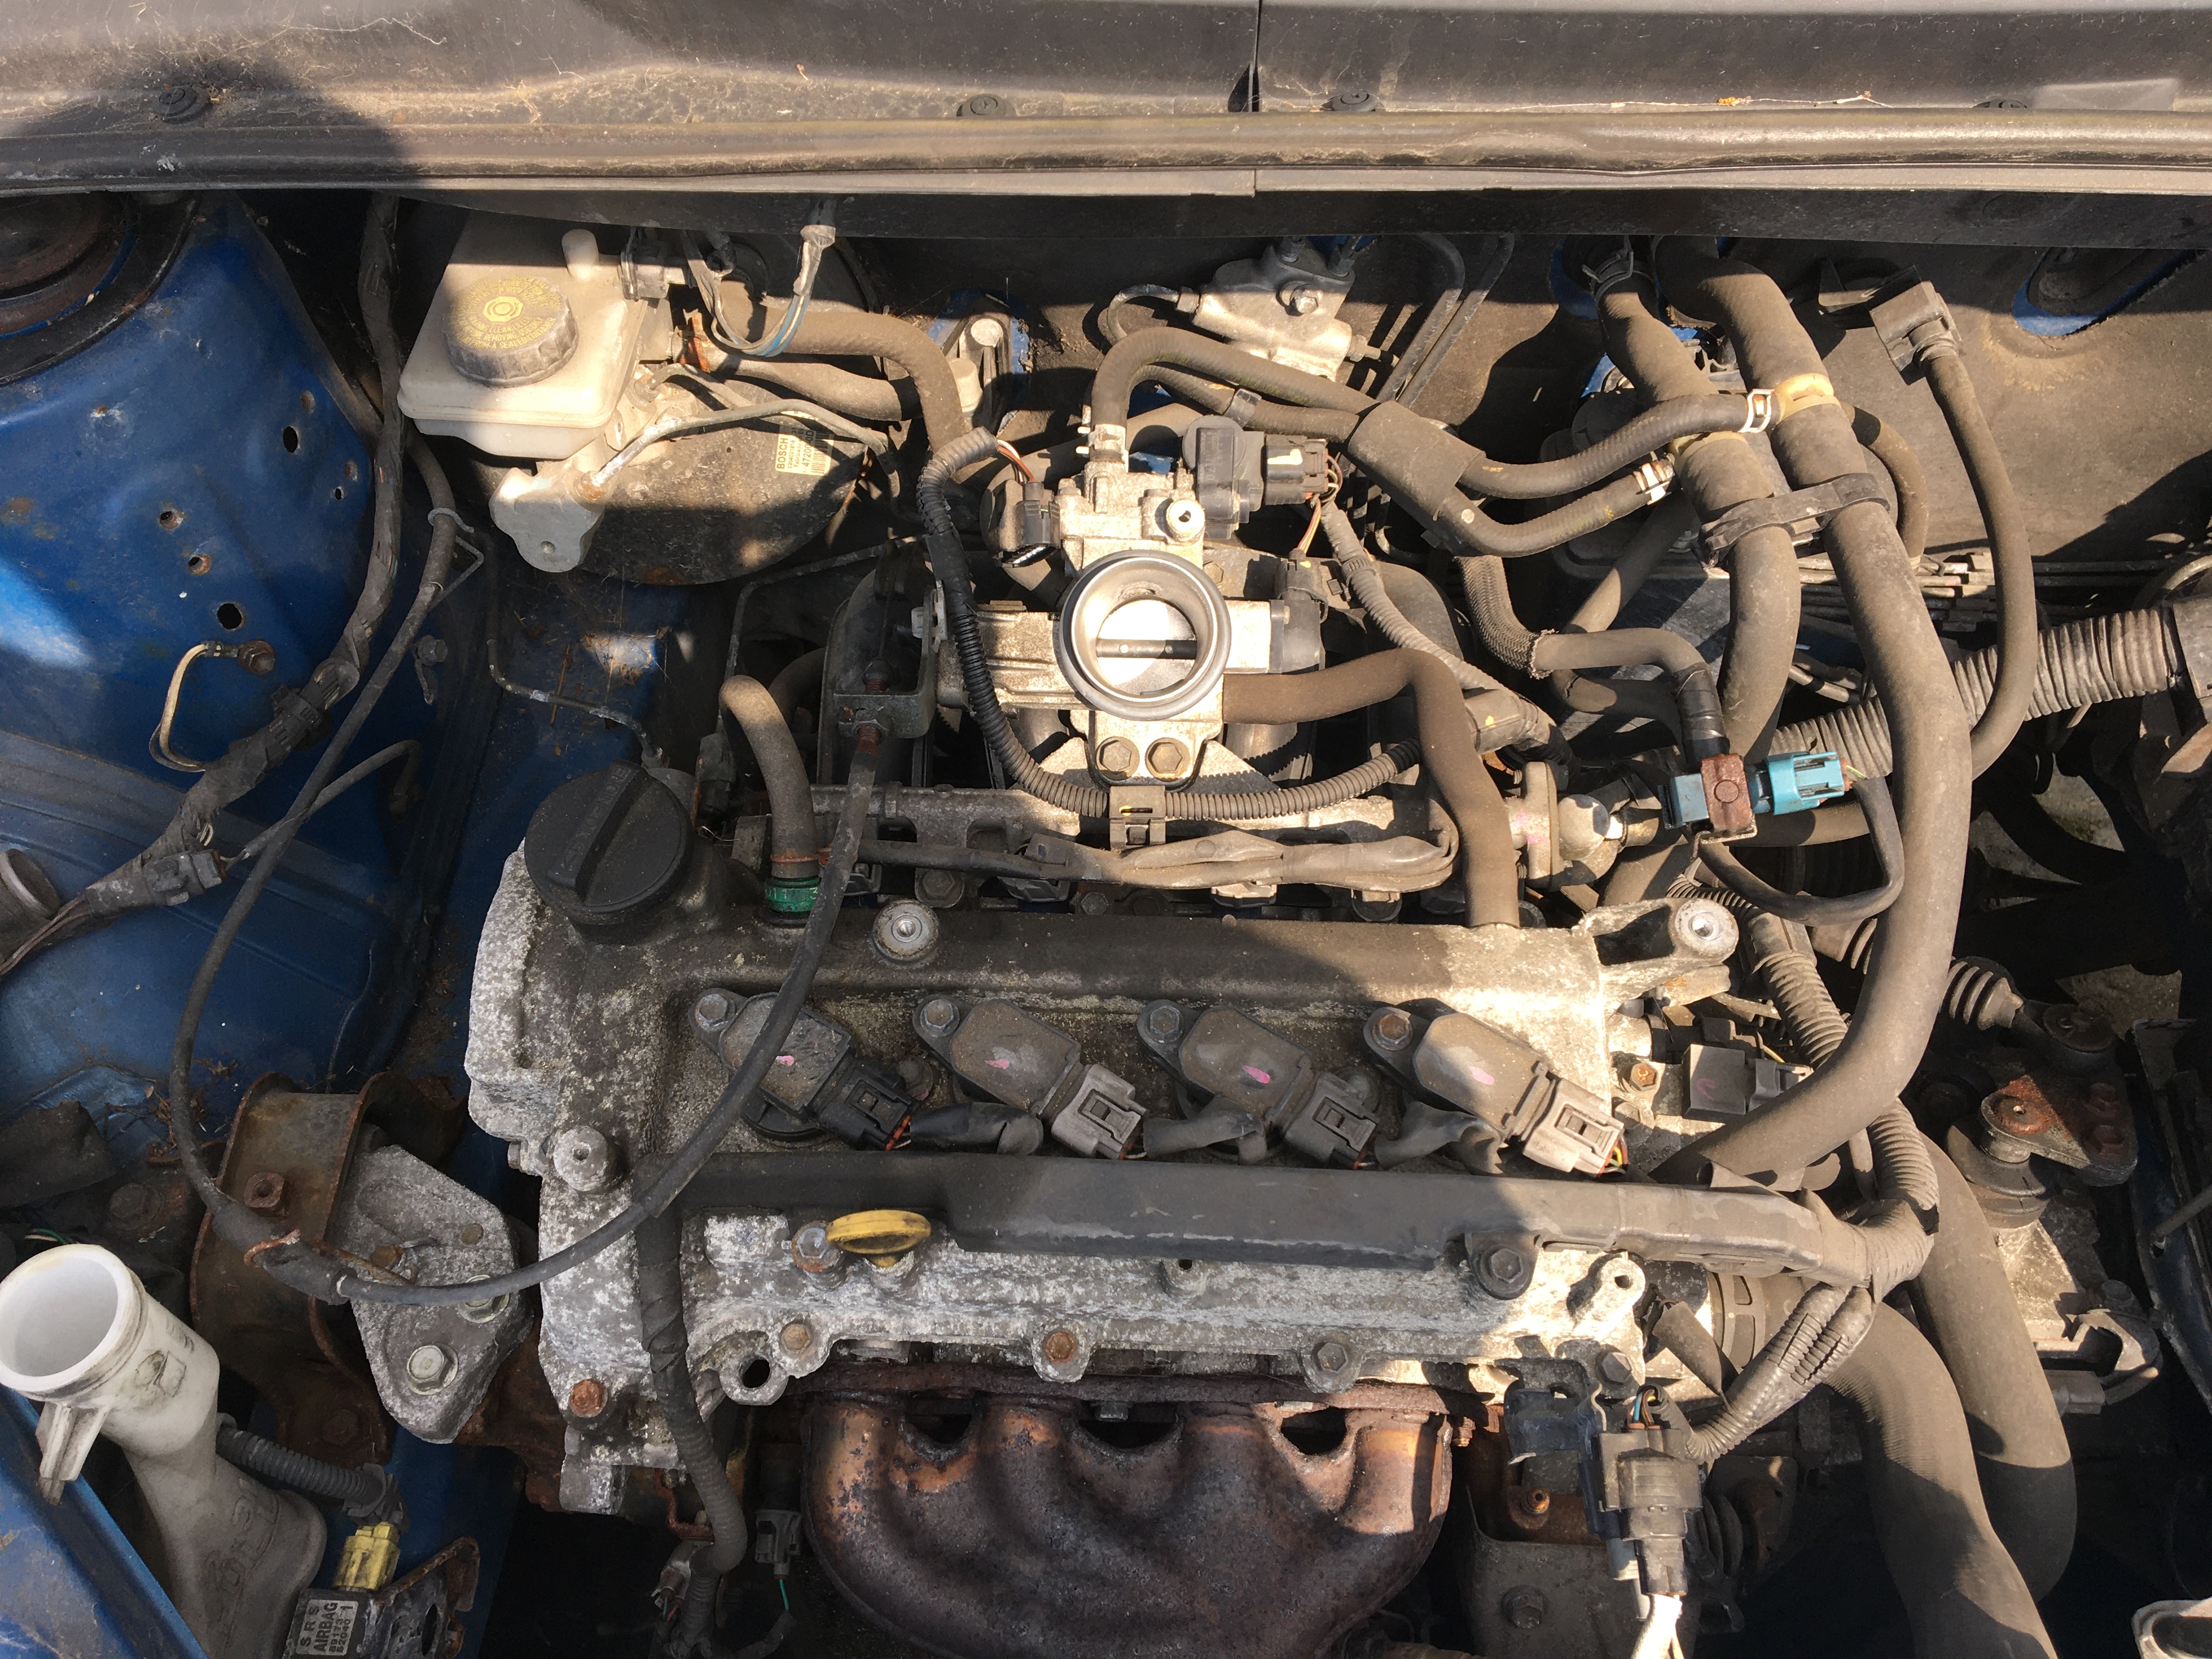
So I ‘Googled’ and searched YouTube and it seemed (as it often does) that this is a common problem that many makes and models of petrol engine cars of a certain age suffer from. And the culprit is the ‘Idle Control Valve’ located in the ‘Throttle Body’ … so I went in search and found the little devil;
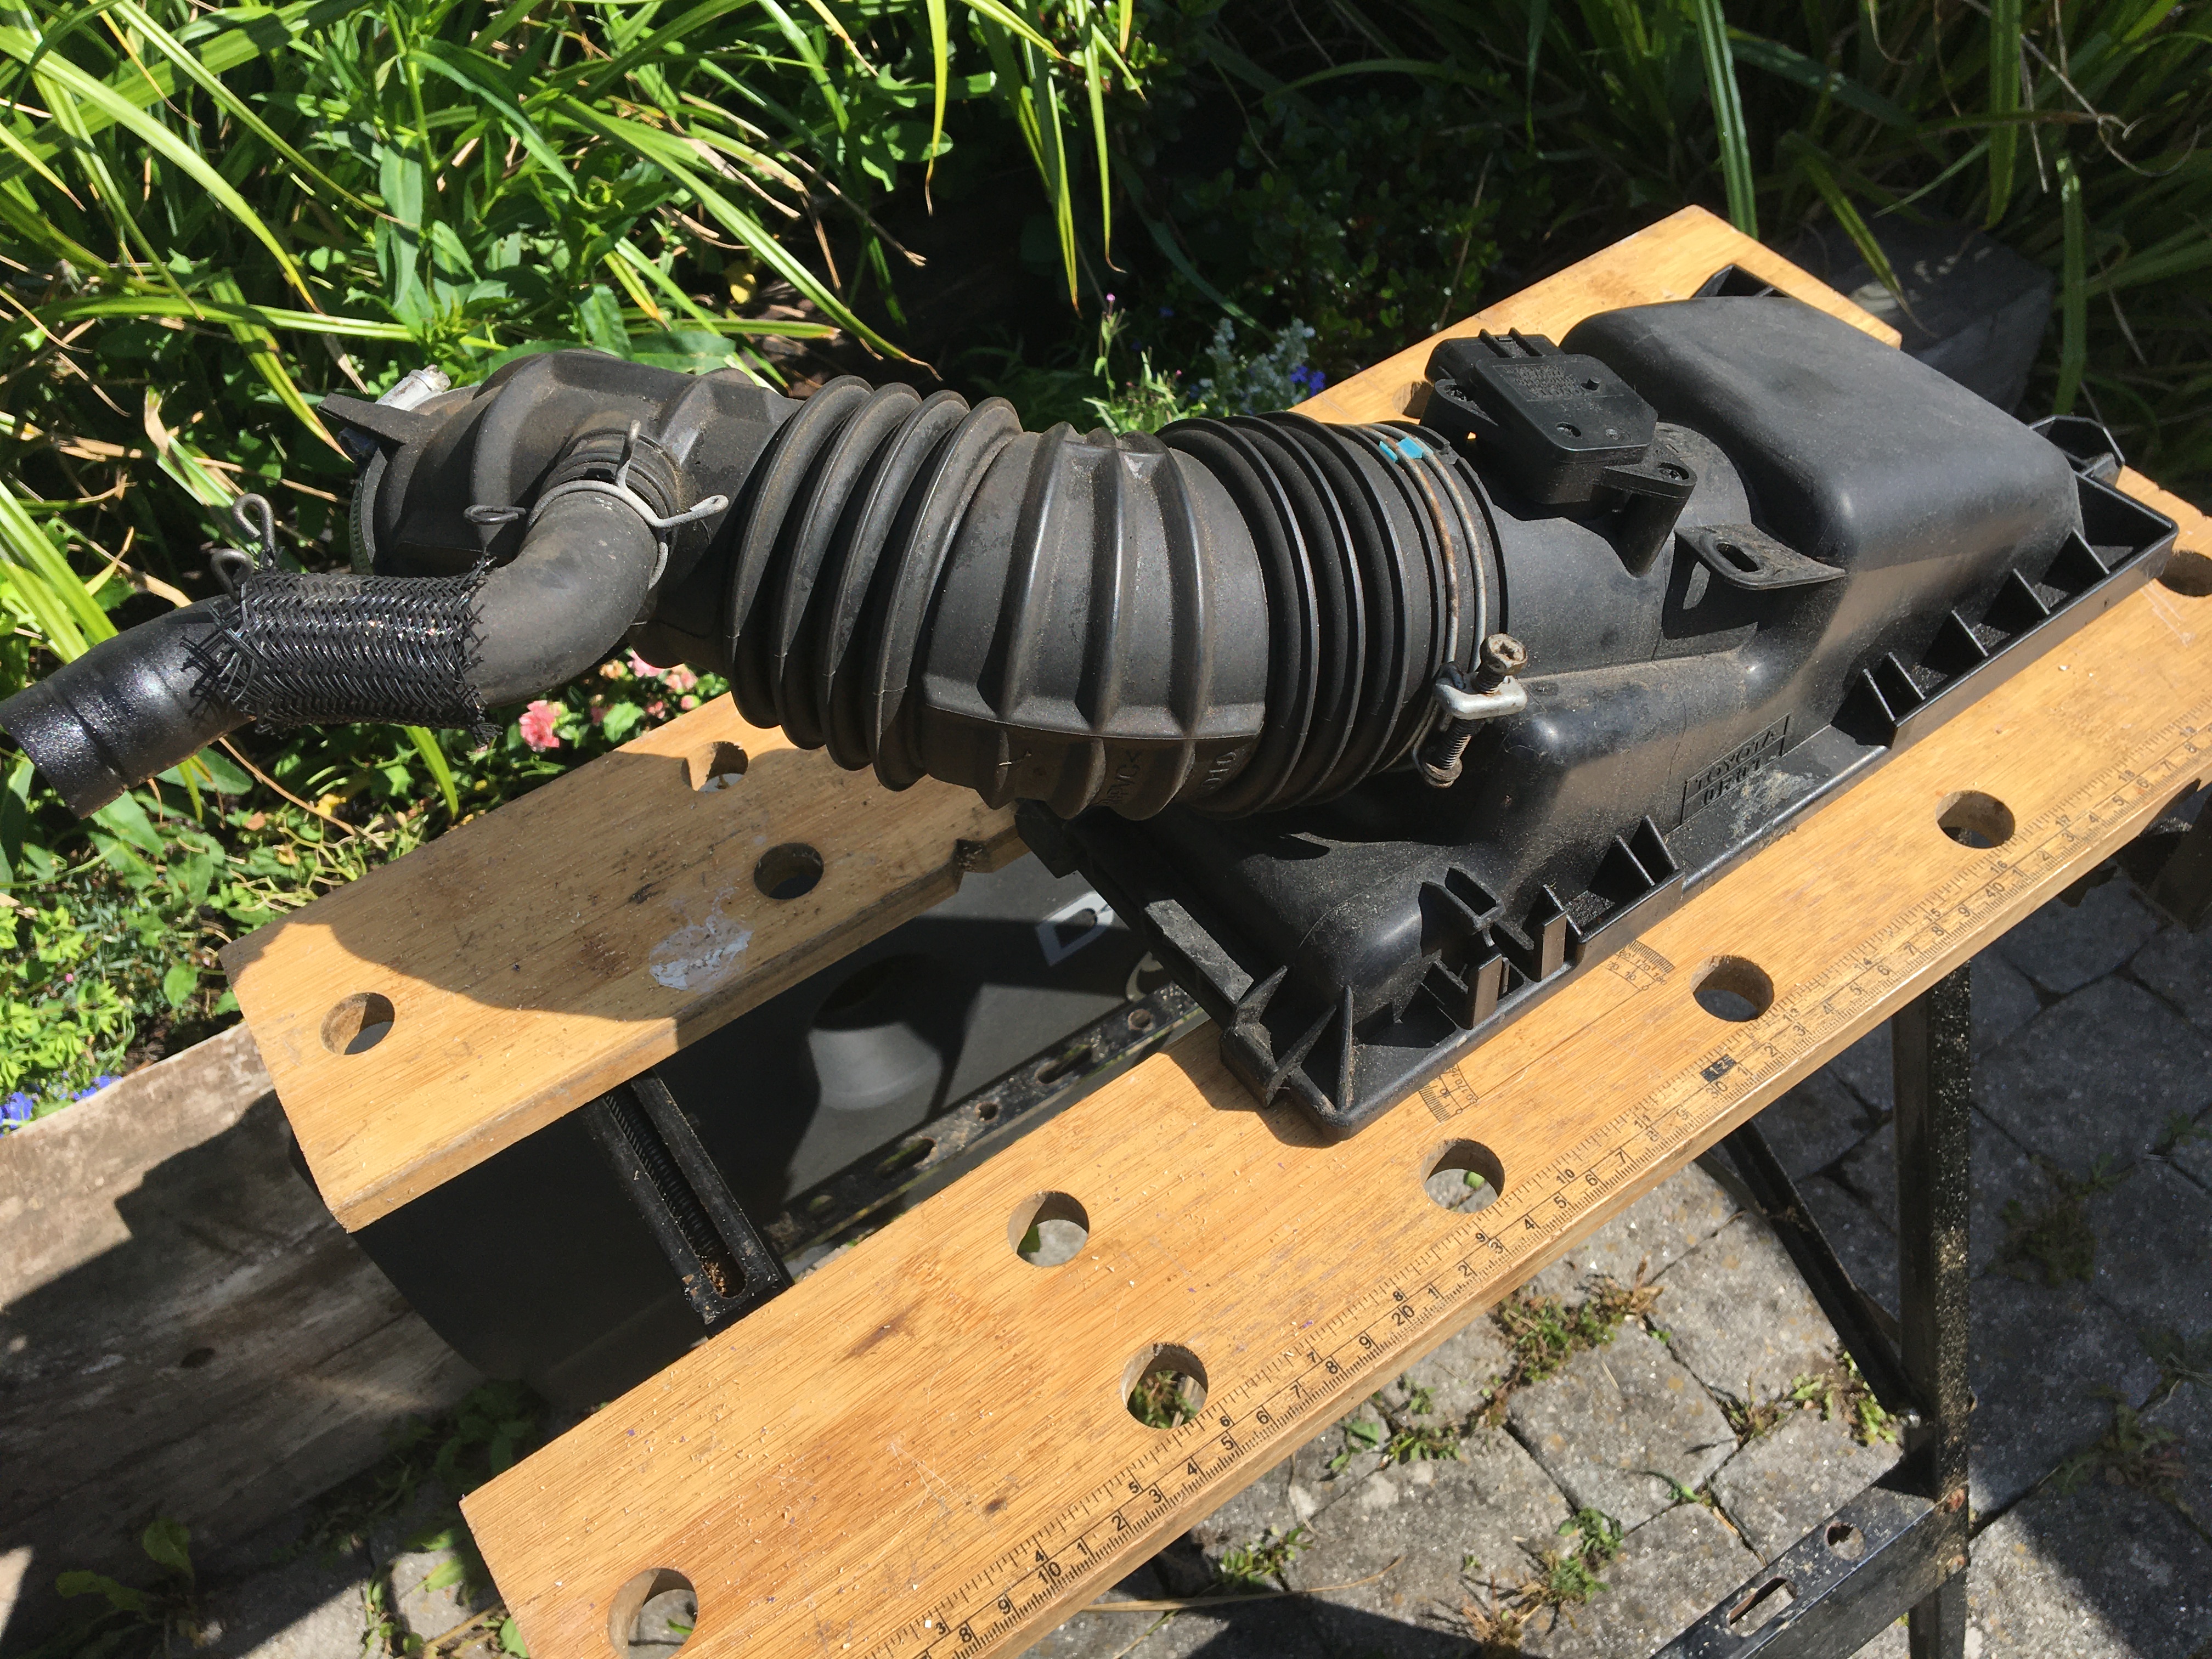
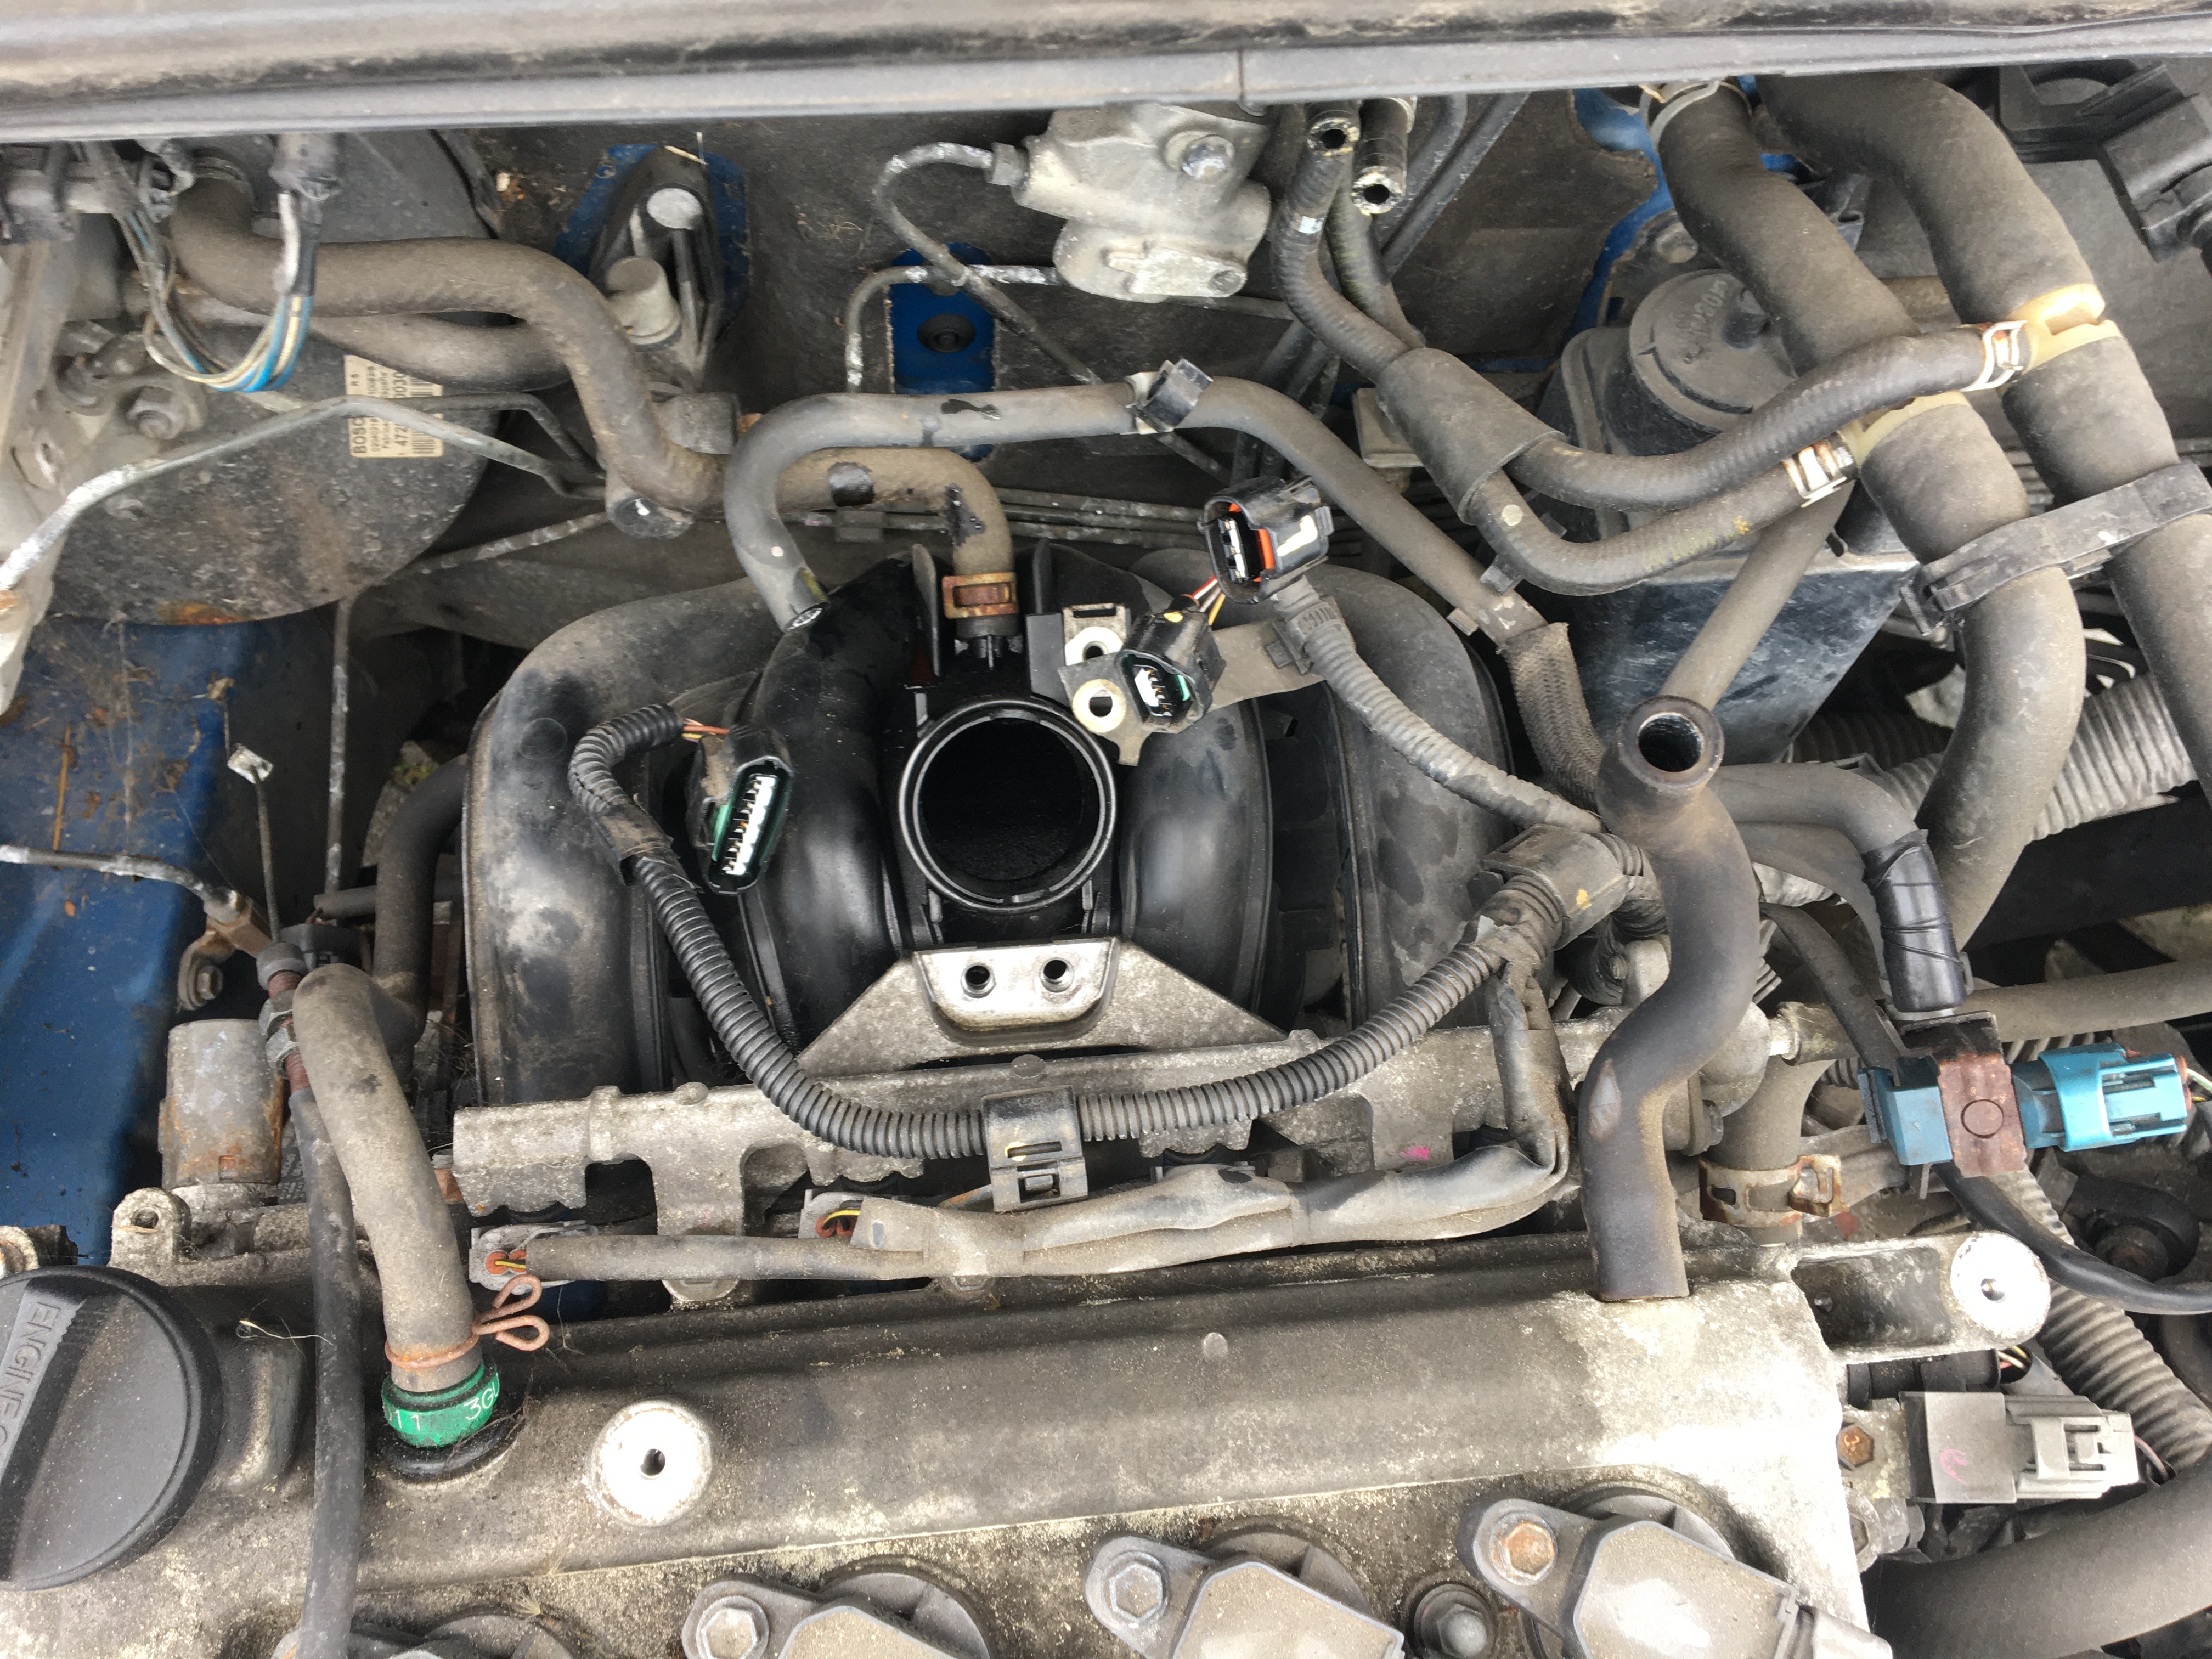
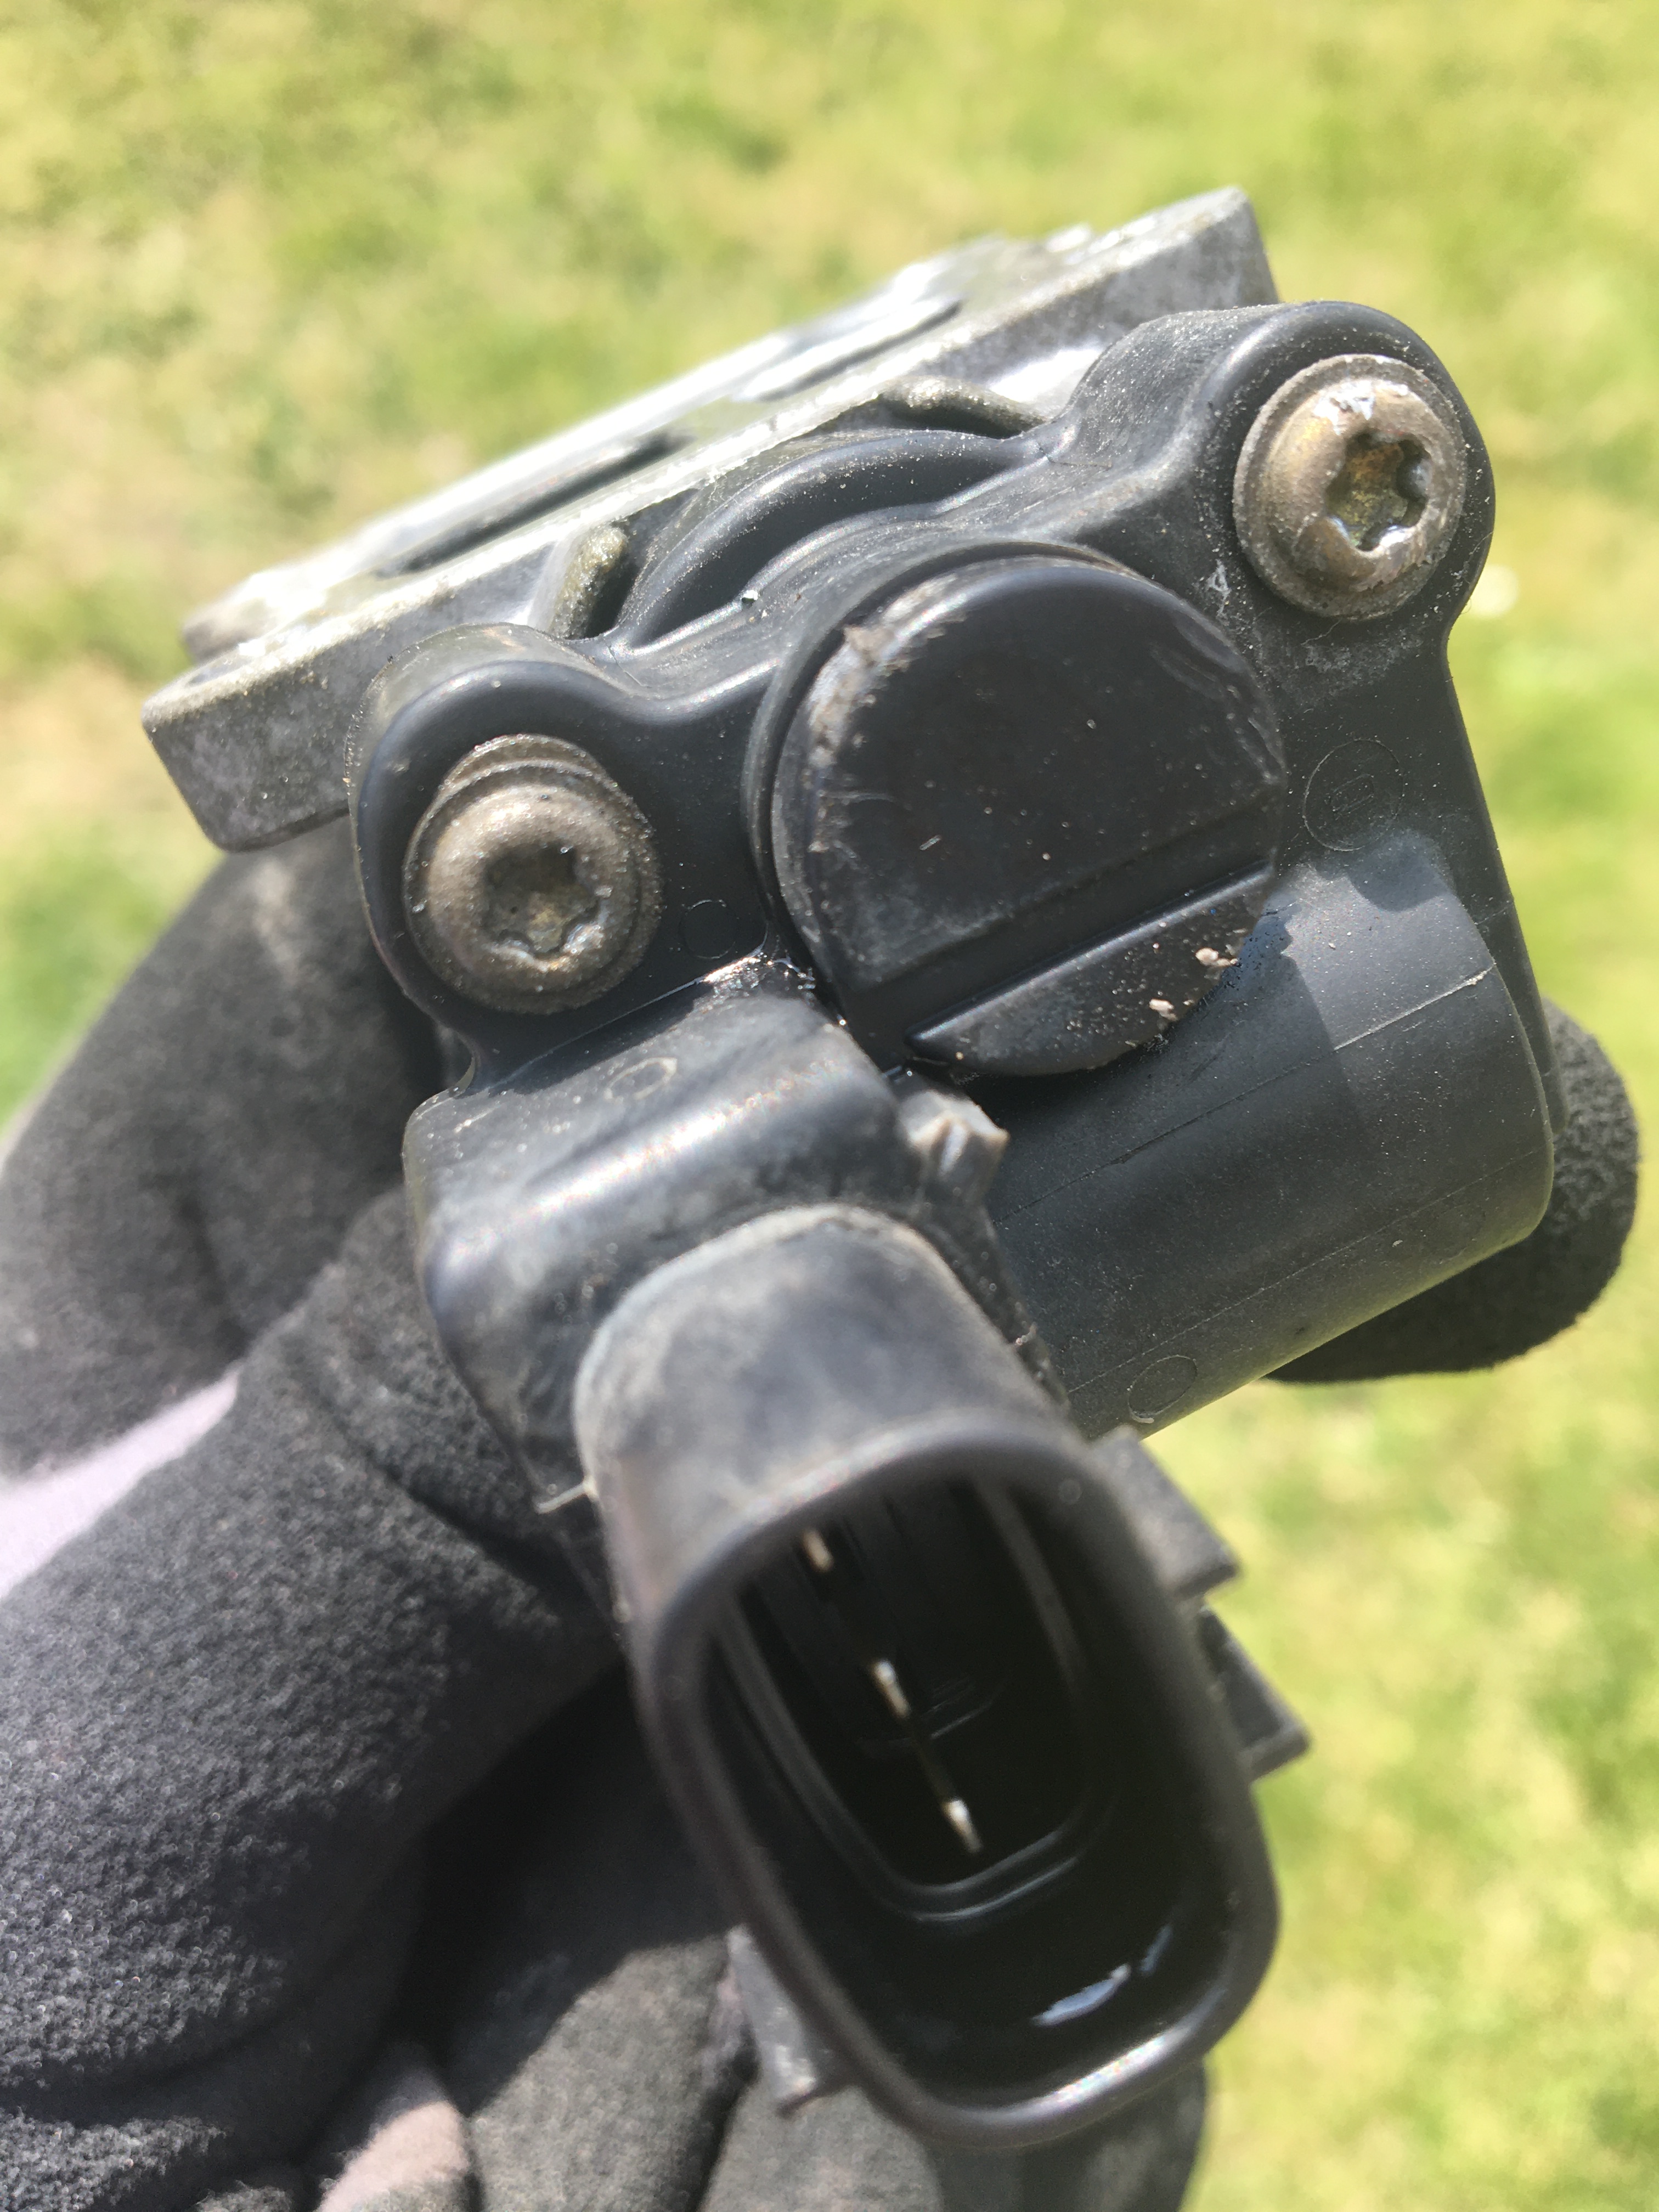
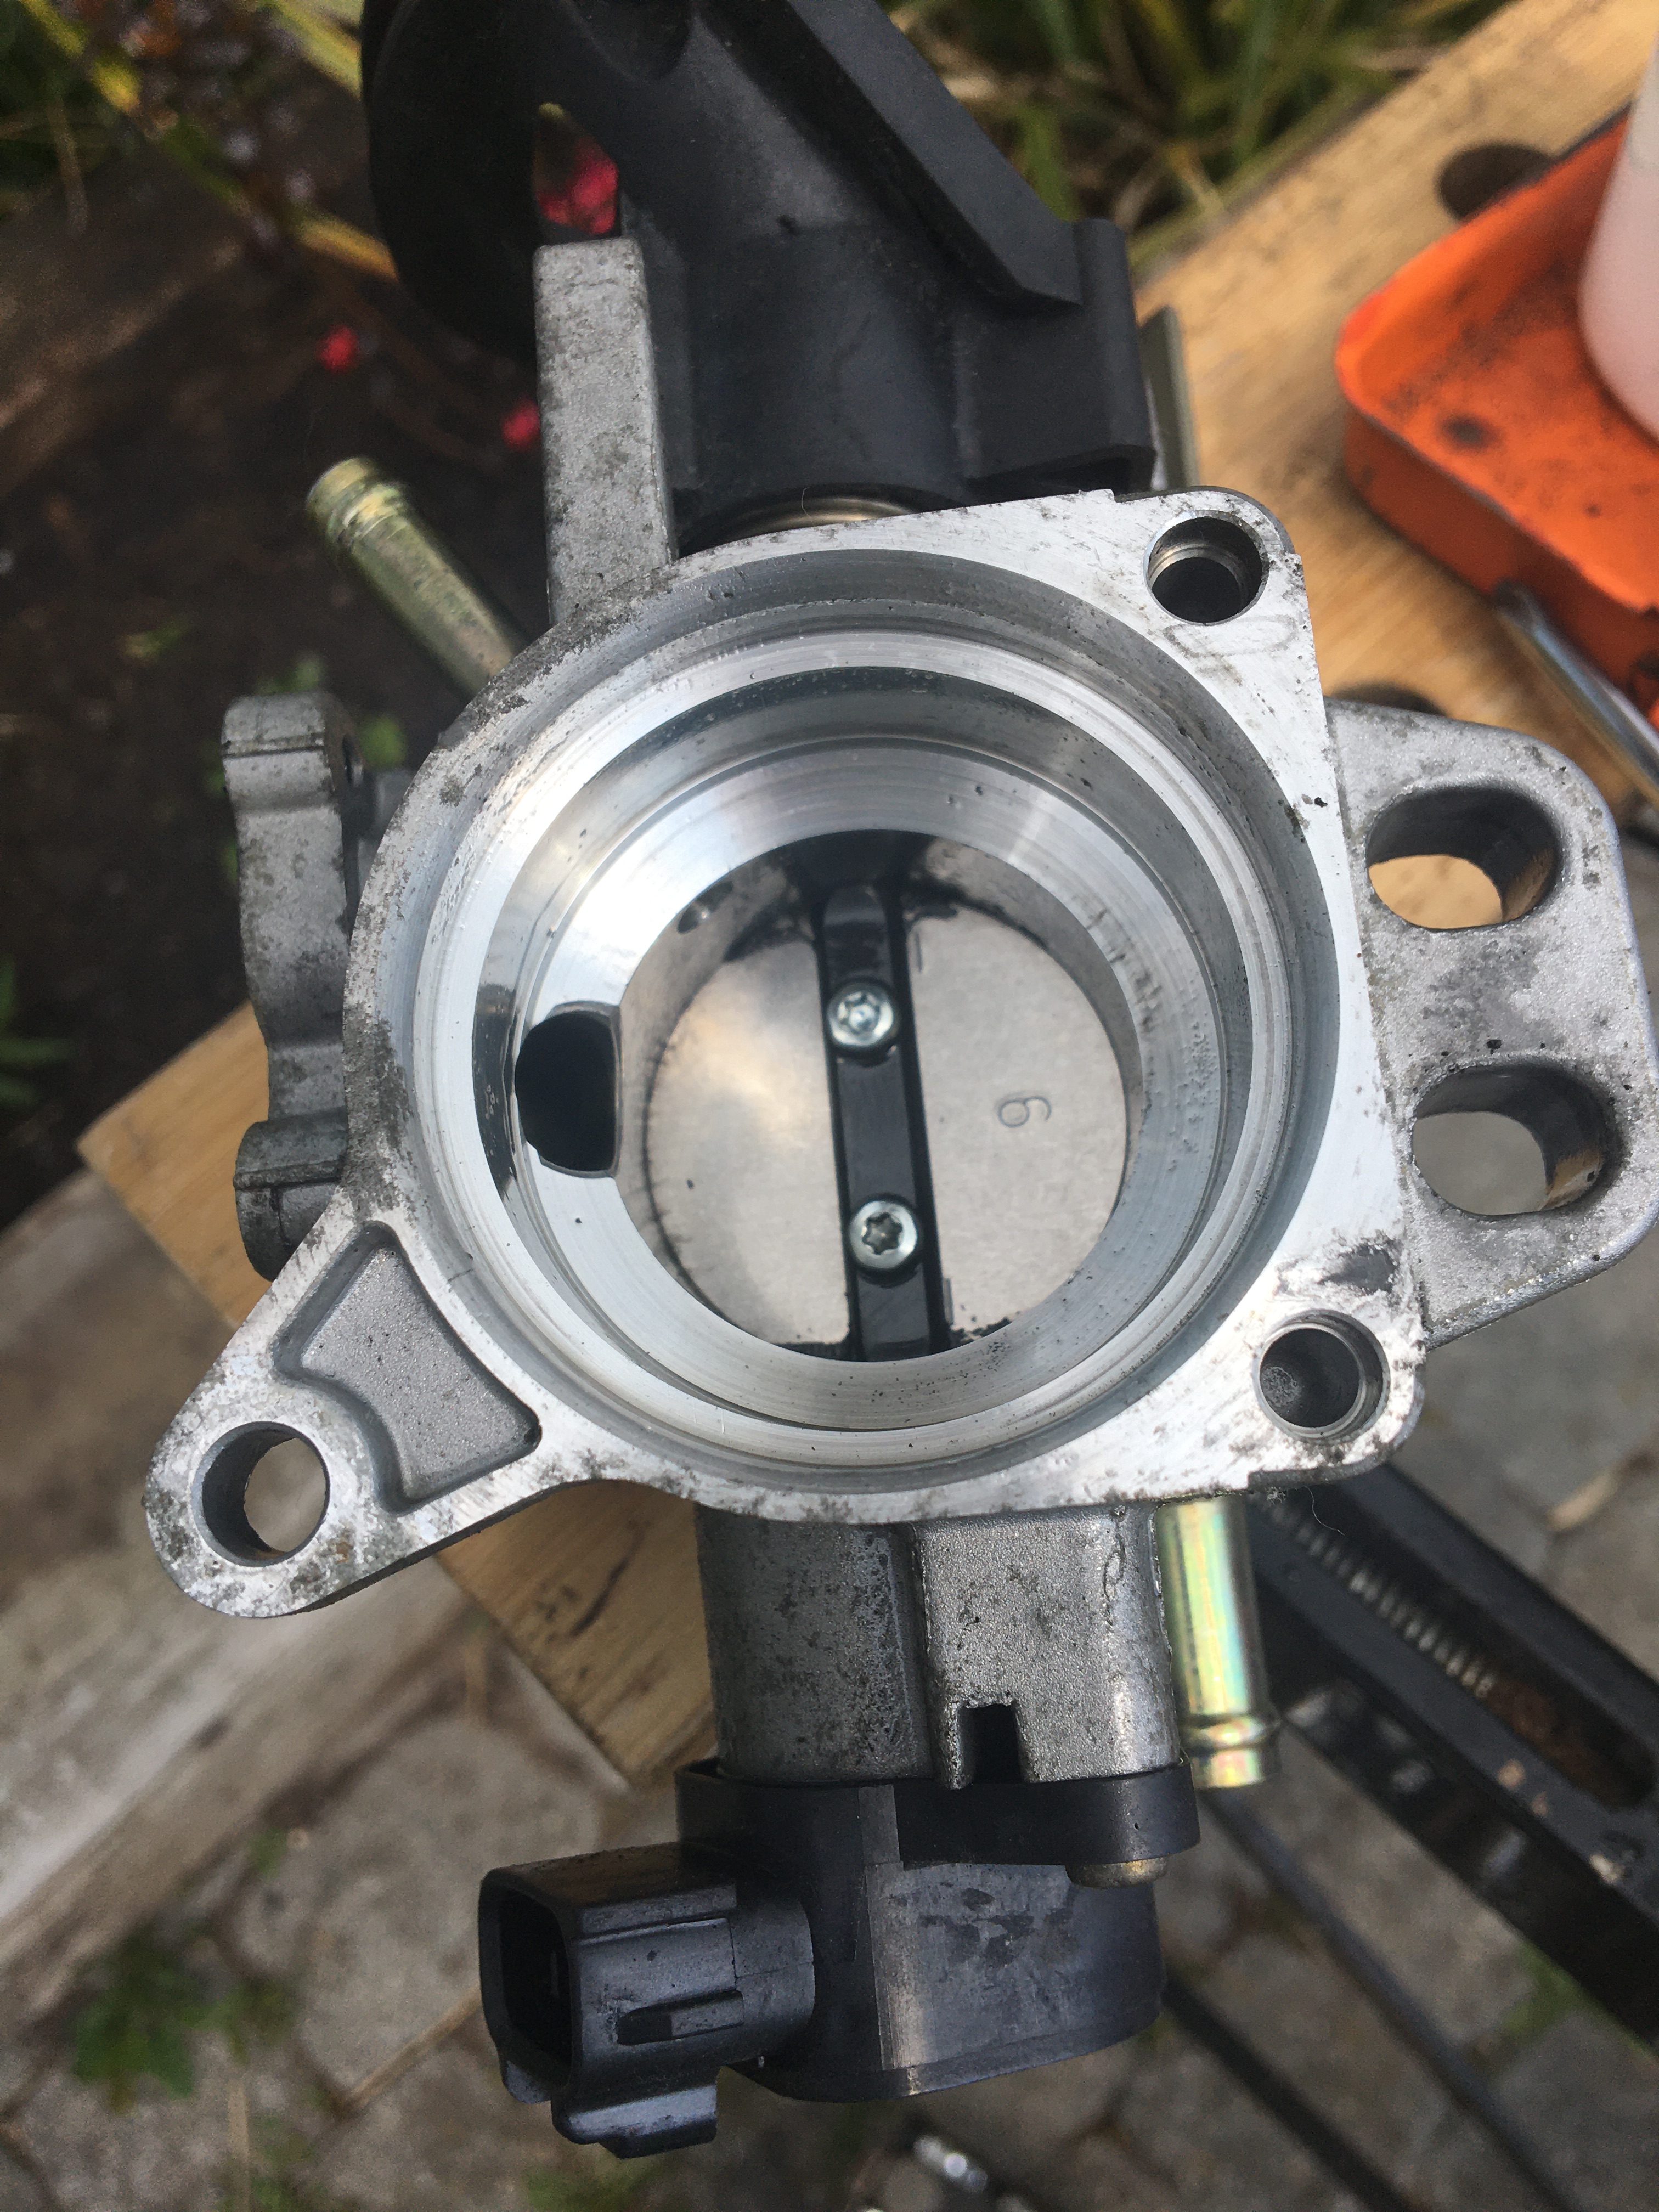
Above is the engine with the Airbox removed, the airbox connects to the Throttle Body which is that circular opening you can see near the top centre of the picture …Close up of the Throttle Body with the butterfly valve (operated by the throttle cable) closed …There are several electrical plugs to unplug, also 2 rubber pipes that run coolant to the throttle body which may leak a little coolant so be prepared …Here’s the Throttle Body removed …The Idle Control Valve is held on with 4 screws …… Here it is removed and I’d have liked to have removed the Idle valve itself but it is held on with these tamper proof ‘5 point star’ type screws which I do not have a tool for … oh well …… The valve itself is a cylindrical shape with a cut out and is turned by a servo motor controlled by the ECU. As I suspected, it was filthy and clogged with oil and gunge! A good spray with Carb Cleaner, an old toothbrush and some patience and persistence had it a lot cleaner!More Carb Cleaner, cloth and toothbrush action had the Throttle Body itself nice and clean, ready for re-fitting.
Re-assembly was just the reverse of the disassembly seen above. With all pipework and electrical plugs replaced, coolant level checked, it was time to start the engine — Yay! Success! The idle is good, no more hunting or stalling 🙂
Cost of parts £6.05 (for can of Carb Cleaner) £0.00 for Labour, £Priceless sense of achievement, reward and Mindful Wellbeing