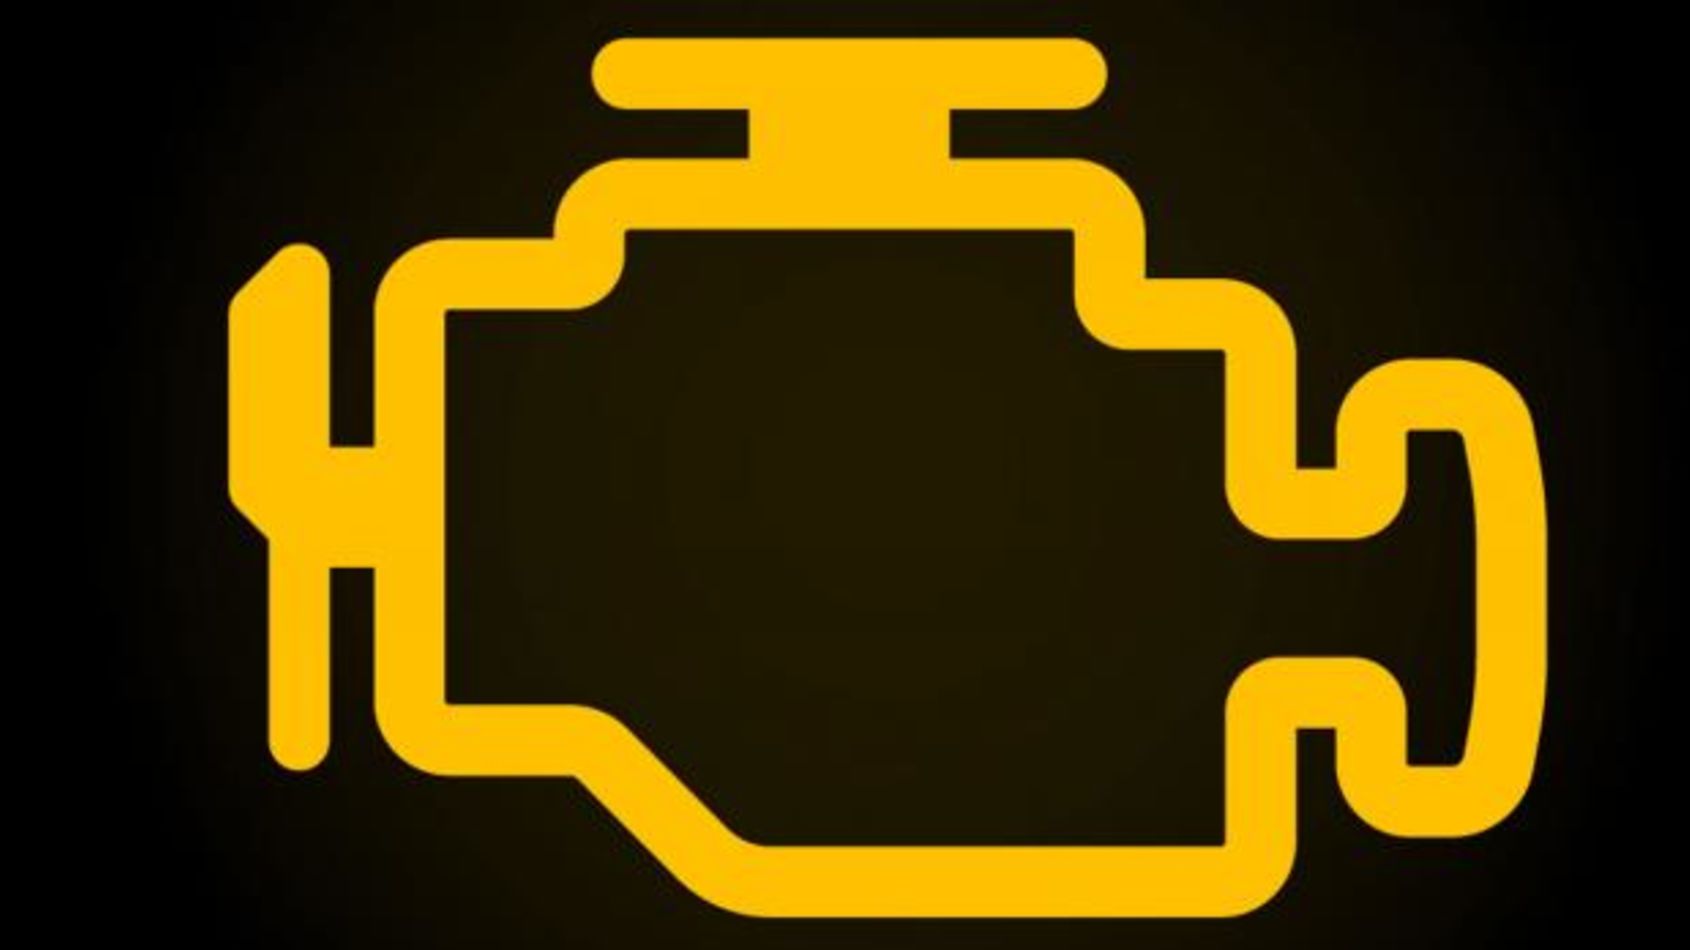
The dreaded ‘Engine Fault‘ light that tells you nothing apart from “Brace yourself for an automotive industry scam that could relieve you of a a huge wad of £CASH£, because the nondescript ‘Engine Fault’ light commands you to seek ‘Professional‘ advice ASAP!
Your friendly local garage will then charge you anything from £25 – £45 to ‘Plug in the special Computer‘ and diagnose the fault. You then find yourself at the mercy of ‘Mr mechanic’s interpretation of whatever highly technical data only he and his specialist diagnosis tools have been privy to!
Our family car is a 2007 Toyota Corolla Verso, Diesel 2.2 litre ‘D4D’, with over 100,000 miles on the clock. We’ve owned it since 2015, 48,000 miles and at around £5,500.00 purchased from a local dealer, the most expensive and youngest car we’ve ever bought!
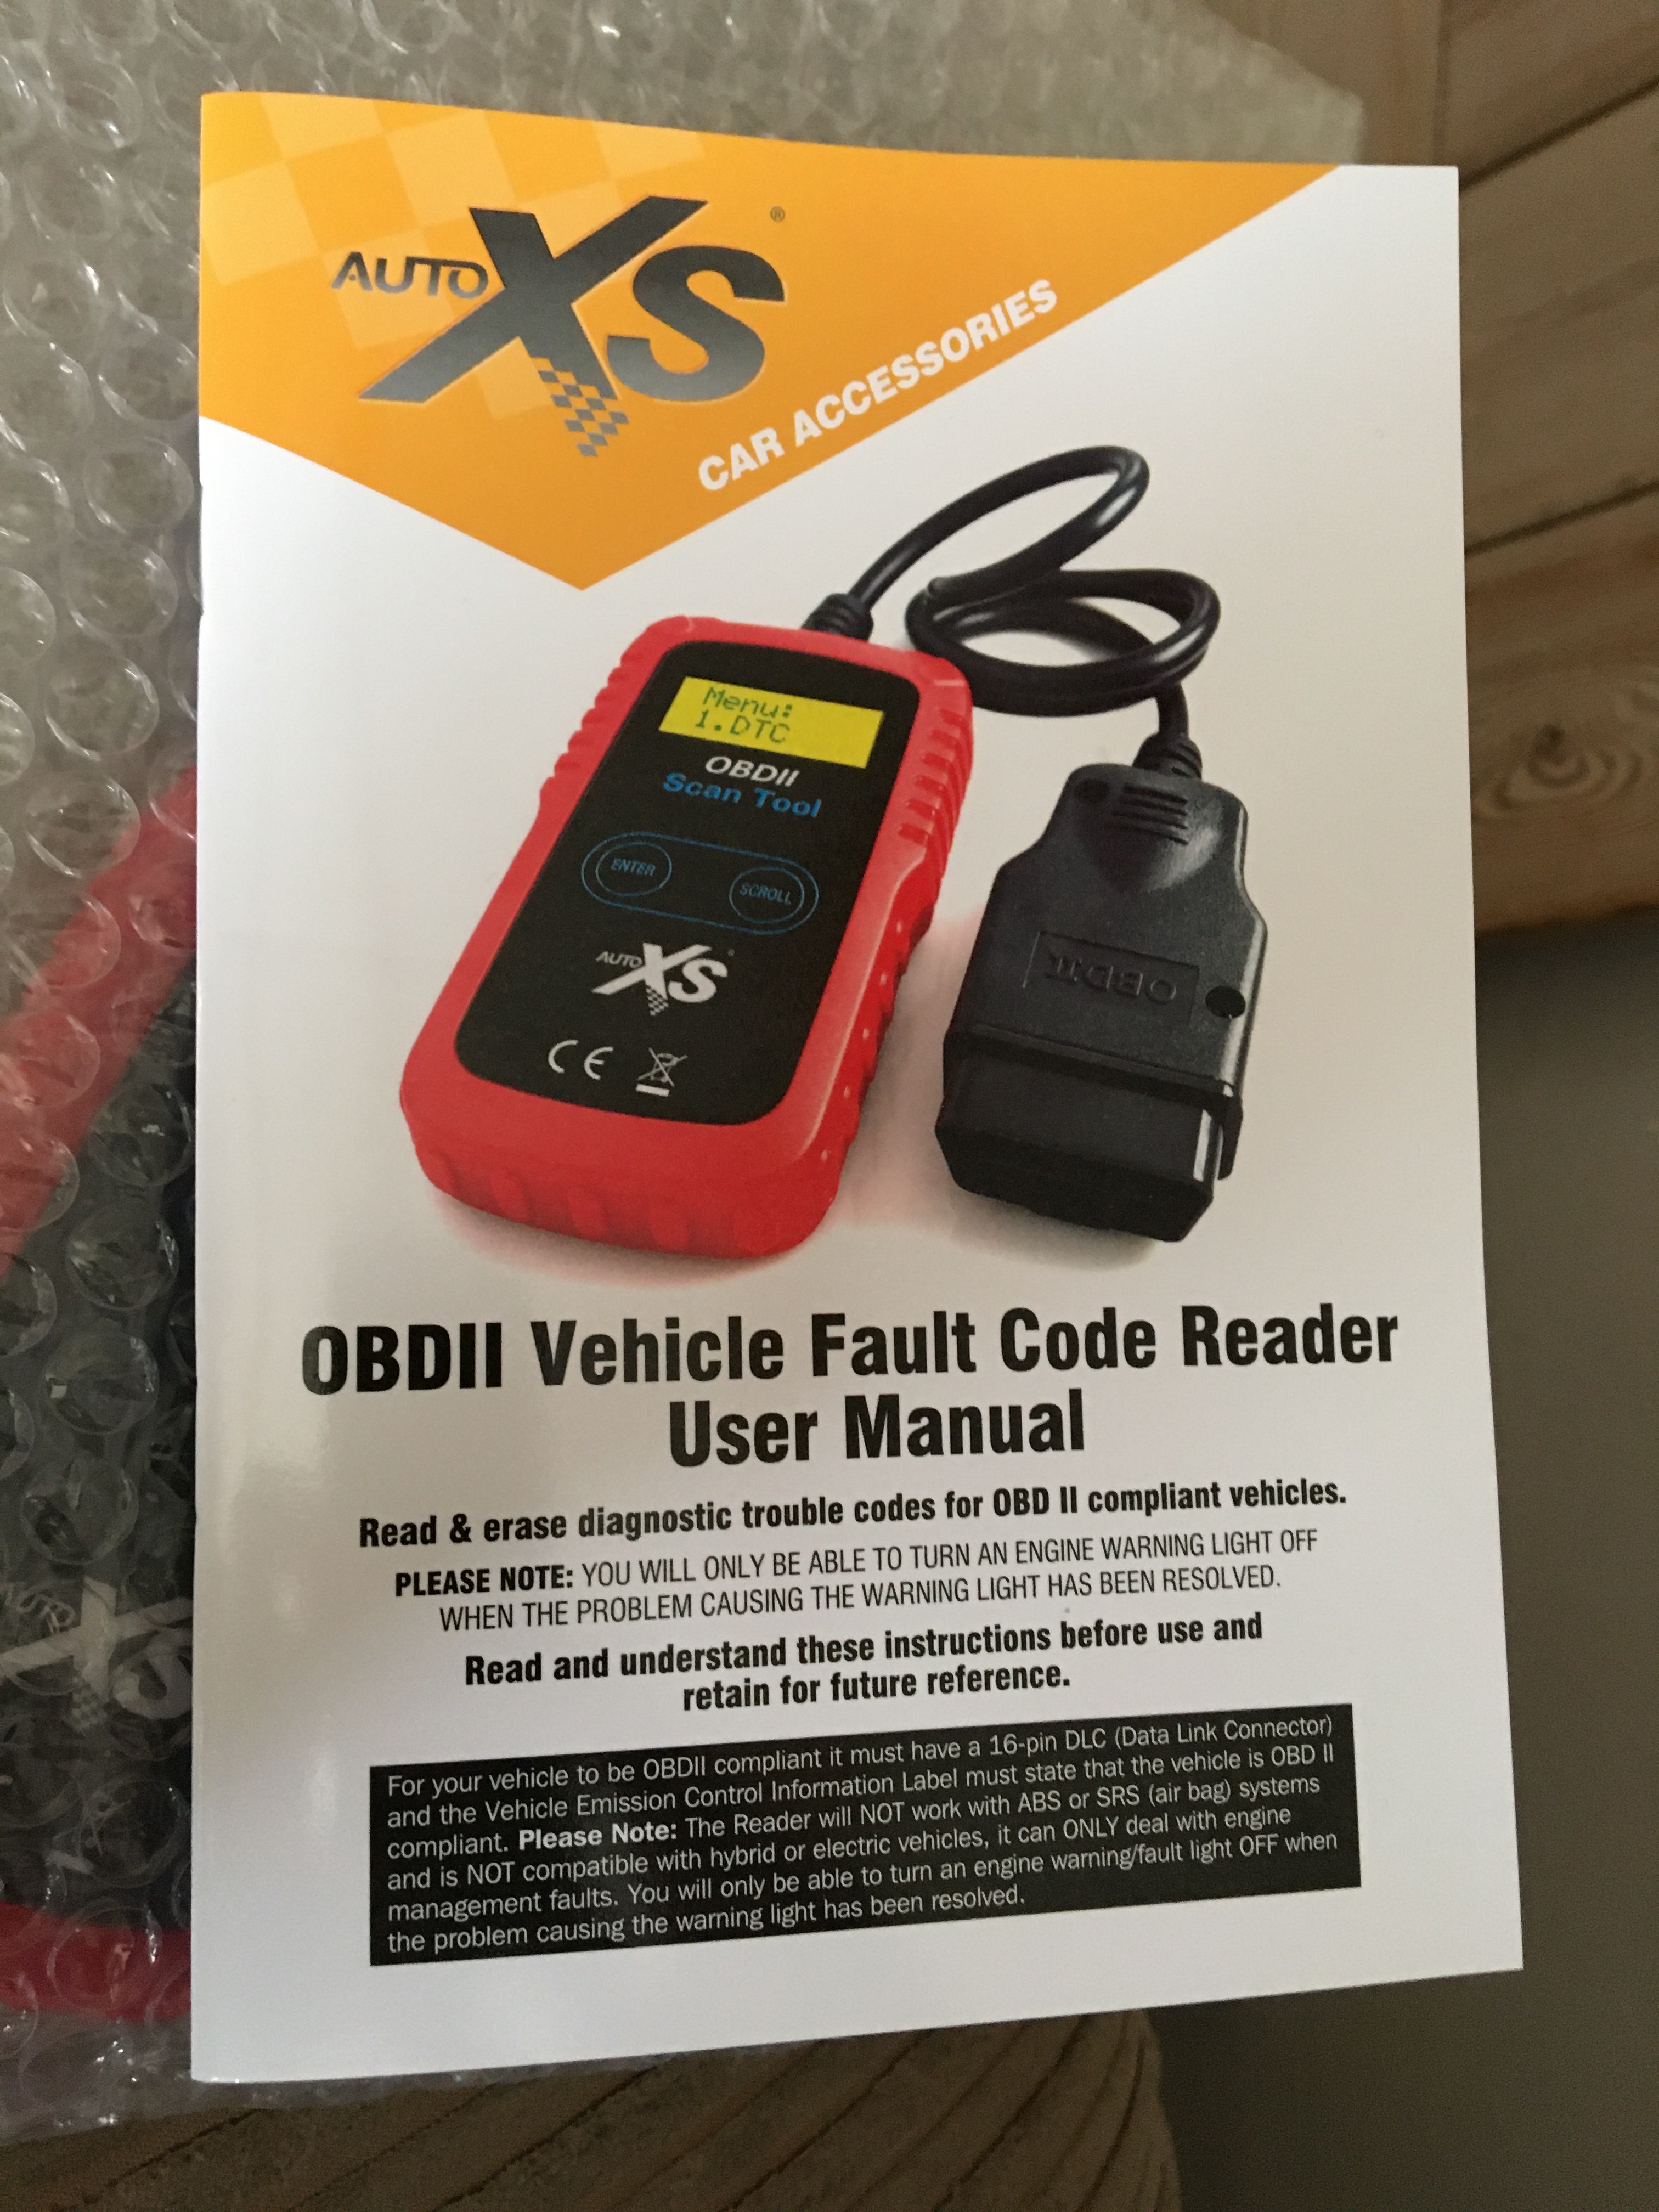
I wrote in a previous post about the mindful, ‘Zen’ like qualities of DIY Car Maintenance – and certainly, this past year alone I have saved many £000’s by carrying out my own servicing, brake replacement and other fault finding and repairs. About 6 months or so ago, I saw and purchased the OBDII gadget below from ALDI’s on-line portal, I thought at the time, this is probably a waste of £15.99 but hey, it might just come in handy?
….So, the gadget above sat in my tool shed for a few months waiting for one of my families 3 old cars to present the dreaded ‘Engine Fault’ instrument cluster warning light! Then a few days ago in the Toyota Corolla mentioned above, while nearing the end of a 120 mile round trip – ON comes said warning light along with belches of black exhaust smoke and reduced engine performance … Oh SHIT!


The cheap & cheerful gadget came with a booklet of error codes and their meanings. As you can see from below ‘P0400’ is an EGR Flow Malfunction.

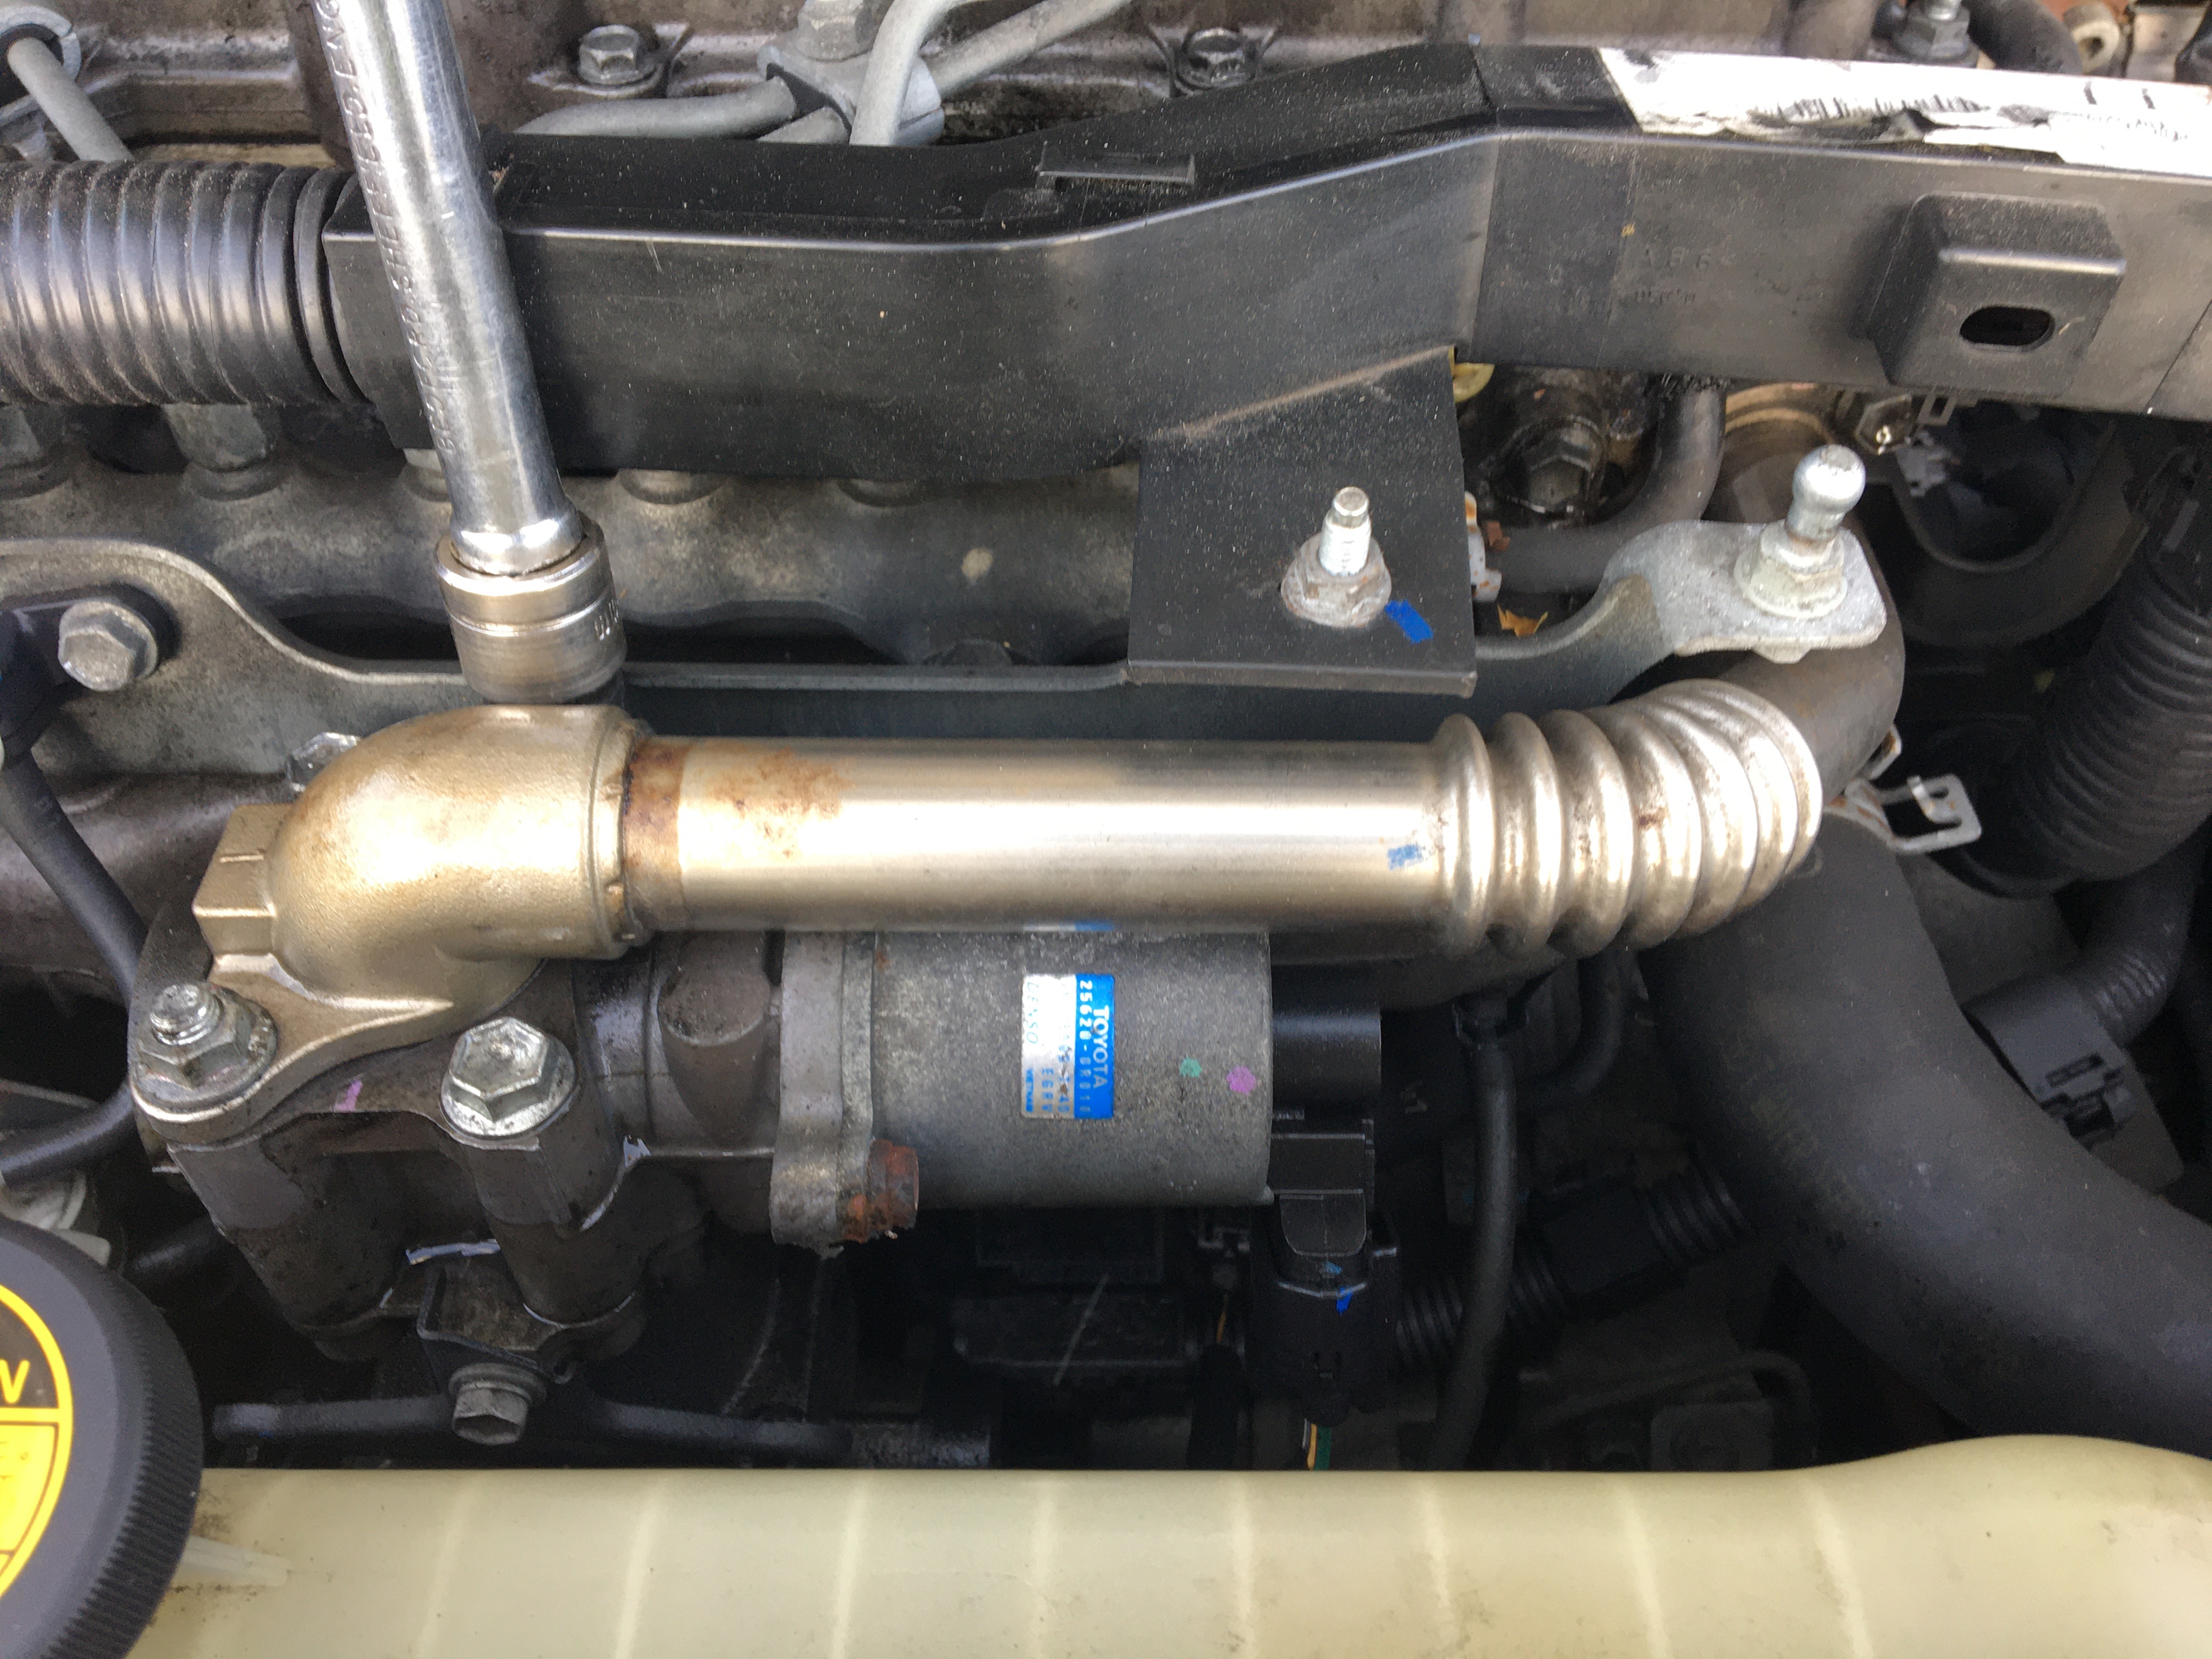
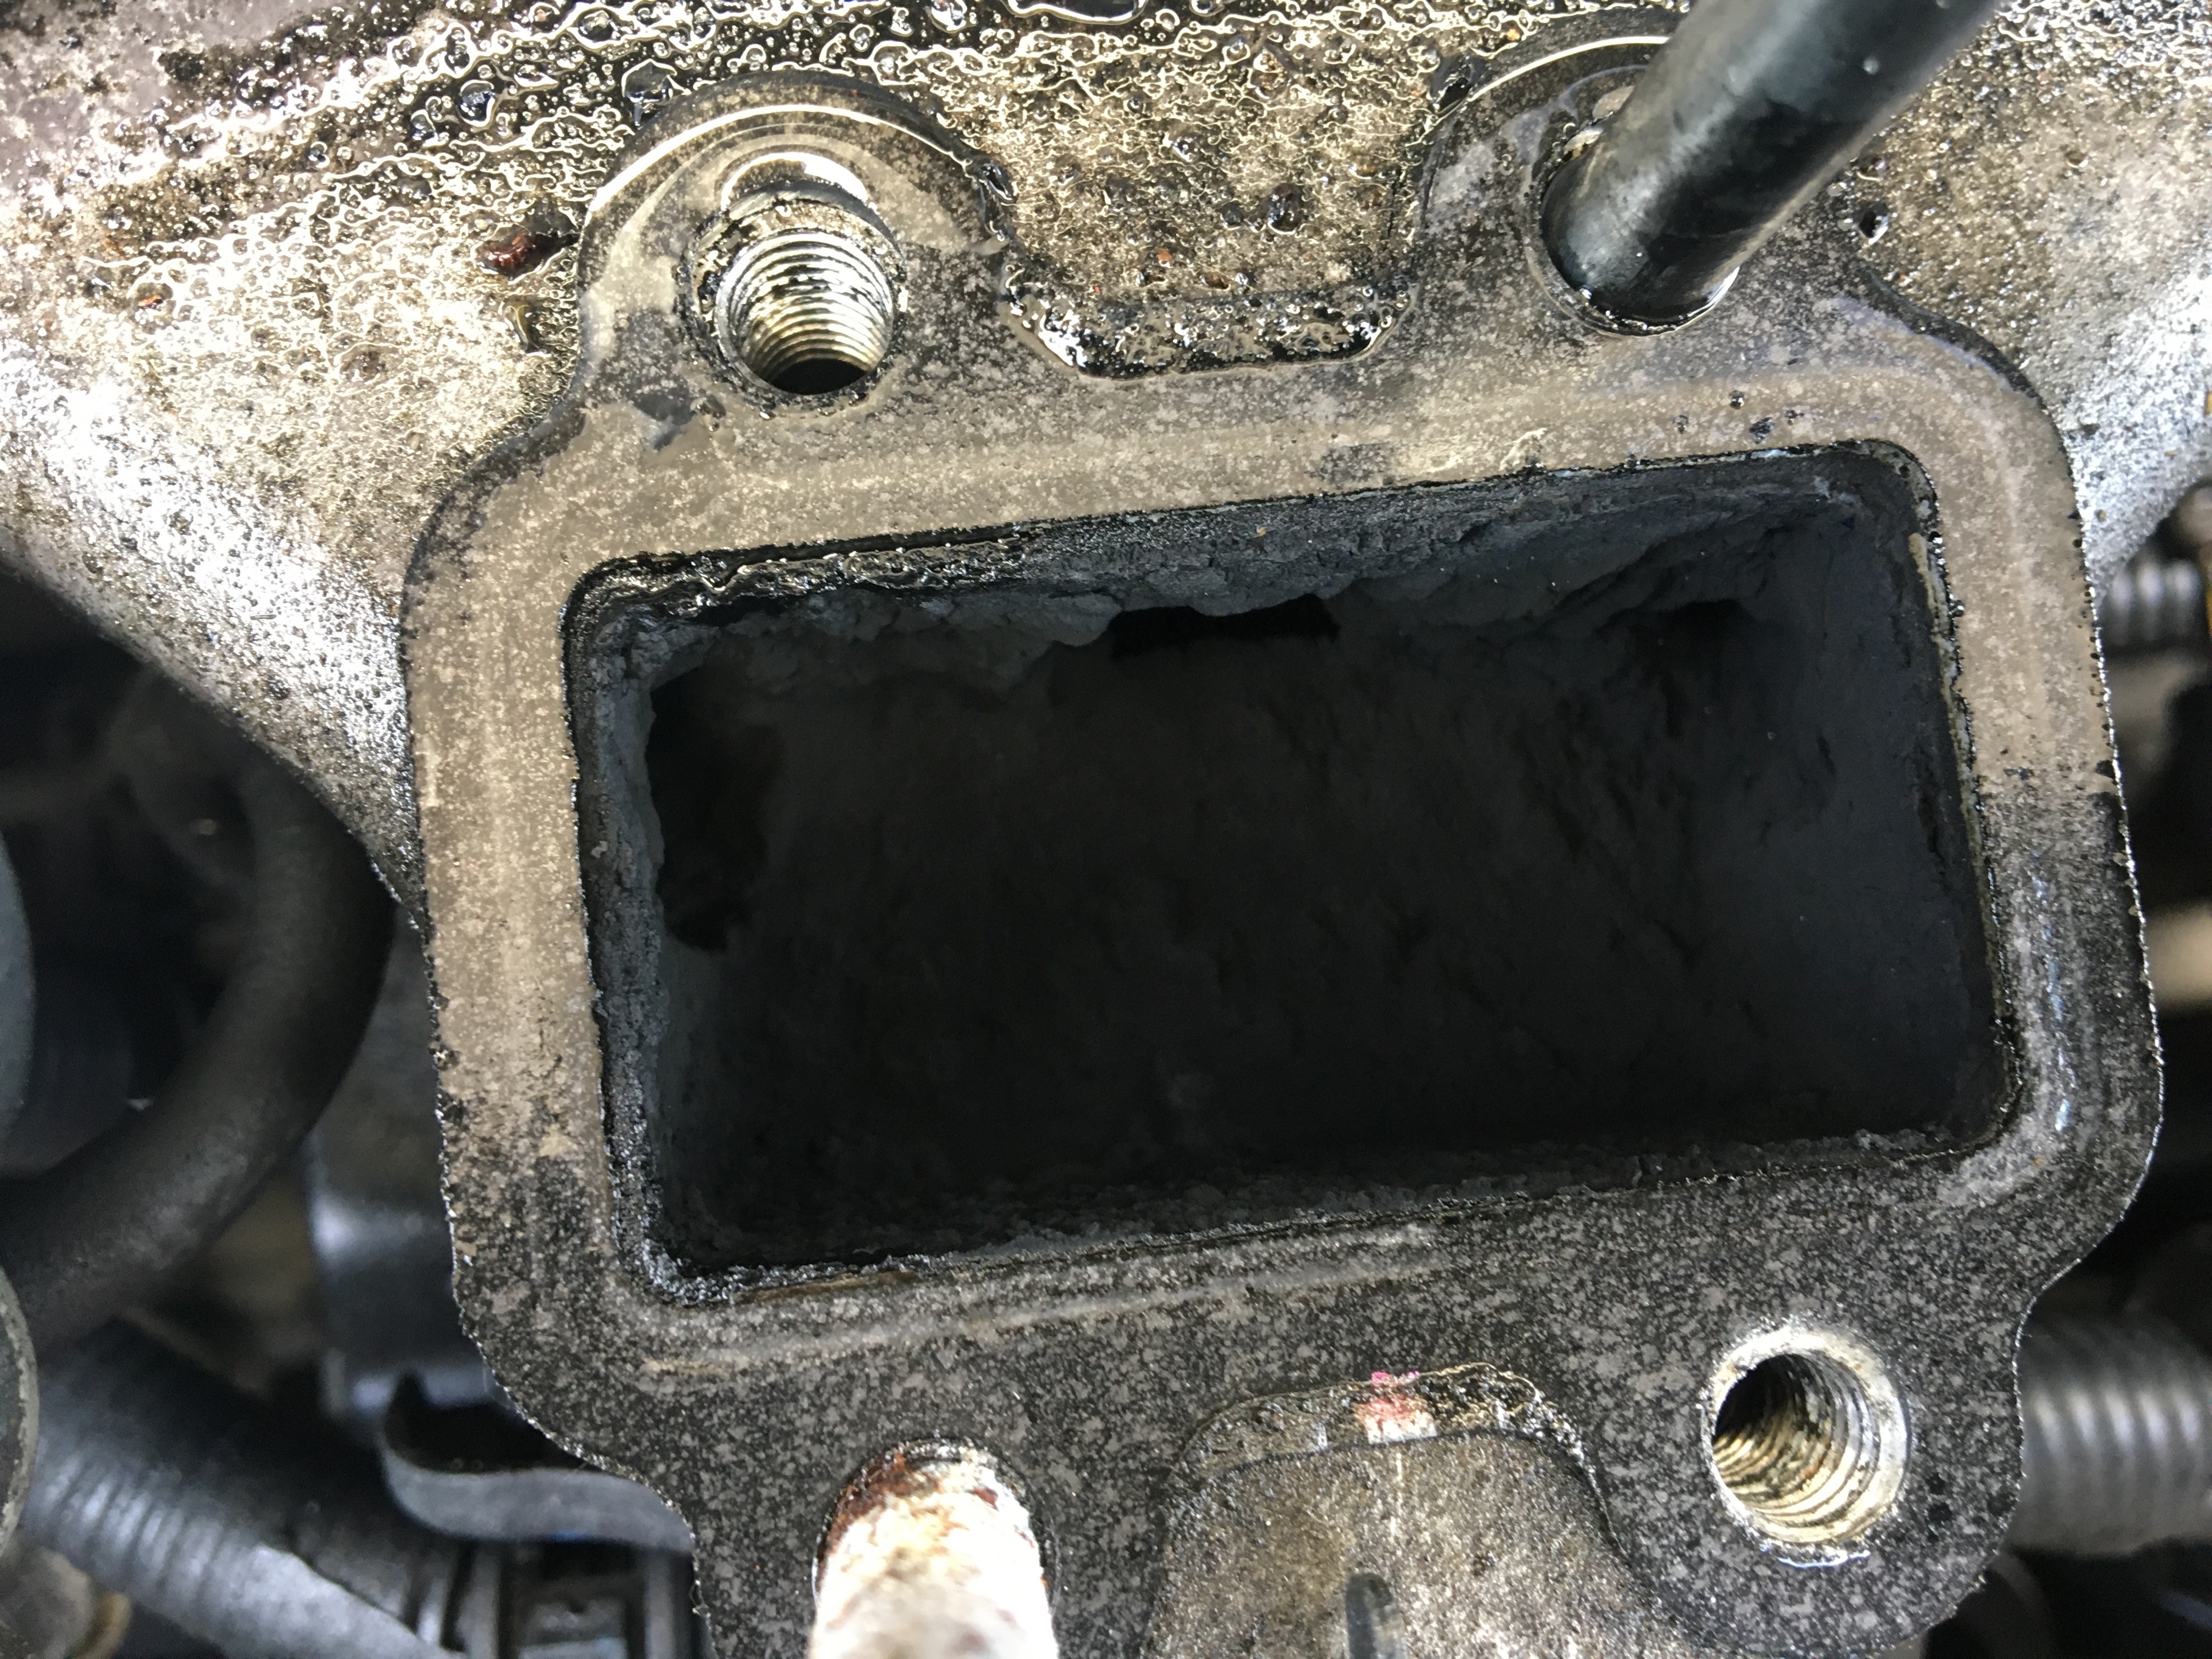
Now, I knew a little about our friend the ‘EGR’ – ‘Exhaust Gas Recirculation’ valve, because, a few years back (and without a fault code reading gadget), I reluctantly dropped the car and illuminated ‘Engine Fault’ light at my local garage of ‘Motor Engineers’, set off back home and awaited their call with diagnosis and estimated cost to rectify/repair. Nerve wracking, when there’s no budget for unexpected car repairs! When that call came it was my introduction to the term ‘EGR’ and the options of repair open to me;
(i) Replace the EGR Valve £260.00 + labour (unspecified) or (ii) Remove and attempt to clean out the EGR Valve, about £150.00 labour & sundries.
So I went for option (ii), collected the car next day, thanked Mr mechanic for saving me over £100.00 blah, blah … no more warning light and the car seemed to be running fine. Result, of sorts, Hmmm.
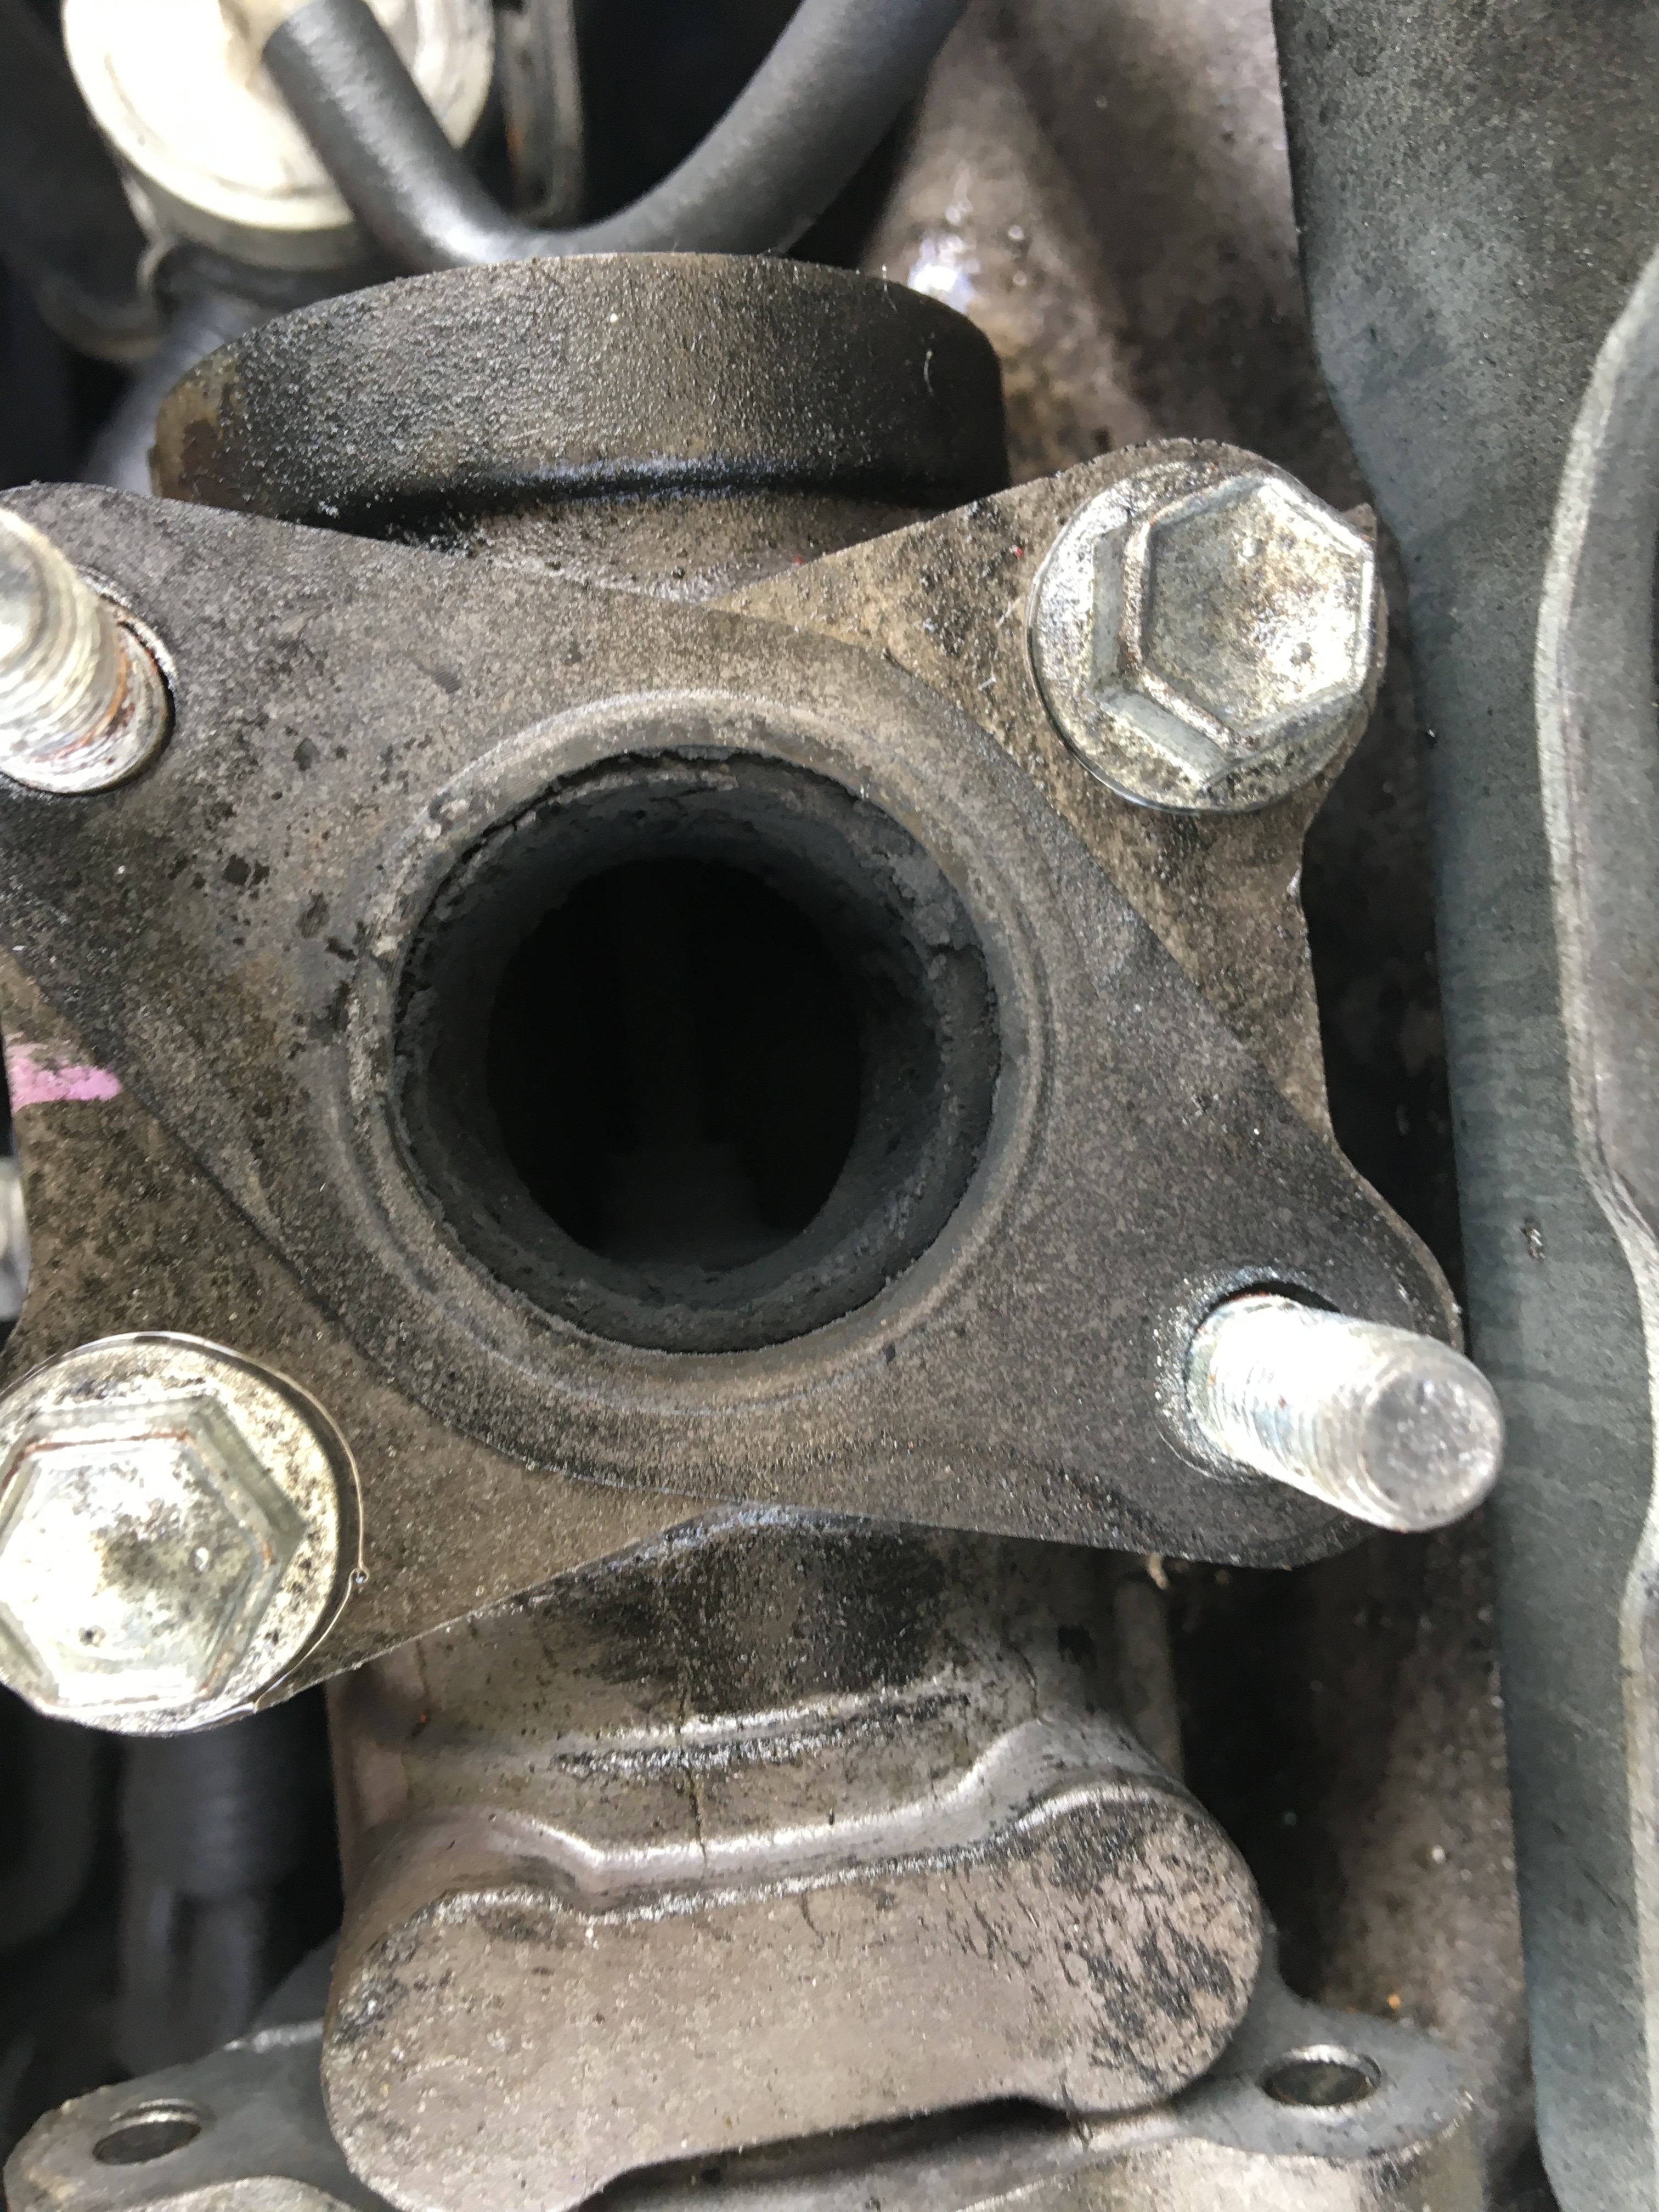
This time however I had my own diagnosis and error code. Half an hour’s ‘Googling’ and an excellent amateur YouTube video later, I was ready to once again practice ‘Zen and the Art of DIY Car Maintenance’, documented below in the form of iPhone photographs taken during the exercise …


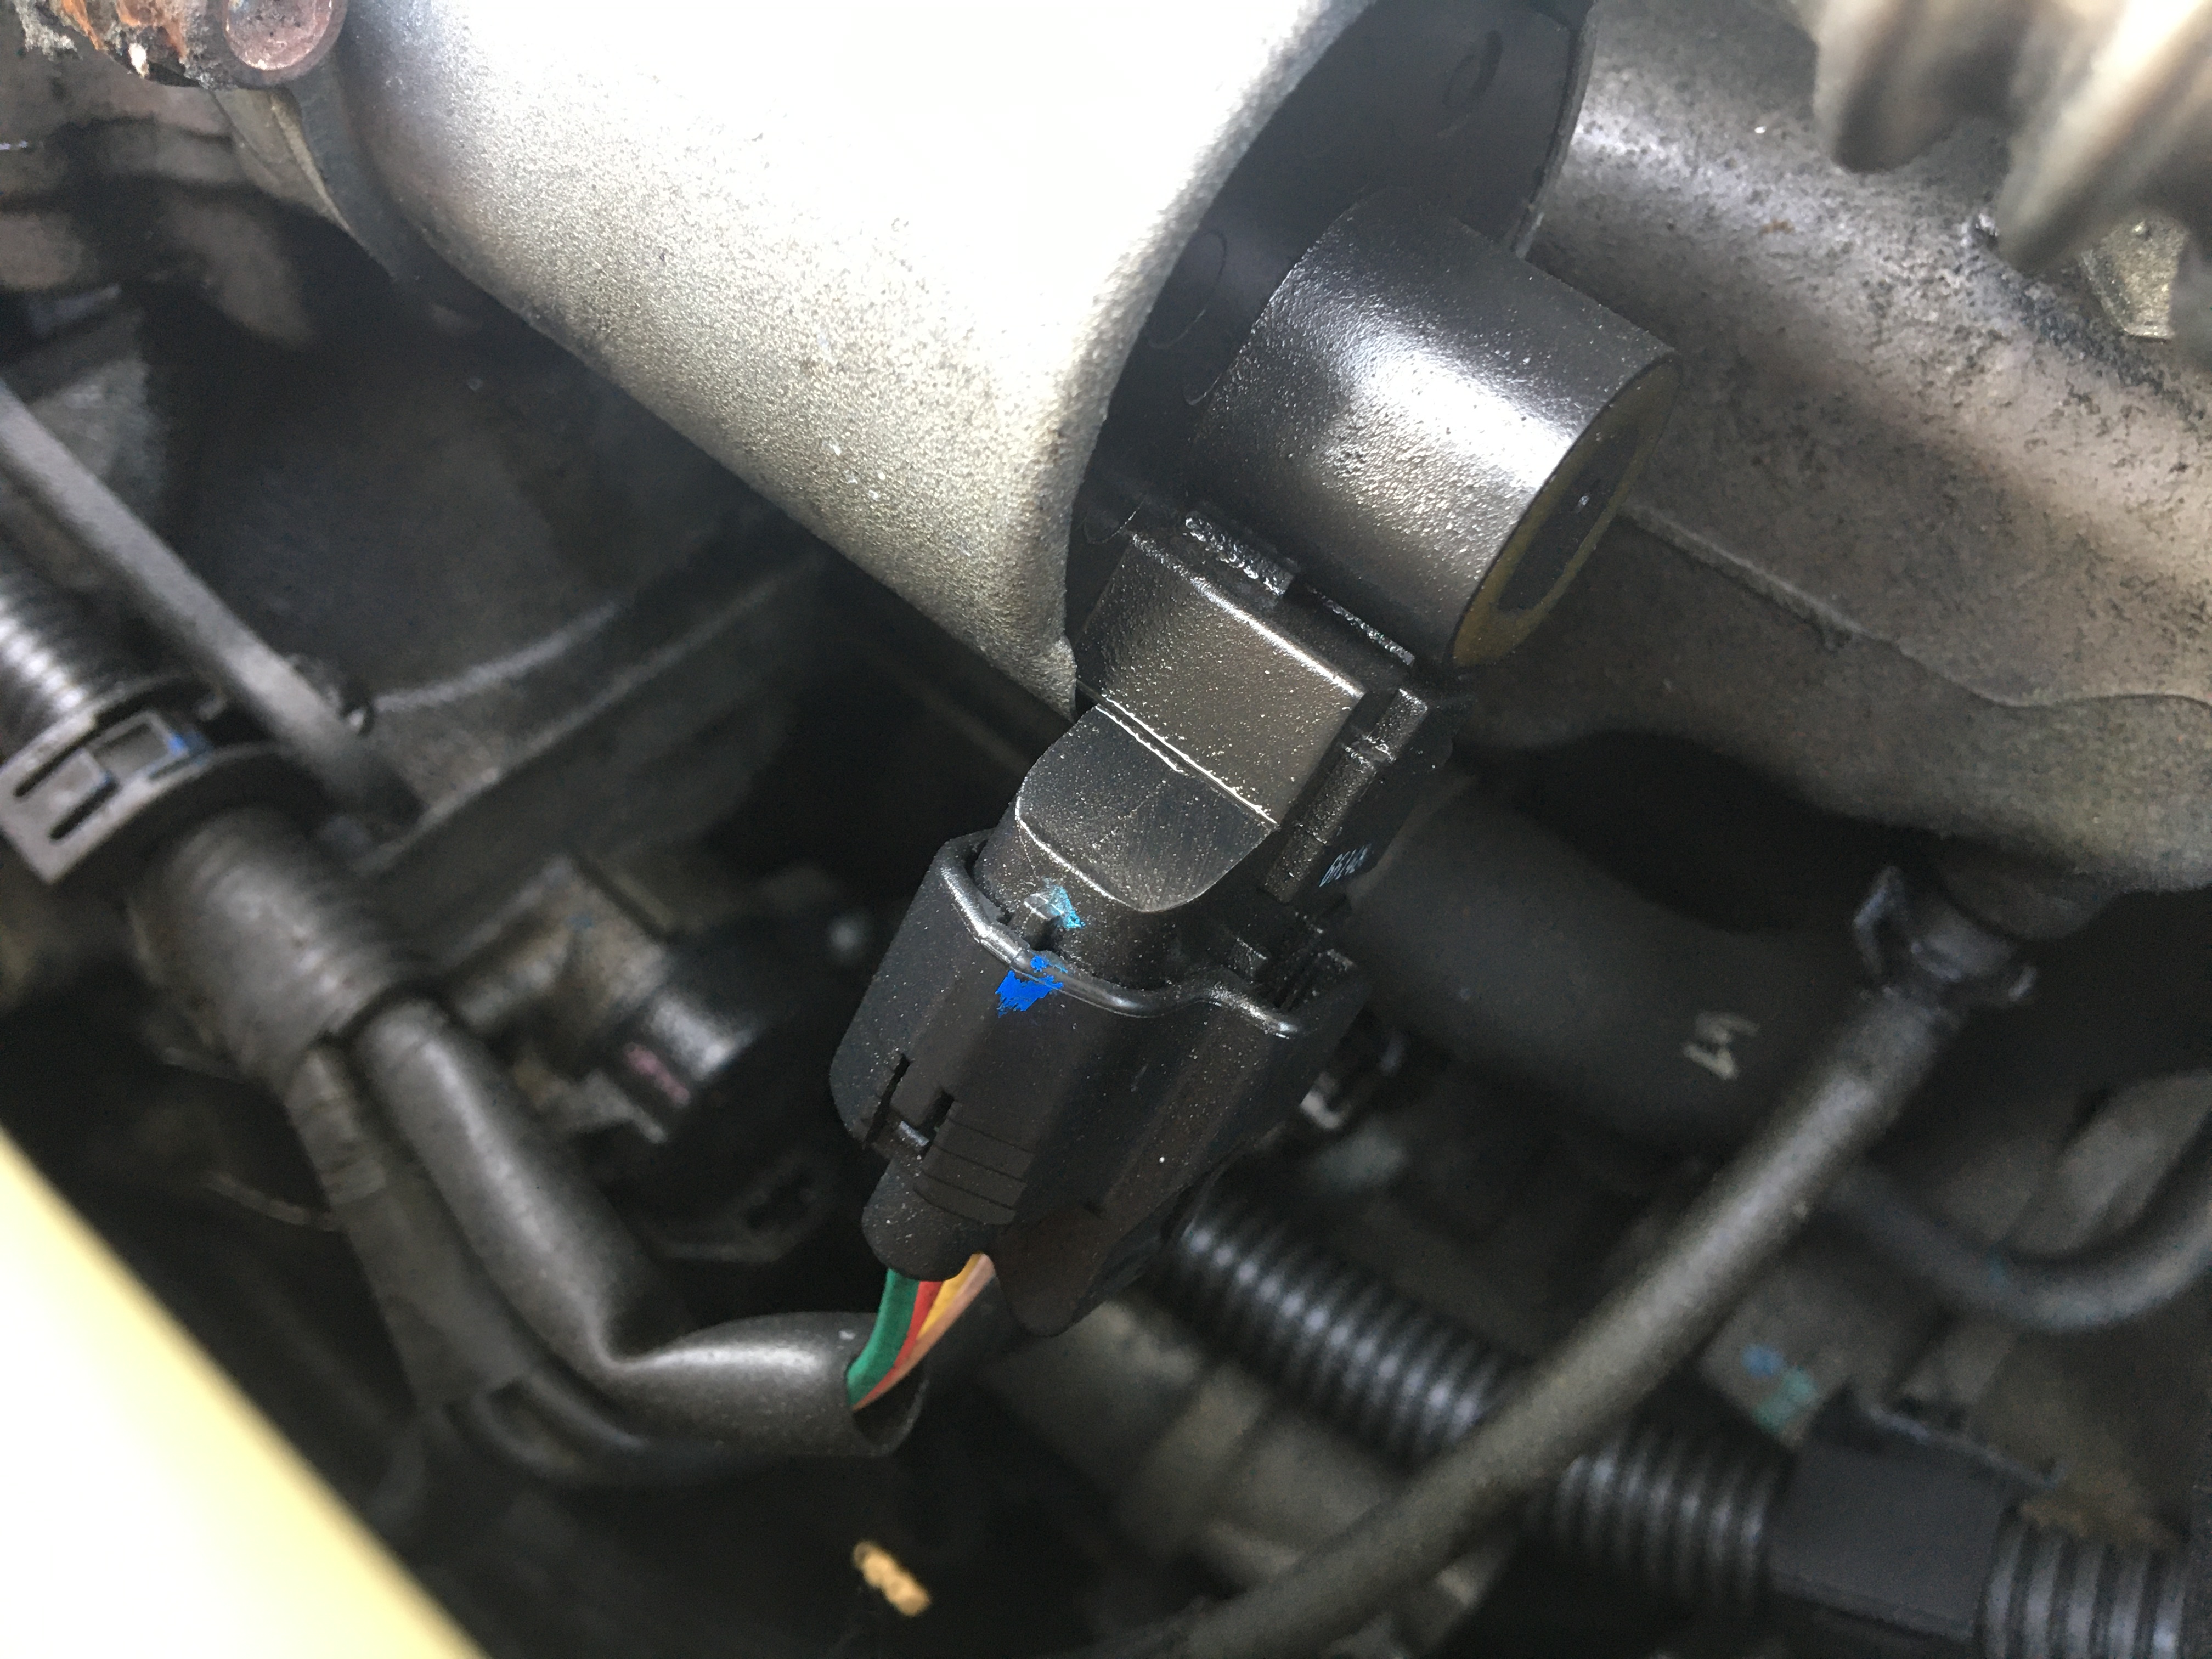


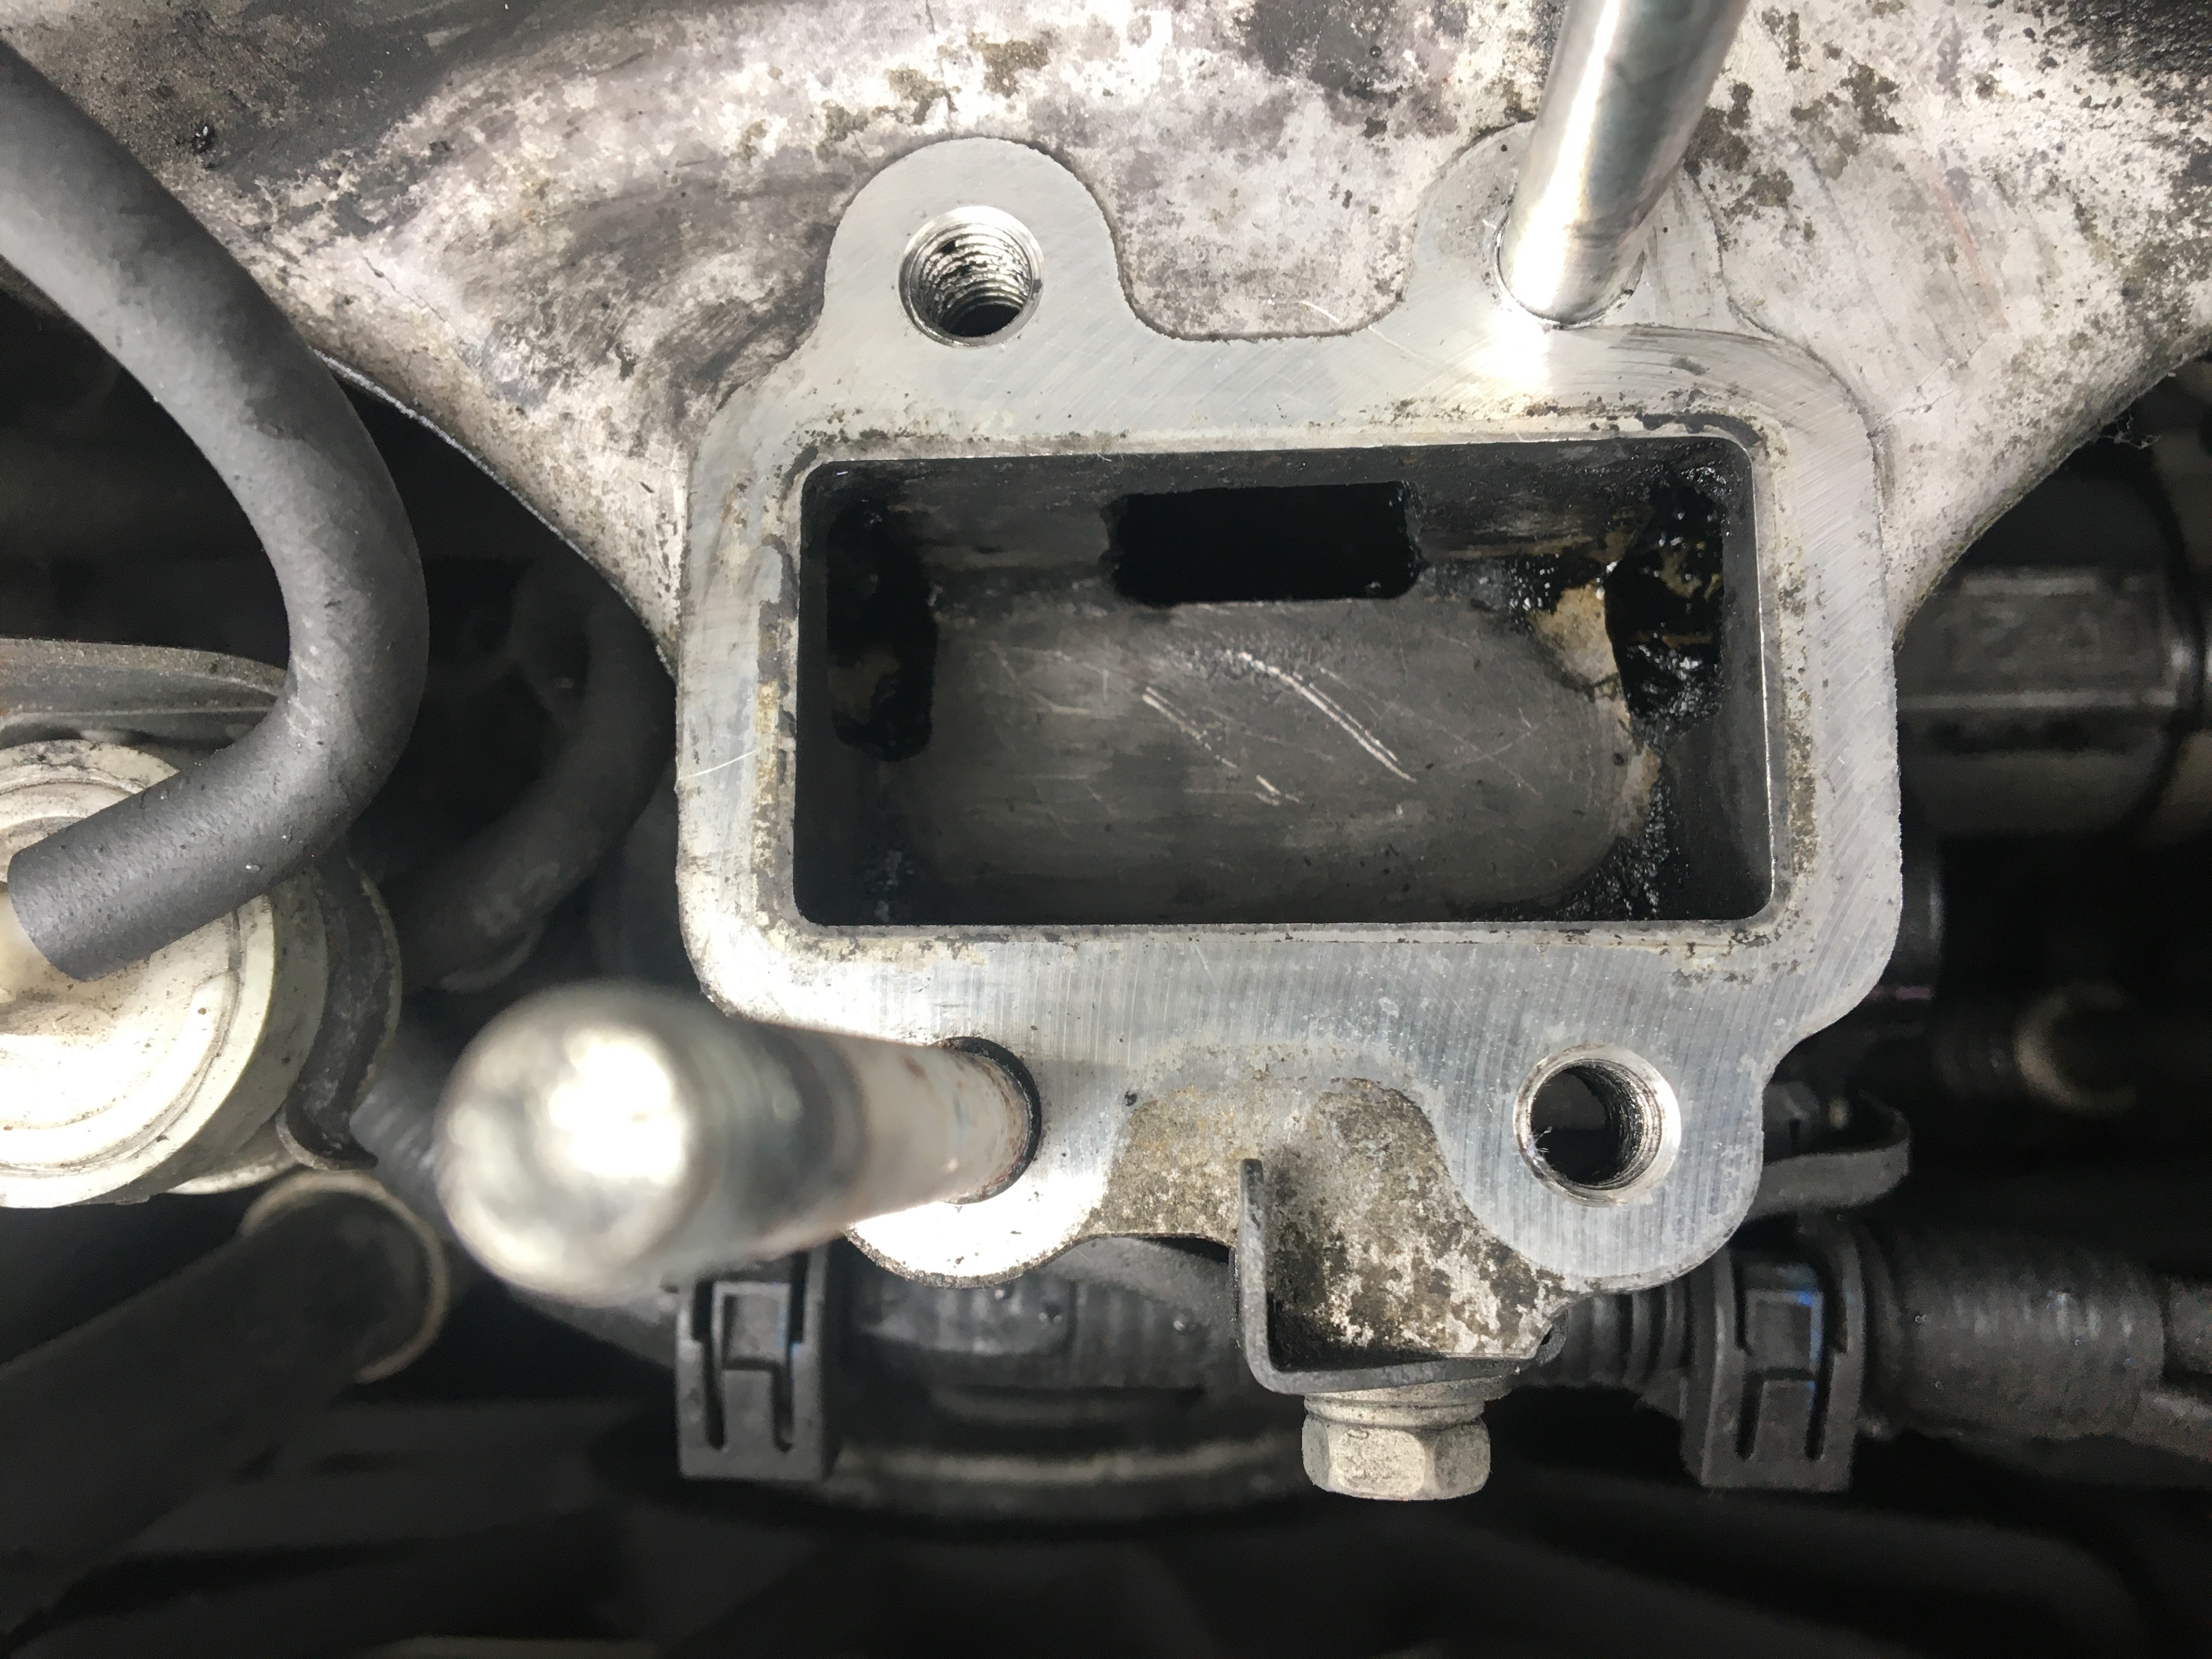


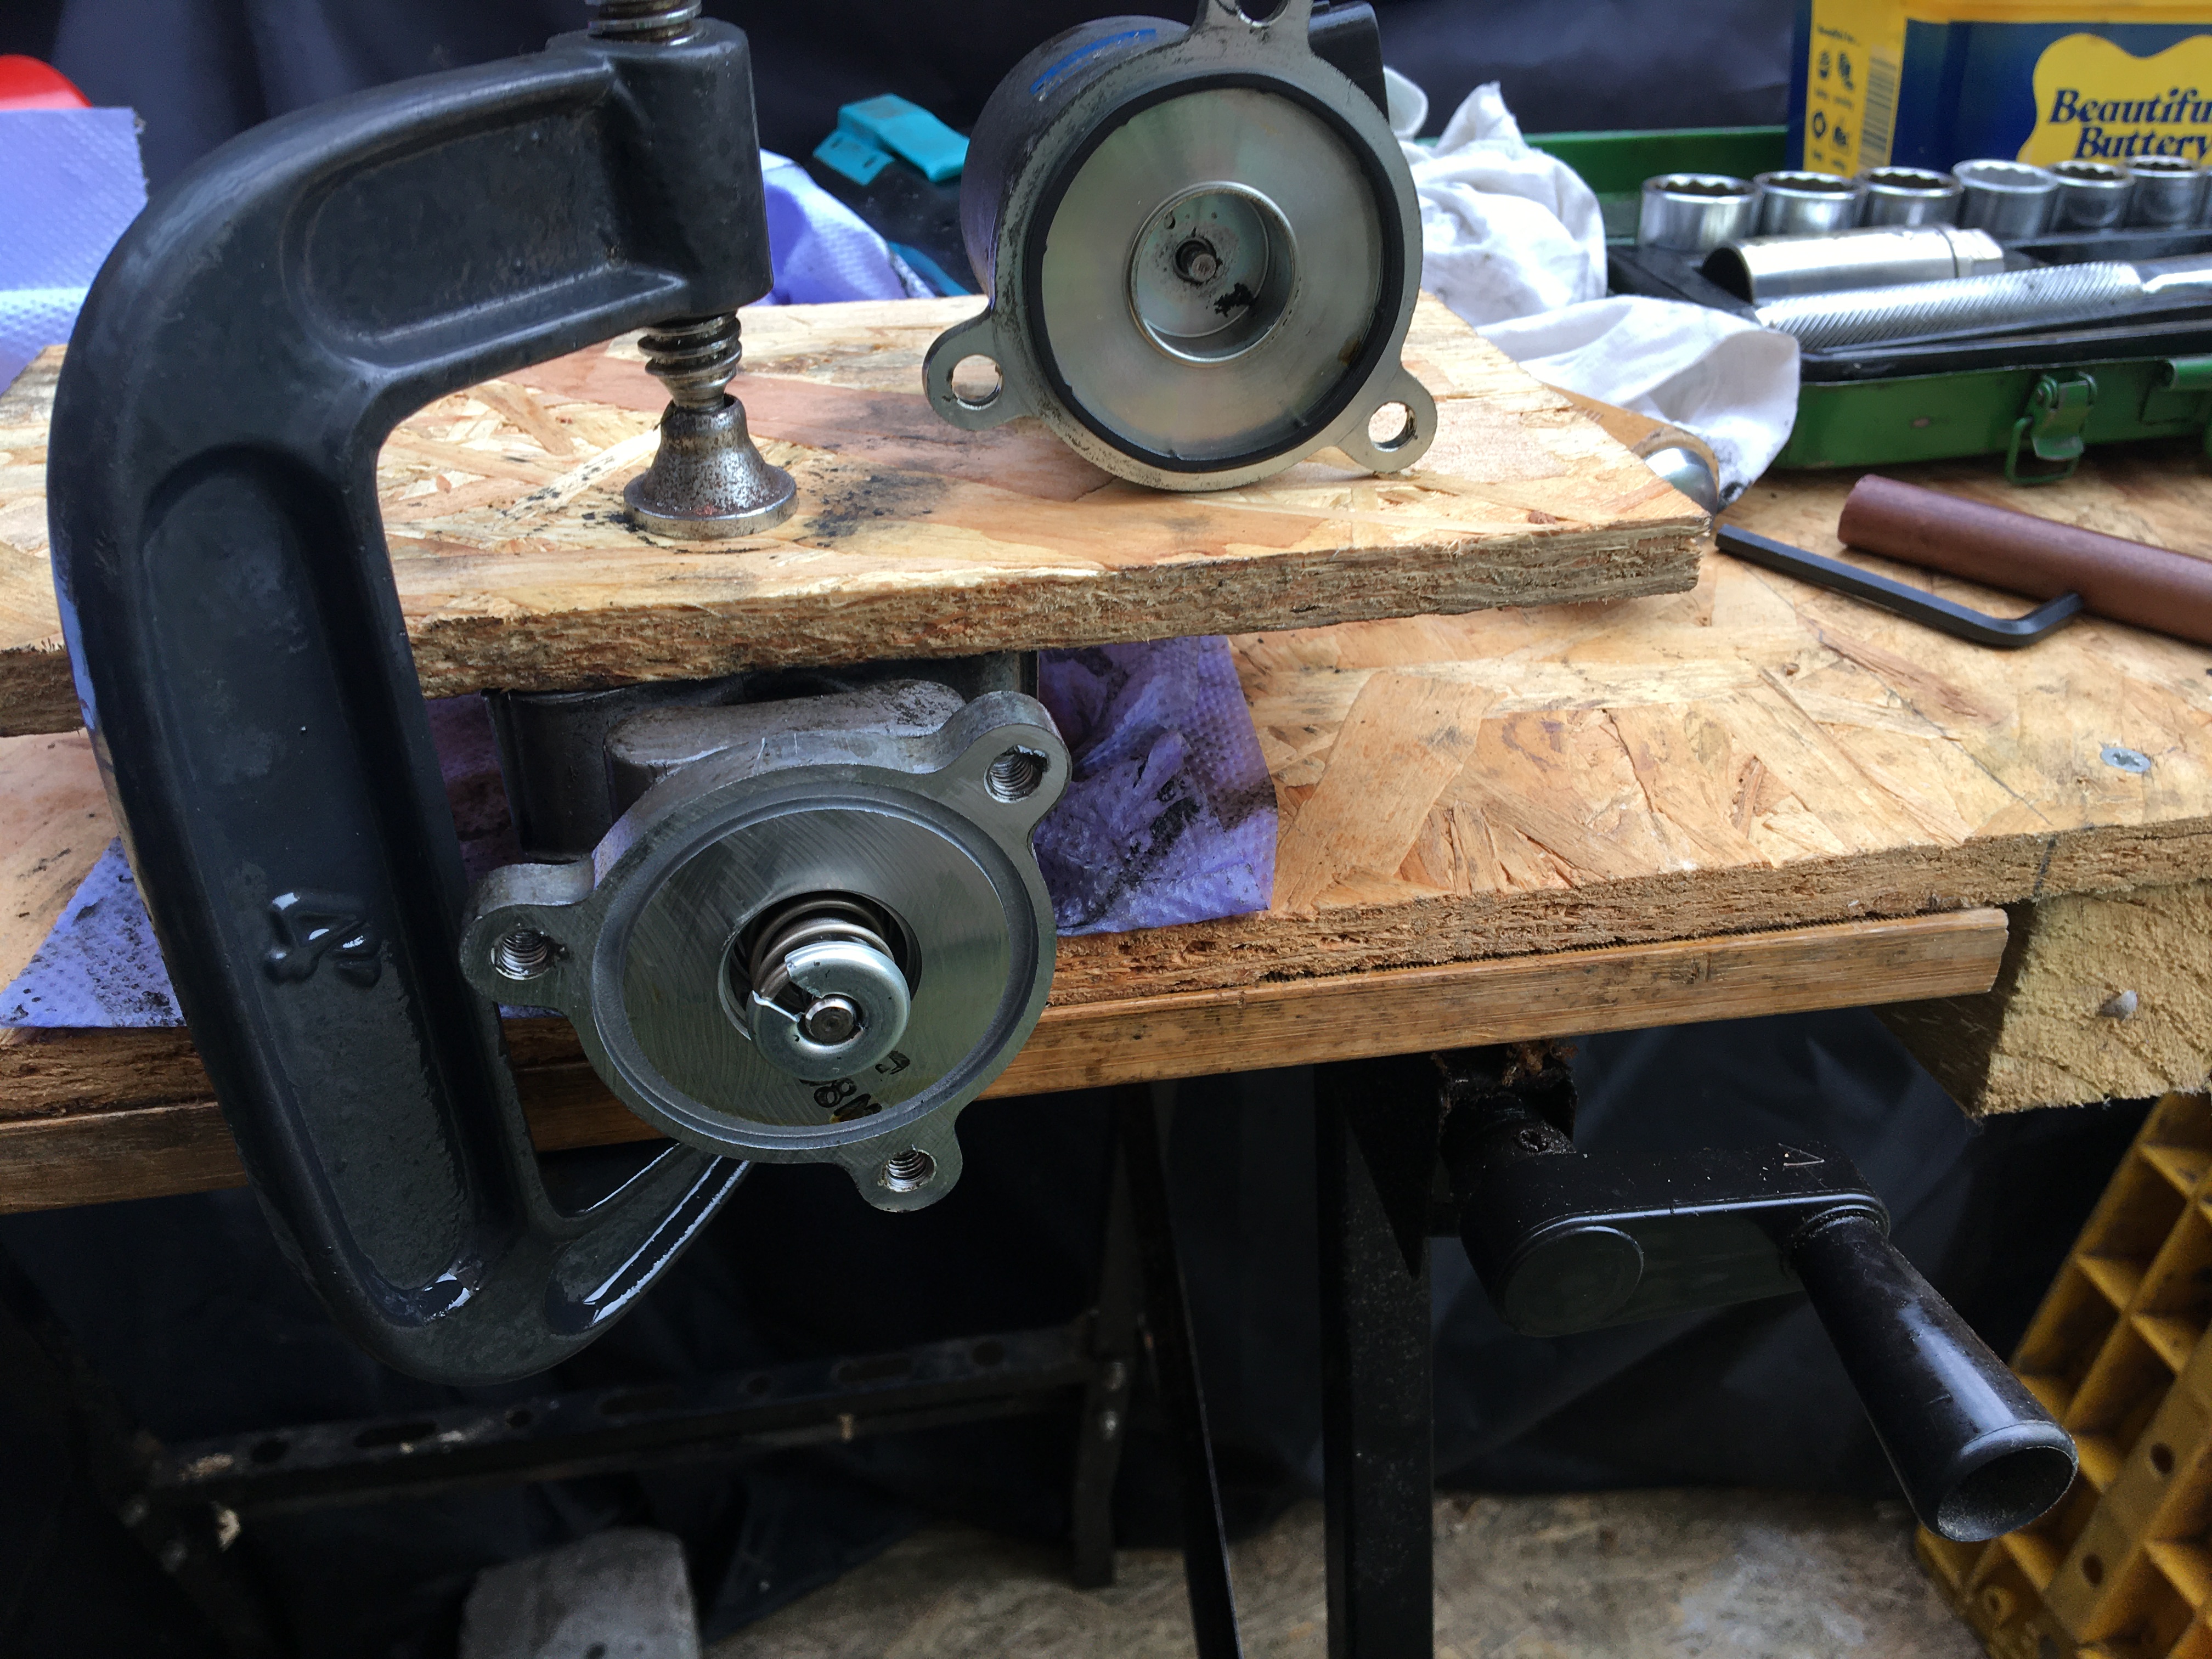

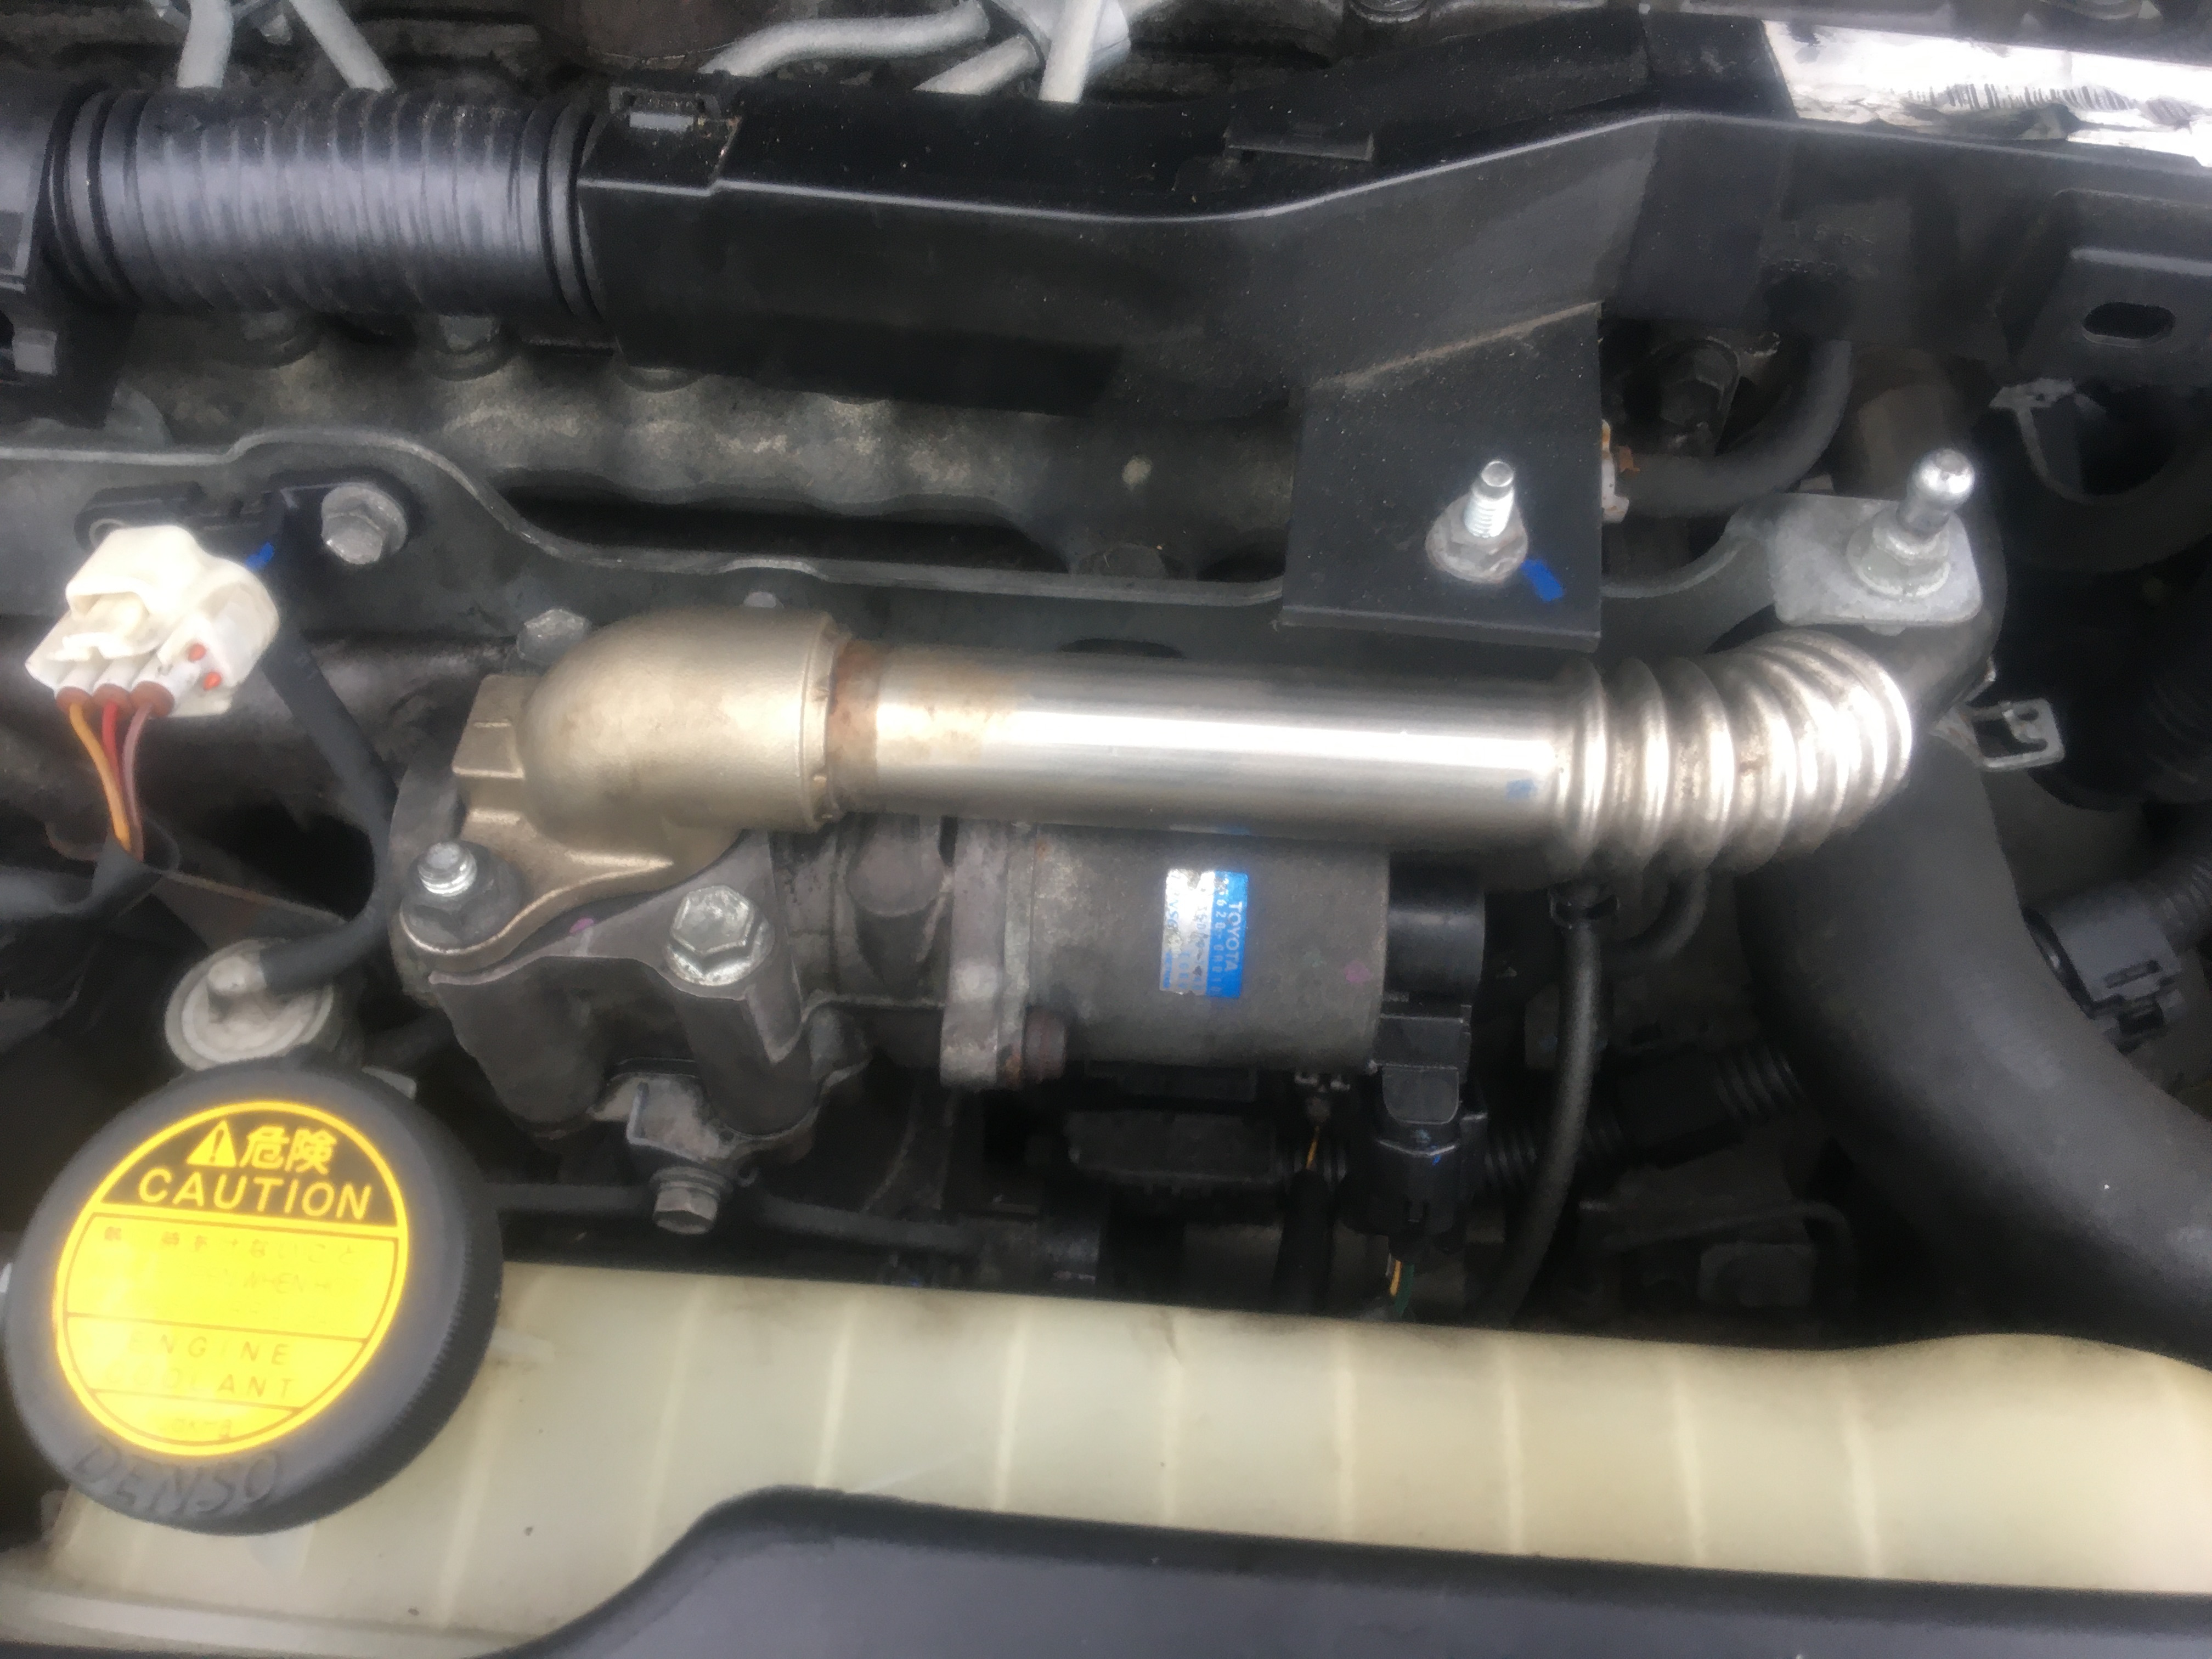

I was going to say here that ‘Cost Of Repair’ = £0.00, however I guess I have to factor in 1/2 can of Carb Cleaner + £9.99 for a replacement gasket the ‘Professionals’ left out! But still …
£Priceless sense of achievement, reward and Mindful Wellbeing.
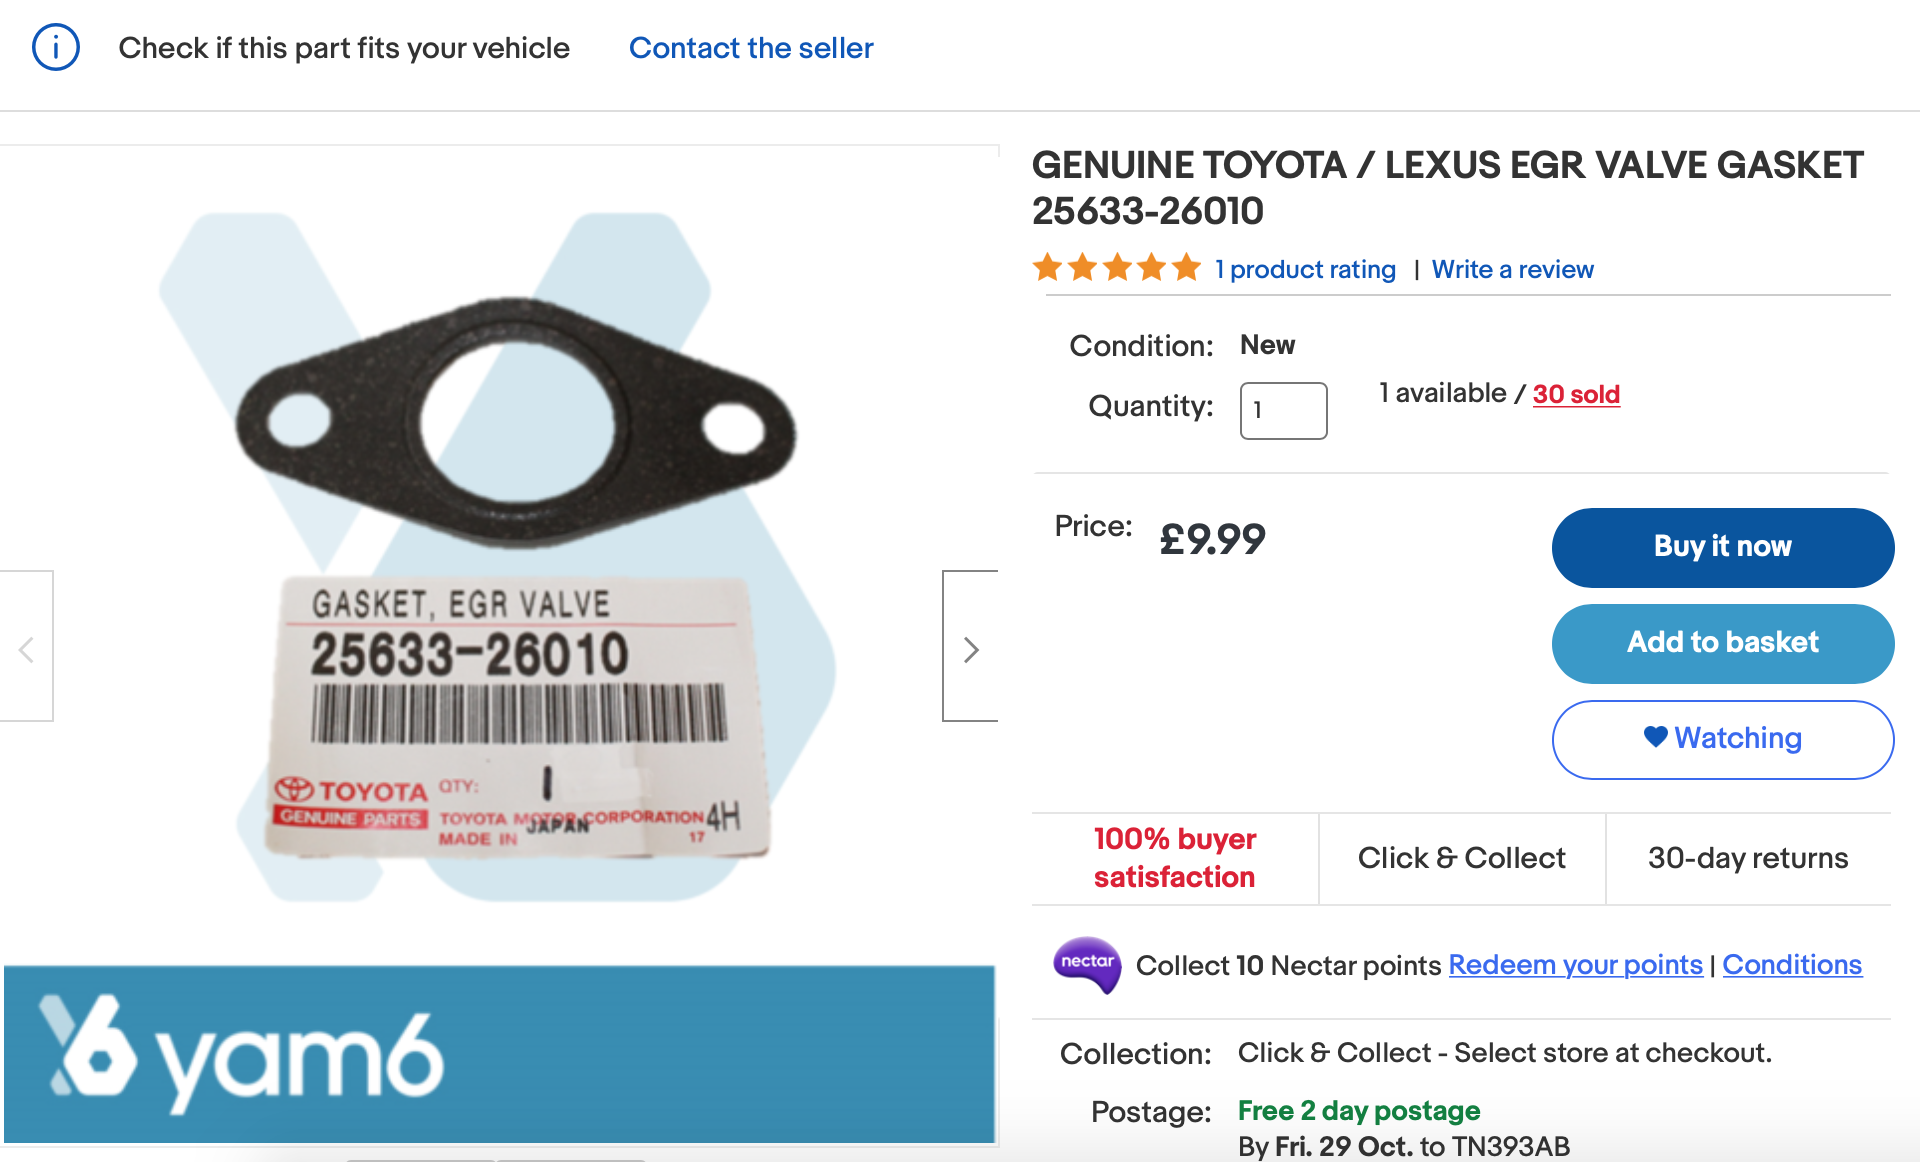
Update 09/11/2021: That gasket above was great BUT the wrong one, my mistake – See how I applied a little ‘Zen and the Art of Motorcycle Maintenance‘ to a solution Here 🙂
Thank you for reading.

One thought on “Zen and the Art of DIY Car Maintenance #02 …”