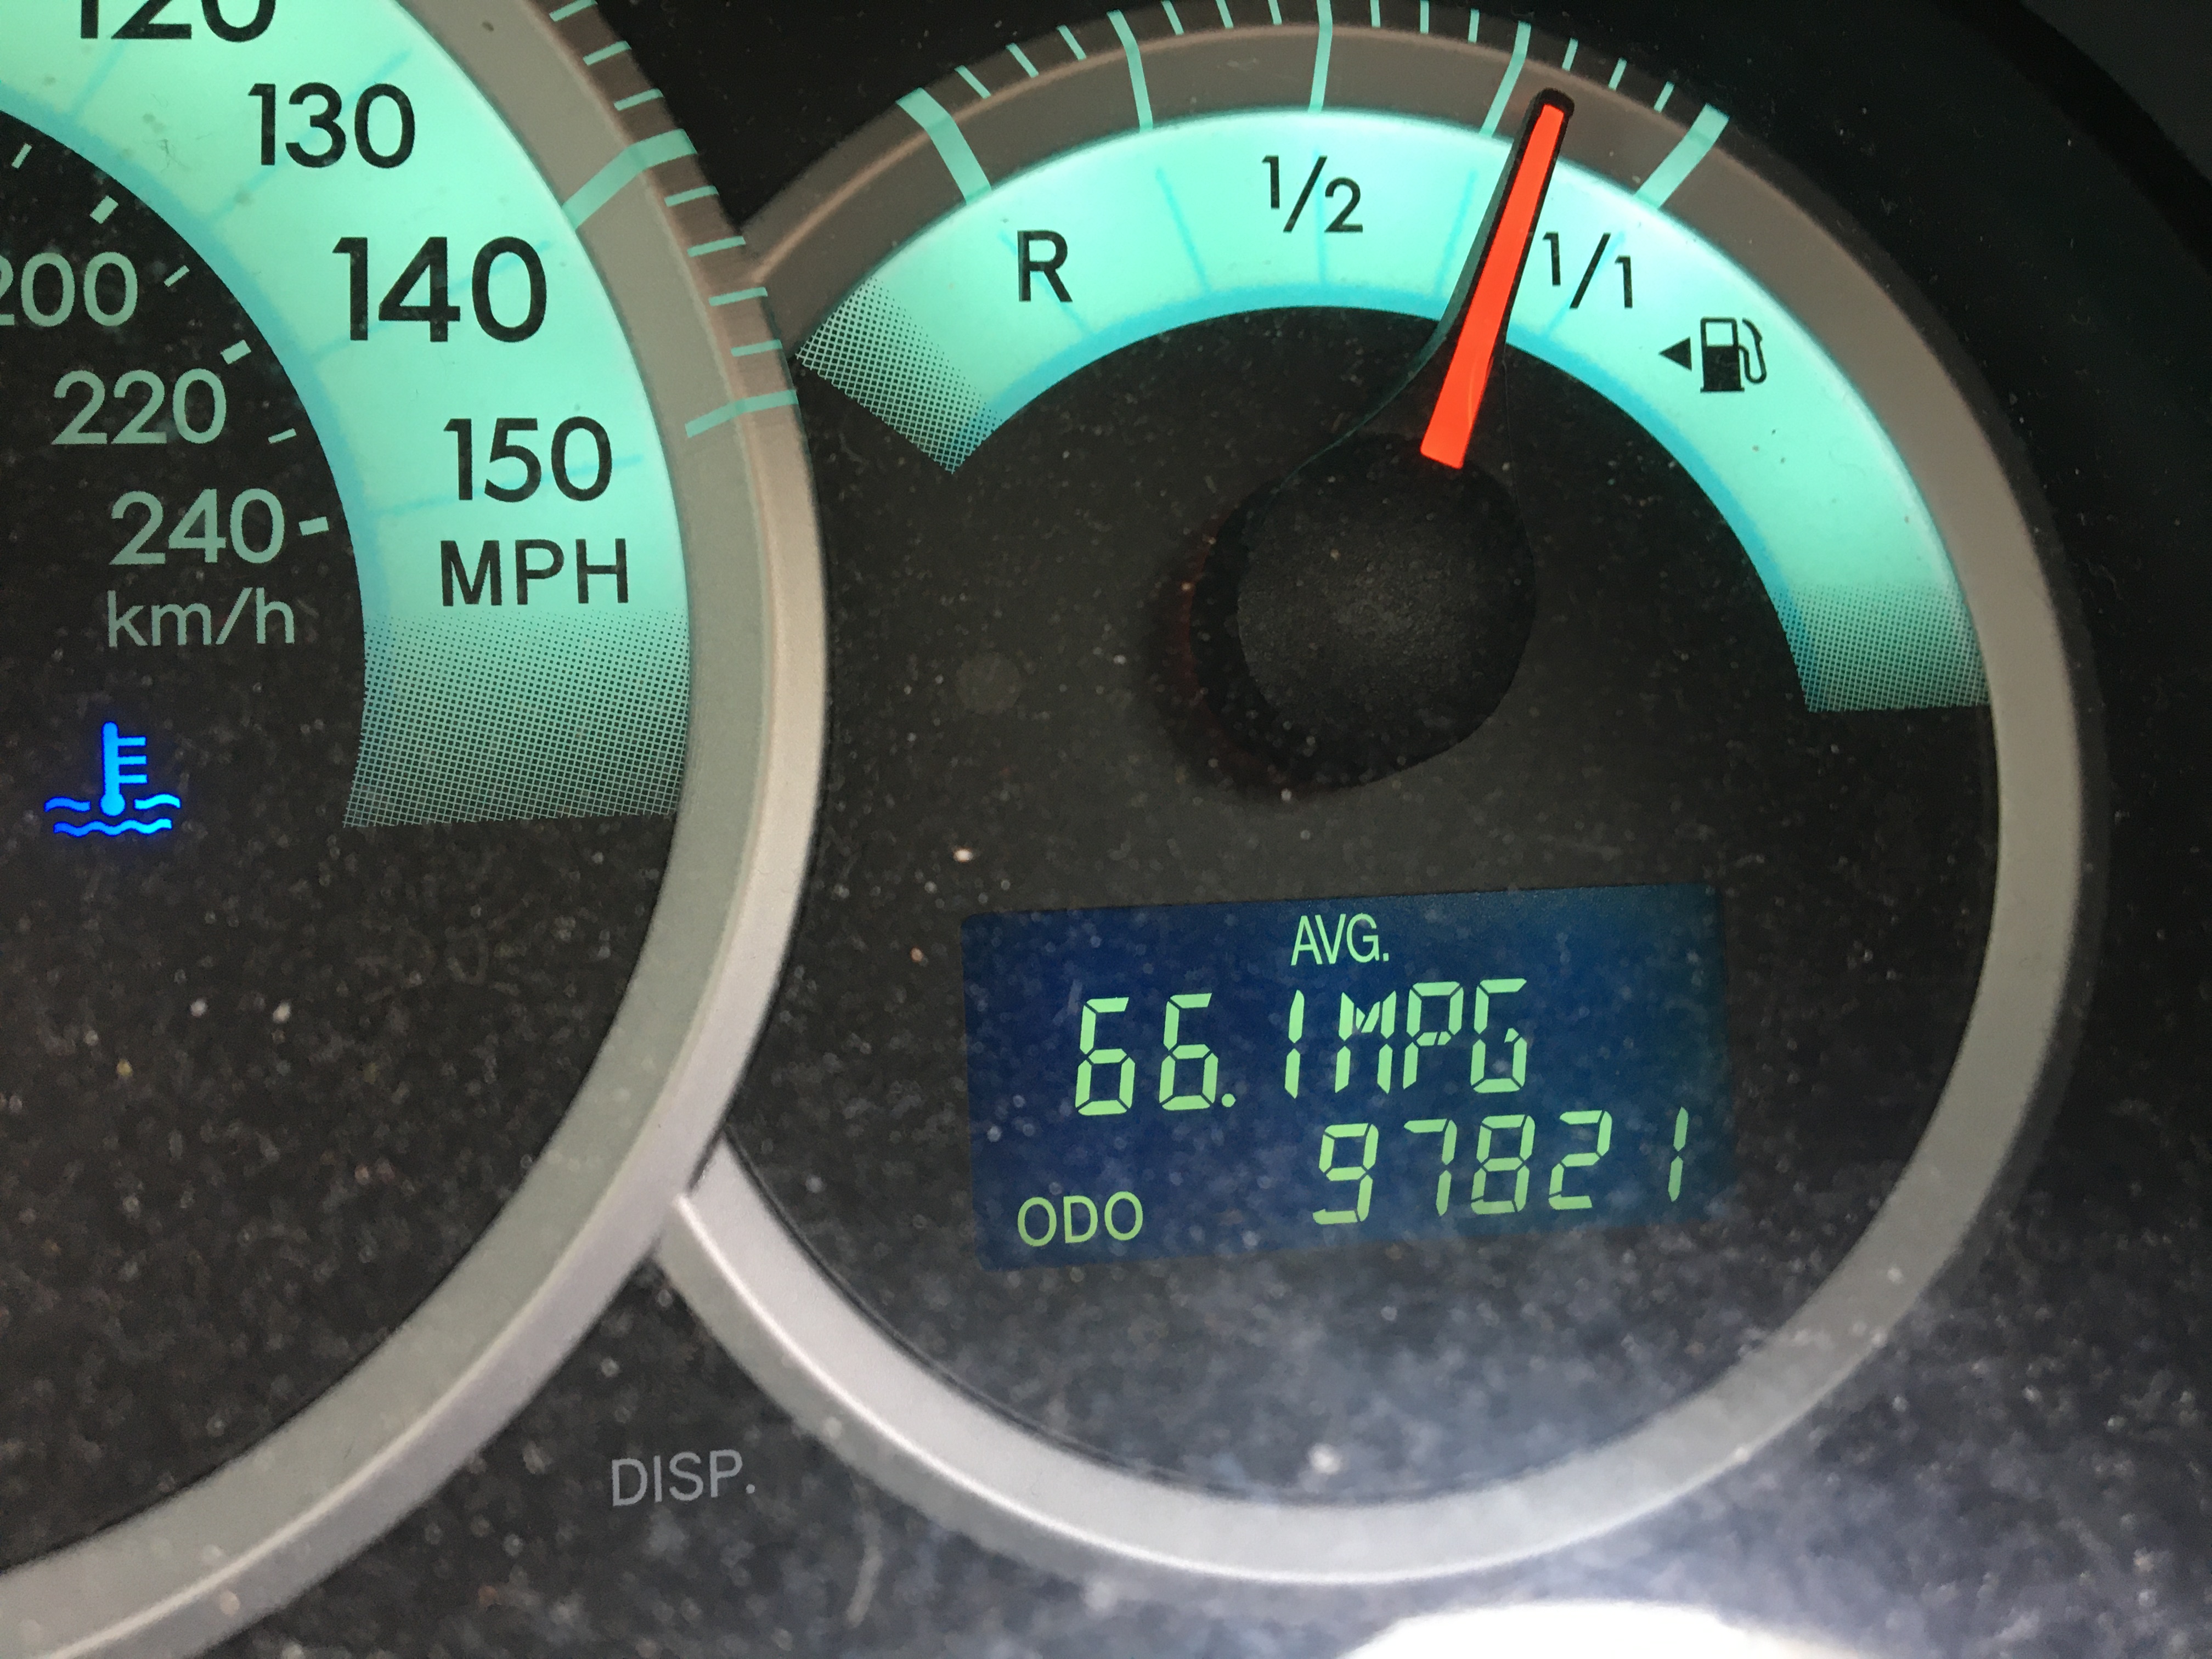
In my family we have 3 old cars. The newest is a 2007 model with over 100,000 miles, and after its recent DIY service returned 66.1 MPG on a long run;
66.1 MPG from a 2007 2.3Litre Diesel with (now) 100K Miles on the ODO – Not Bad!
… the other 2 are 2003 models with 125,000 and 100,000 miles on their clocks respectively;
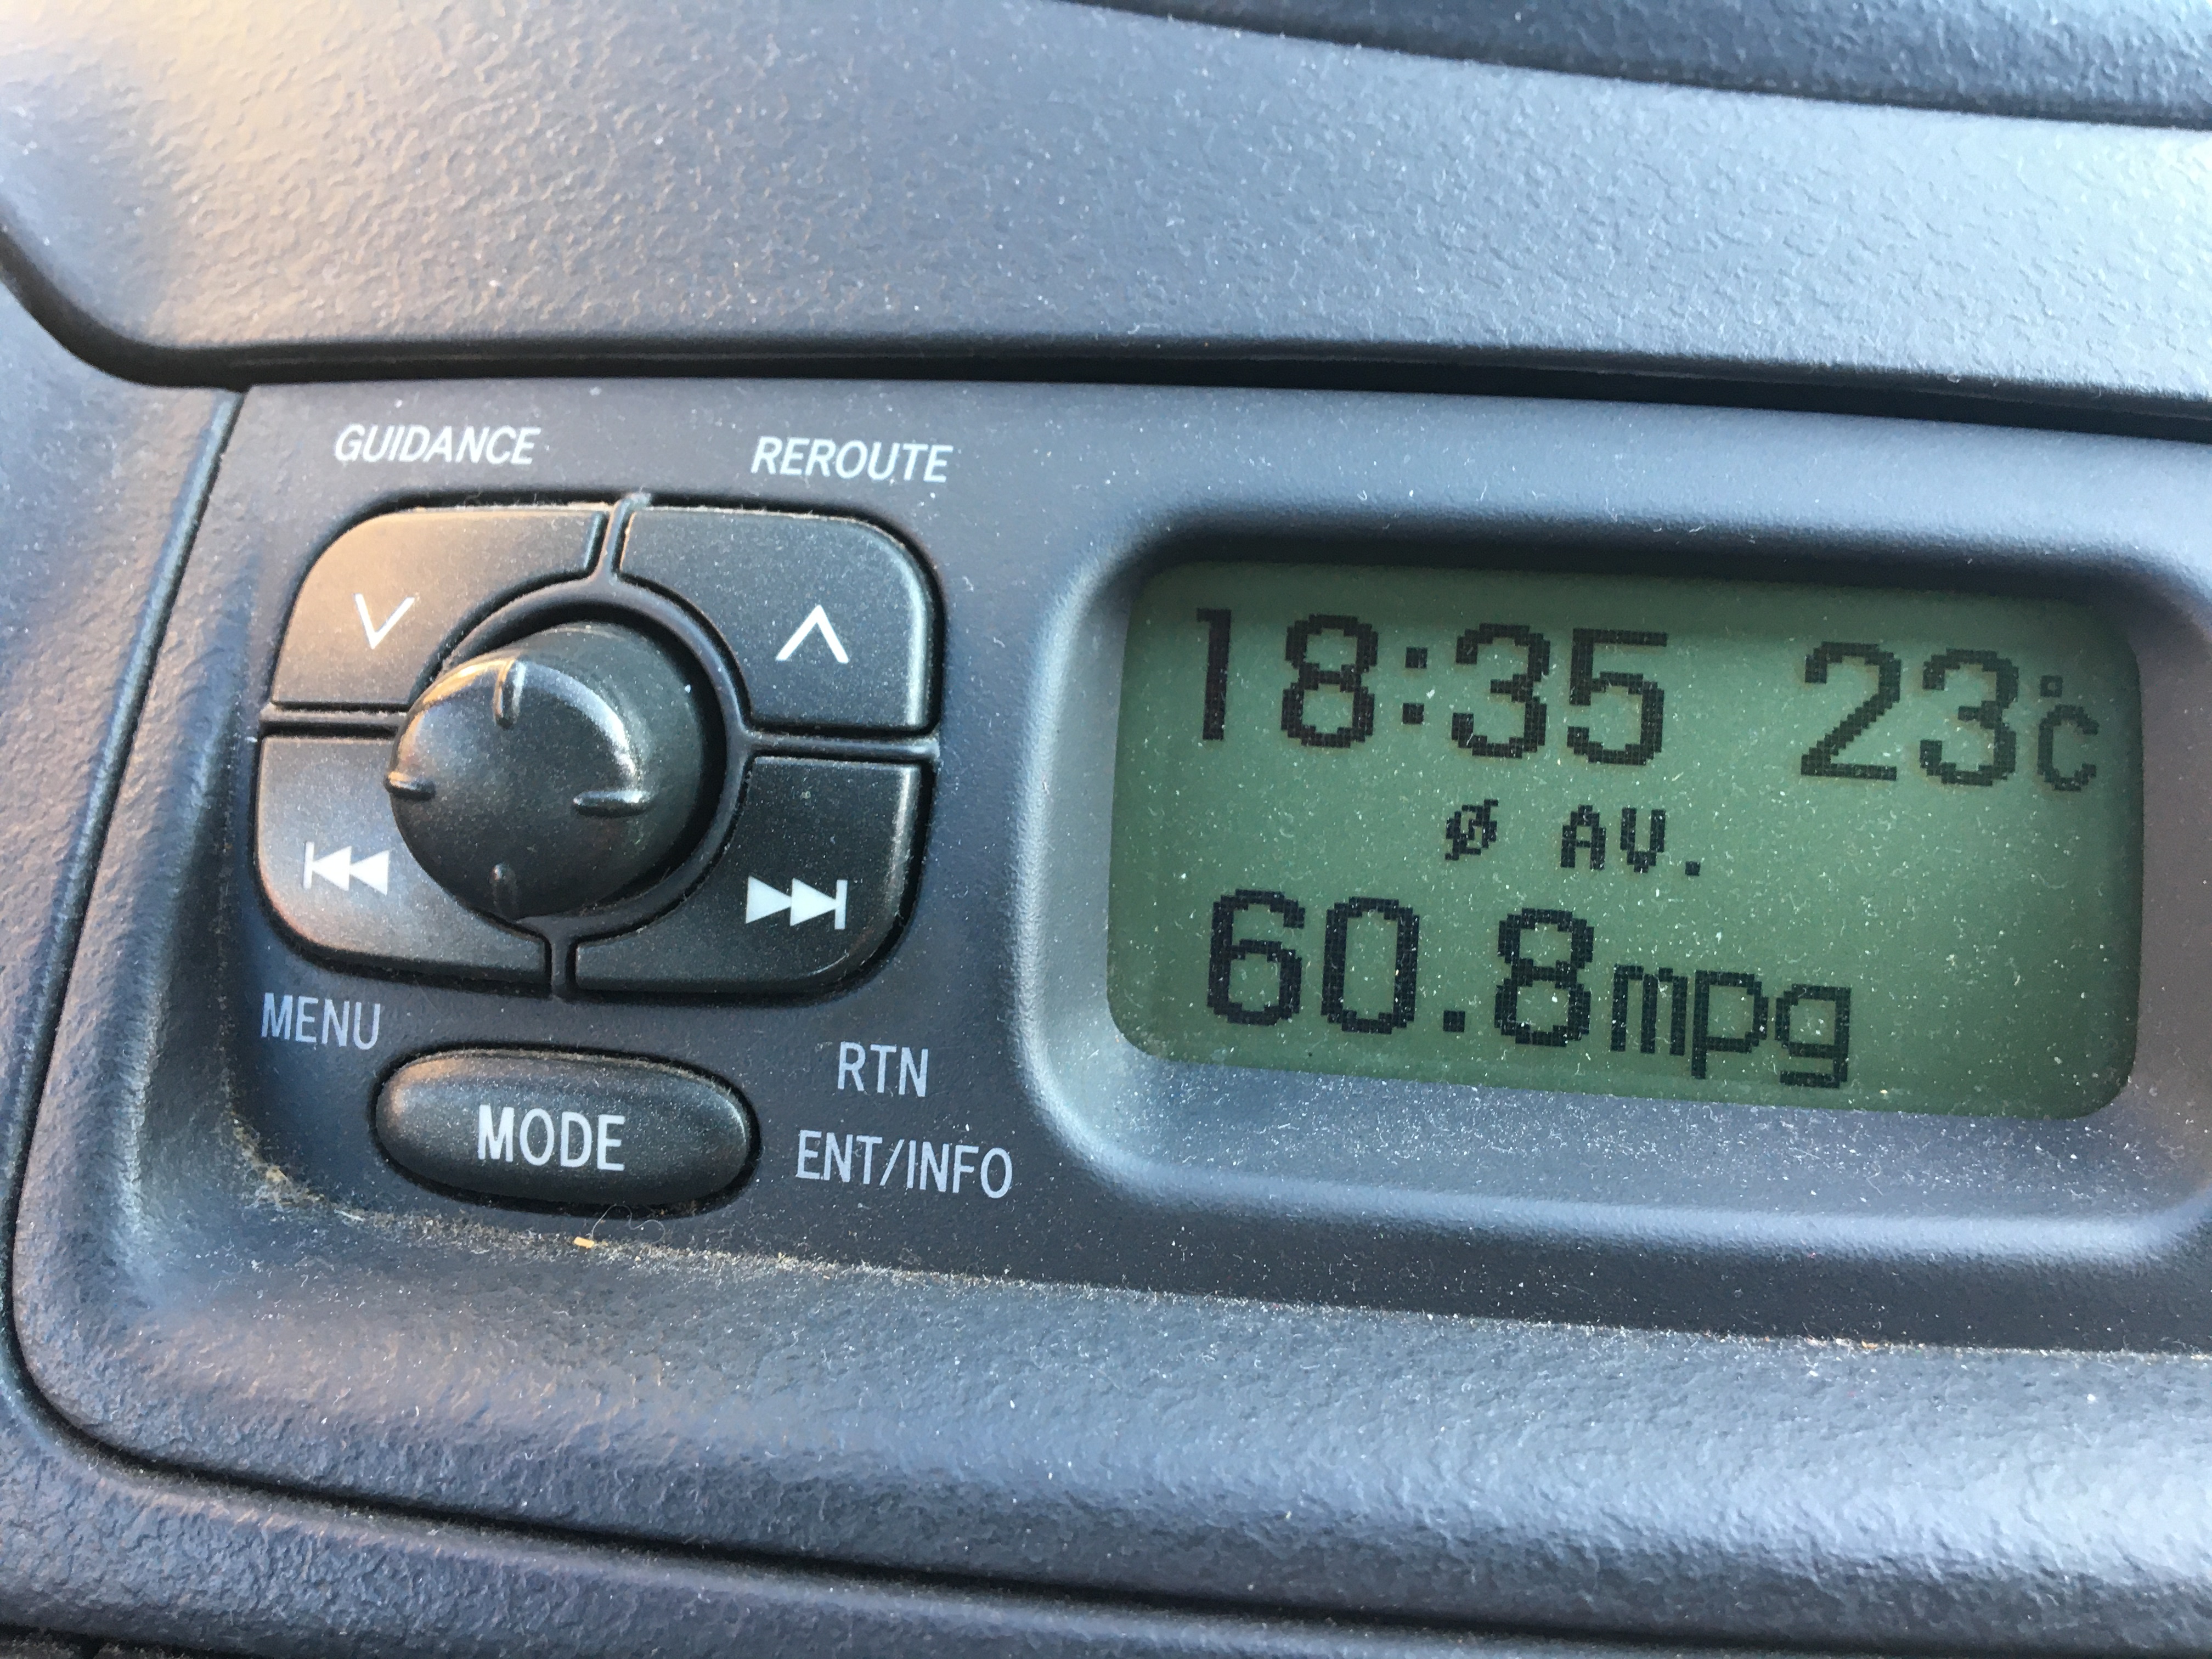
60.8 MPG, 2003 Toyota Yaris, 998cc Petrol over 100,000 miles on the clock and DIY serviced.
There is something very satisfying, rewarding (financially too) and I find ‘mindful’ about maintaining and repairing your own vehicle(s). I realise it is not for everyone, and care must be taken to do work properly and safely. I guess I’m fortunate to have a Mechanical Engineering background, I served a 6 year craft apprenticeship and worked with my hands ‘on the tools’ for many years. I was then promoted to a desk/computer and found myself organising the work for others to do.
Now, in my 60’s I have dug out the old tools, bought a couple of new ones, and primarily to save money on extortionate mechanics (with dubious skill levels and ability) labour fees, but then discovering the mindful benefits of ‘doing a good job yourself’, getting stuck in … I discovered an almost meditative experience, losing myself in the task at hand, rediscovering and re-applying those old skills and enjoying the benefits of wellbeing possibly more than the substantial financial savings.
Here are a few images taken while practicing ‘Zen and the art of DIY Car Maintenance‘.
Removed, pistons freed off, cleaned and re-assembled – Cost £0.00 just some mindful effort A seized rear brake (slave) cylinder on my Daughters car.
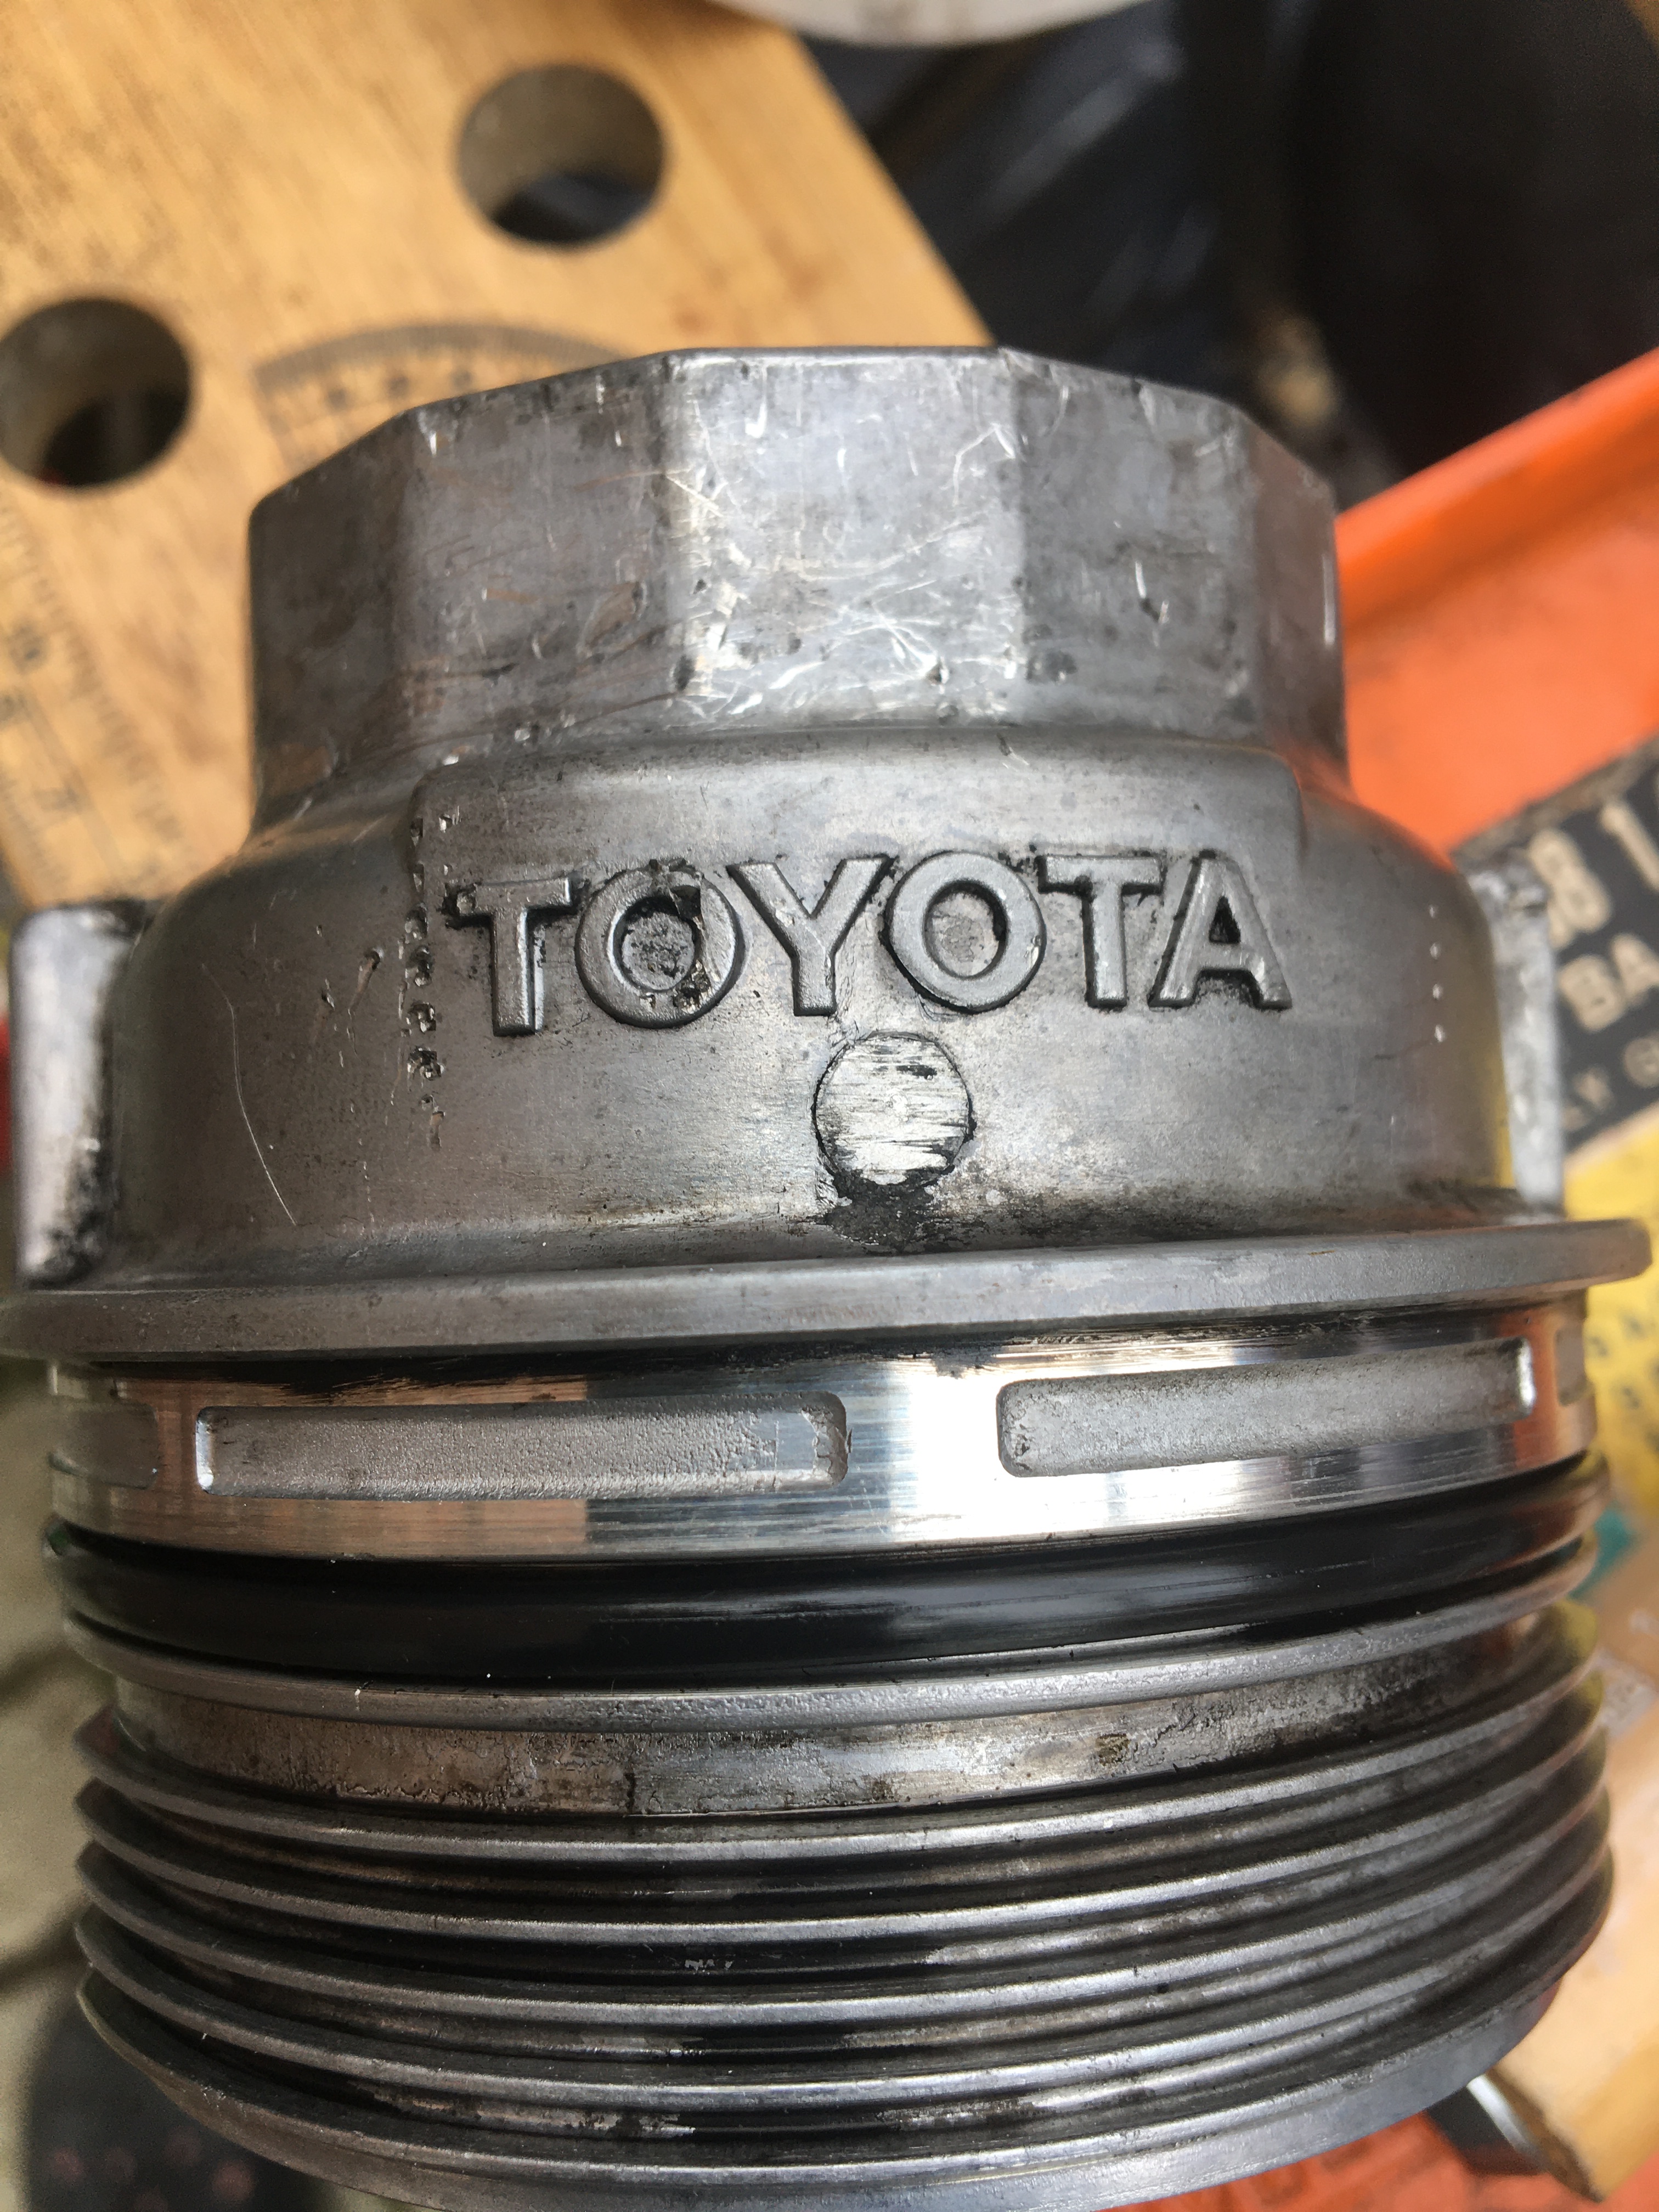
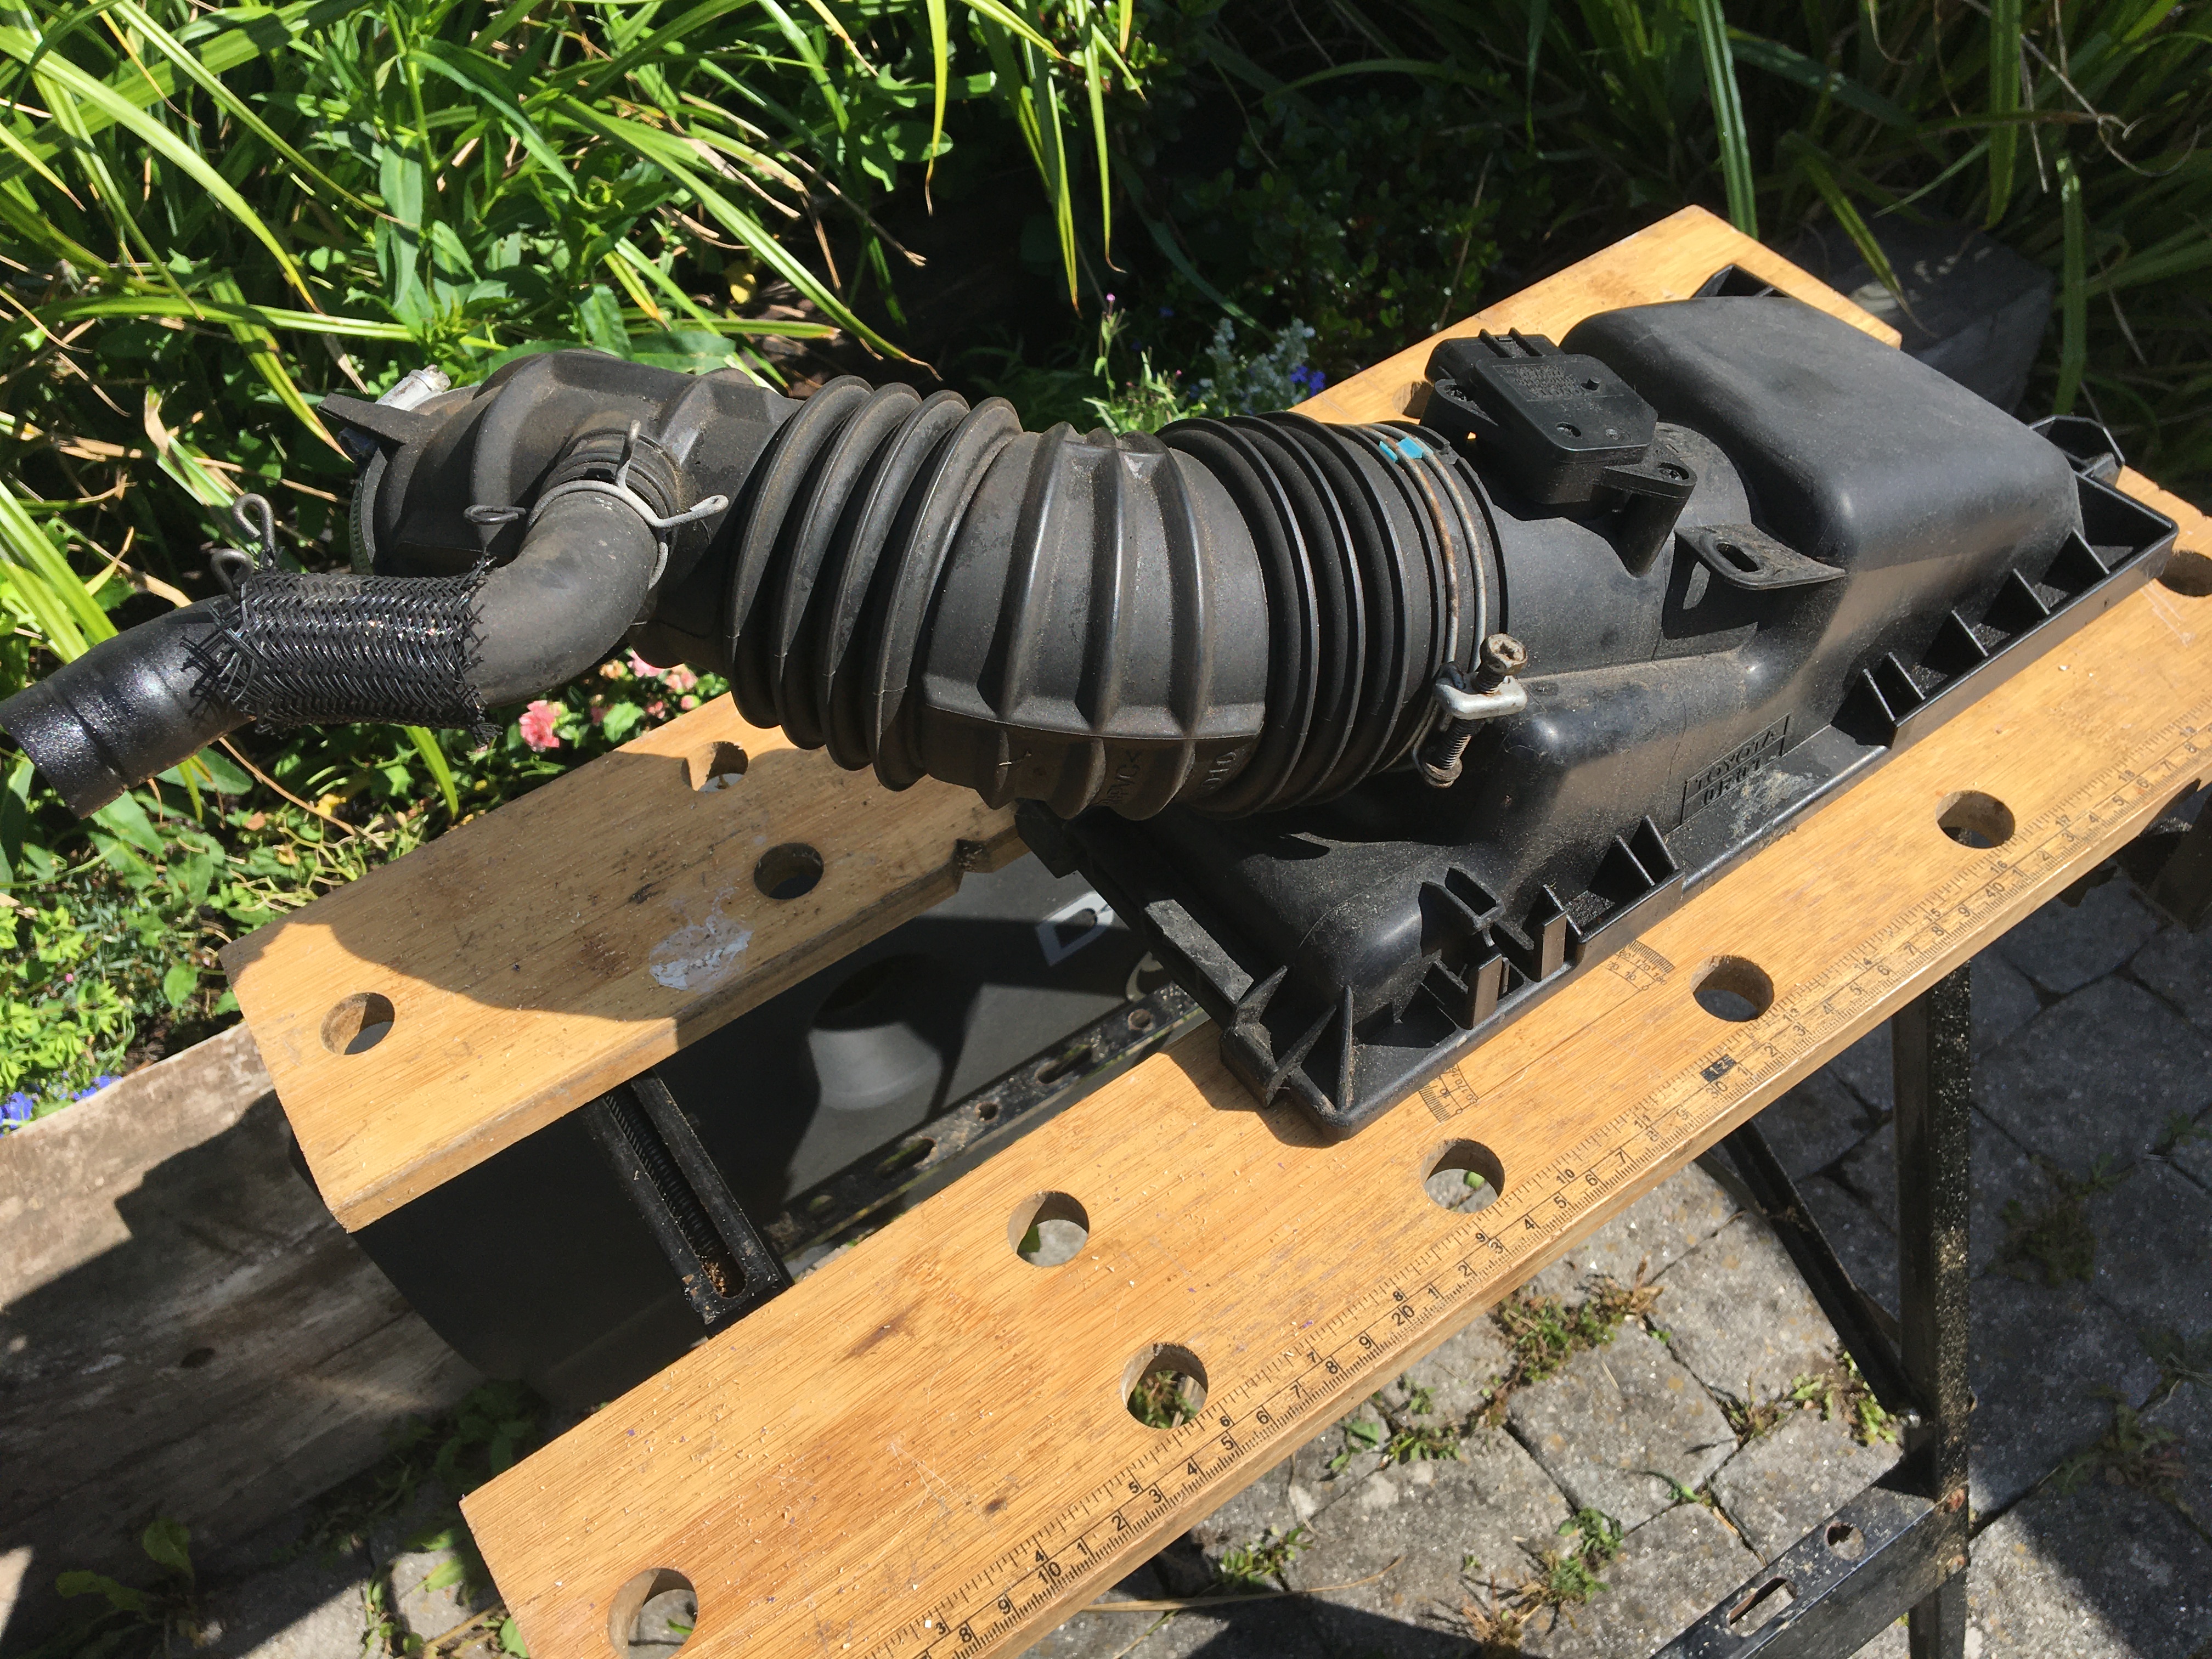
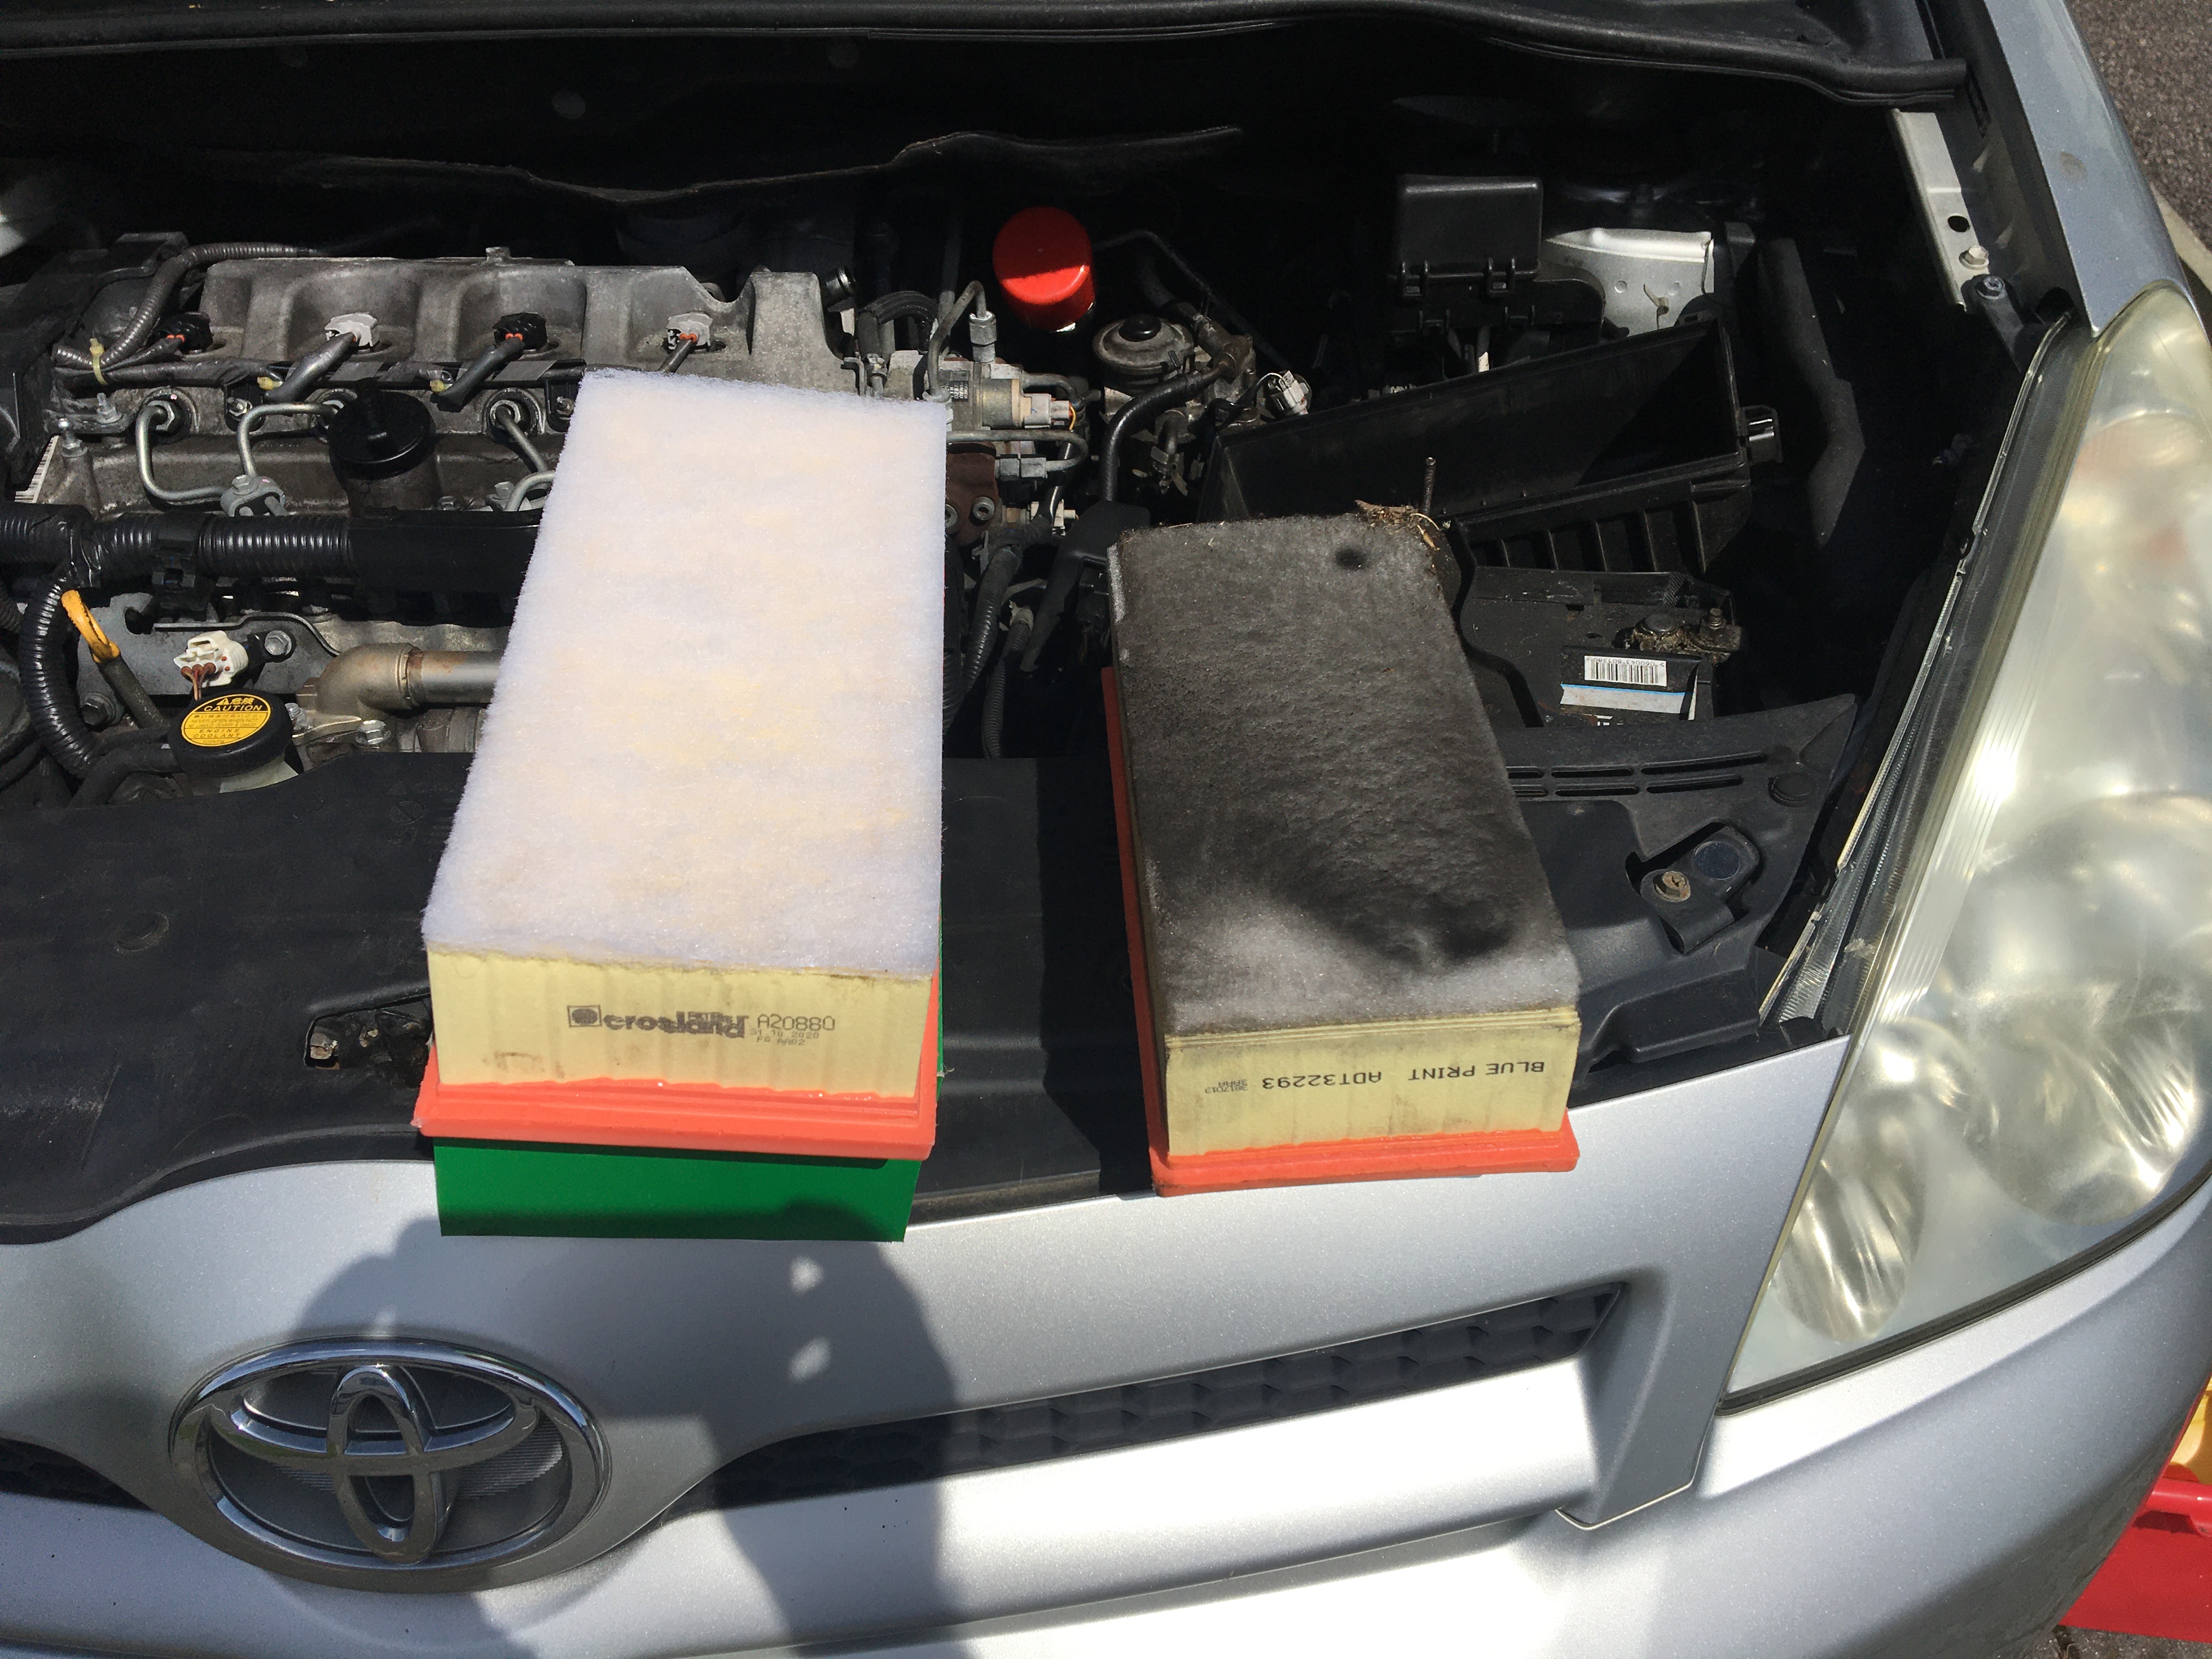
The pictures below are of my DIY annual service of our family car. Engine Oil, Oil Filter, Fuel Filter and Air Filter;
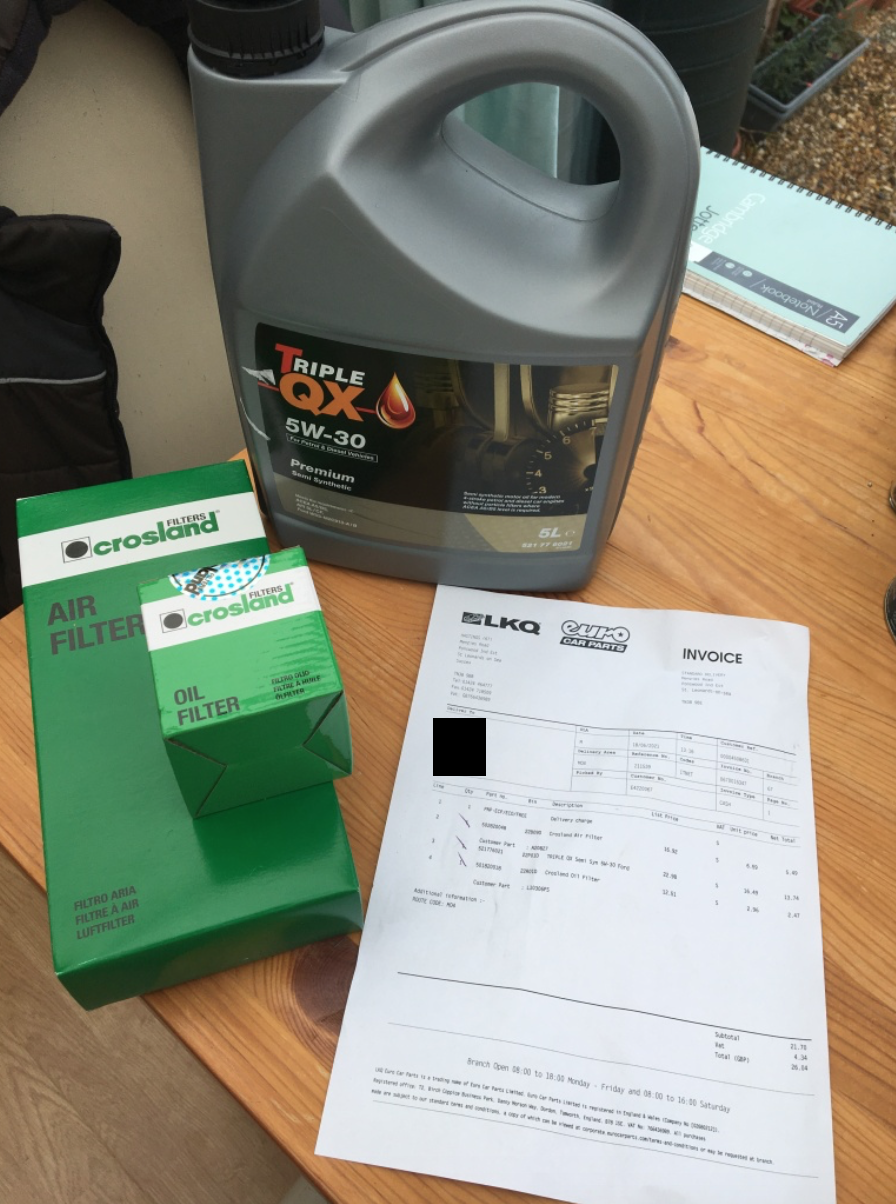
Oil Filter HousingFuel Filter is under there somewhere …… Get this fella out of the way and …… There it is, disconnect a few pipes and electrics and …… the fuel filter housing is out, now to strip it down… drain the remaining fuel, in this case diesel …Remove the water warning float …Remove the filter cartridgeInside the old filter fitted for less than a year … compared to the new filter internalAll re-assembled and ready to refit… And of course while I was there I replaced the Air Filter, again slightly less than one year old!Cost of parts £26.04 (Local Garage Quoted £140.00) Mindful value, sense of achievement and job satisfaction = £Priceless 🙂
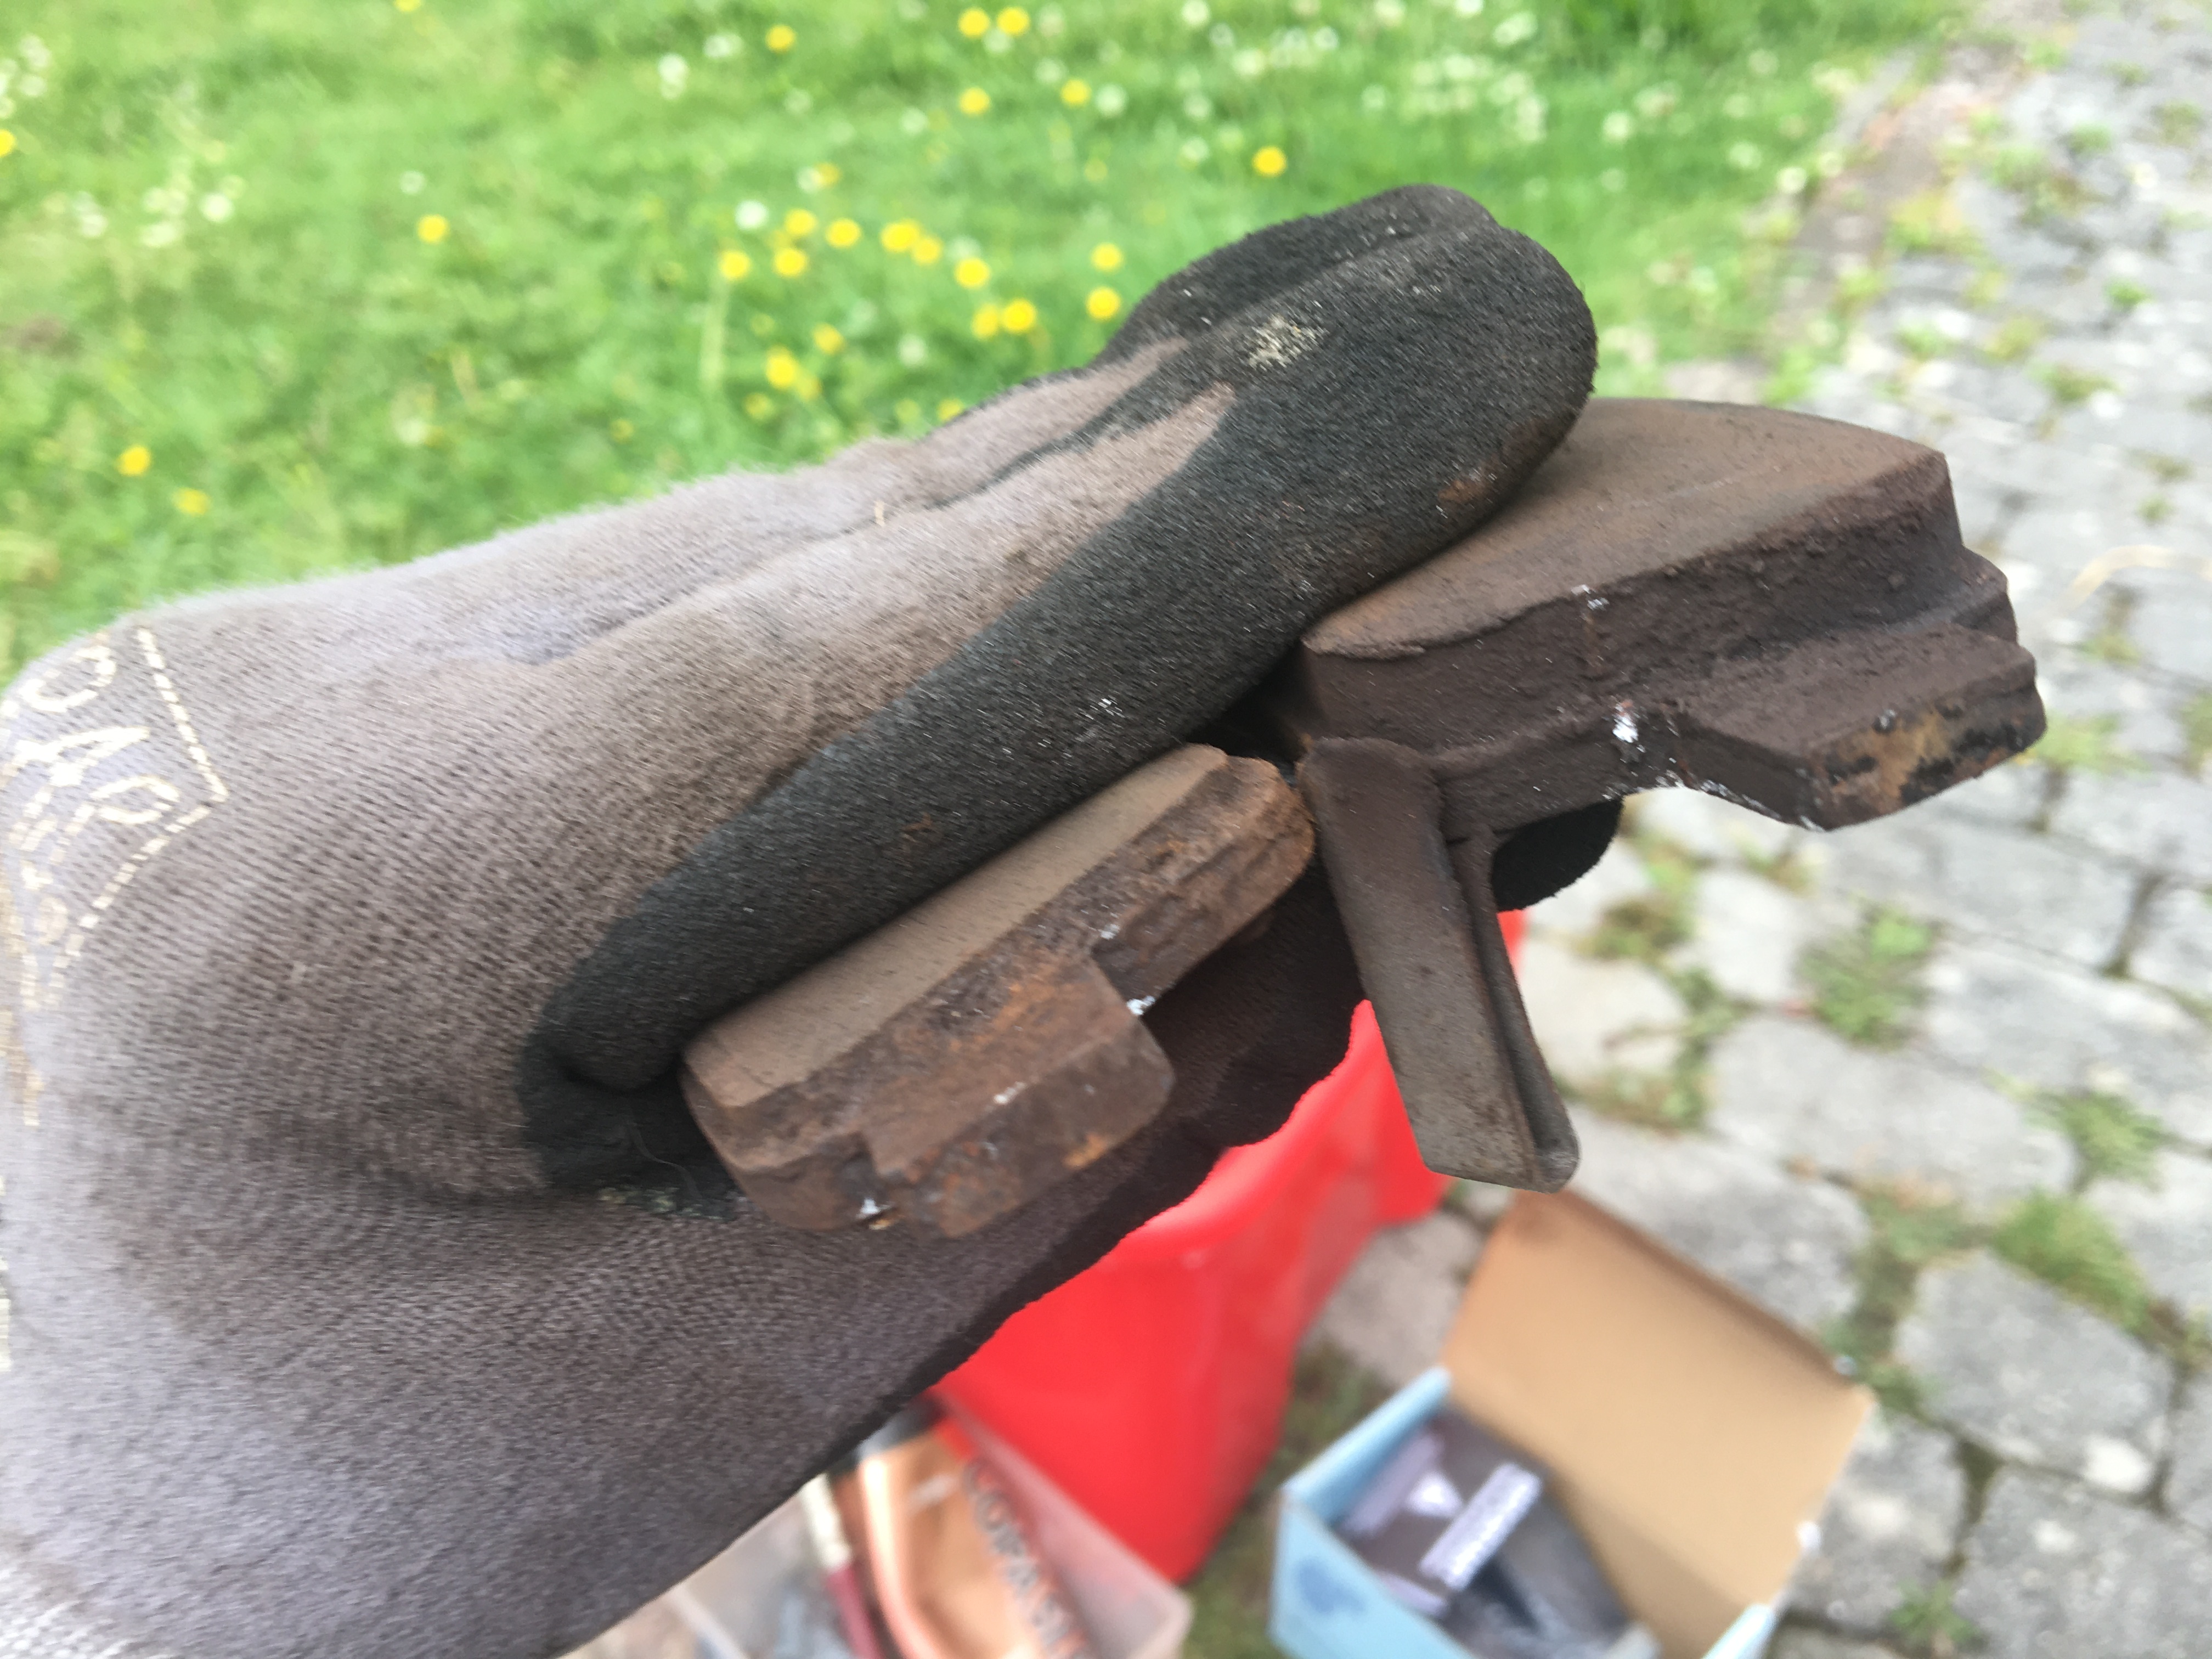
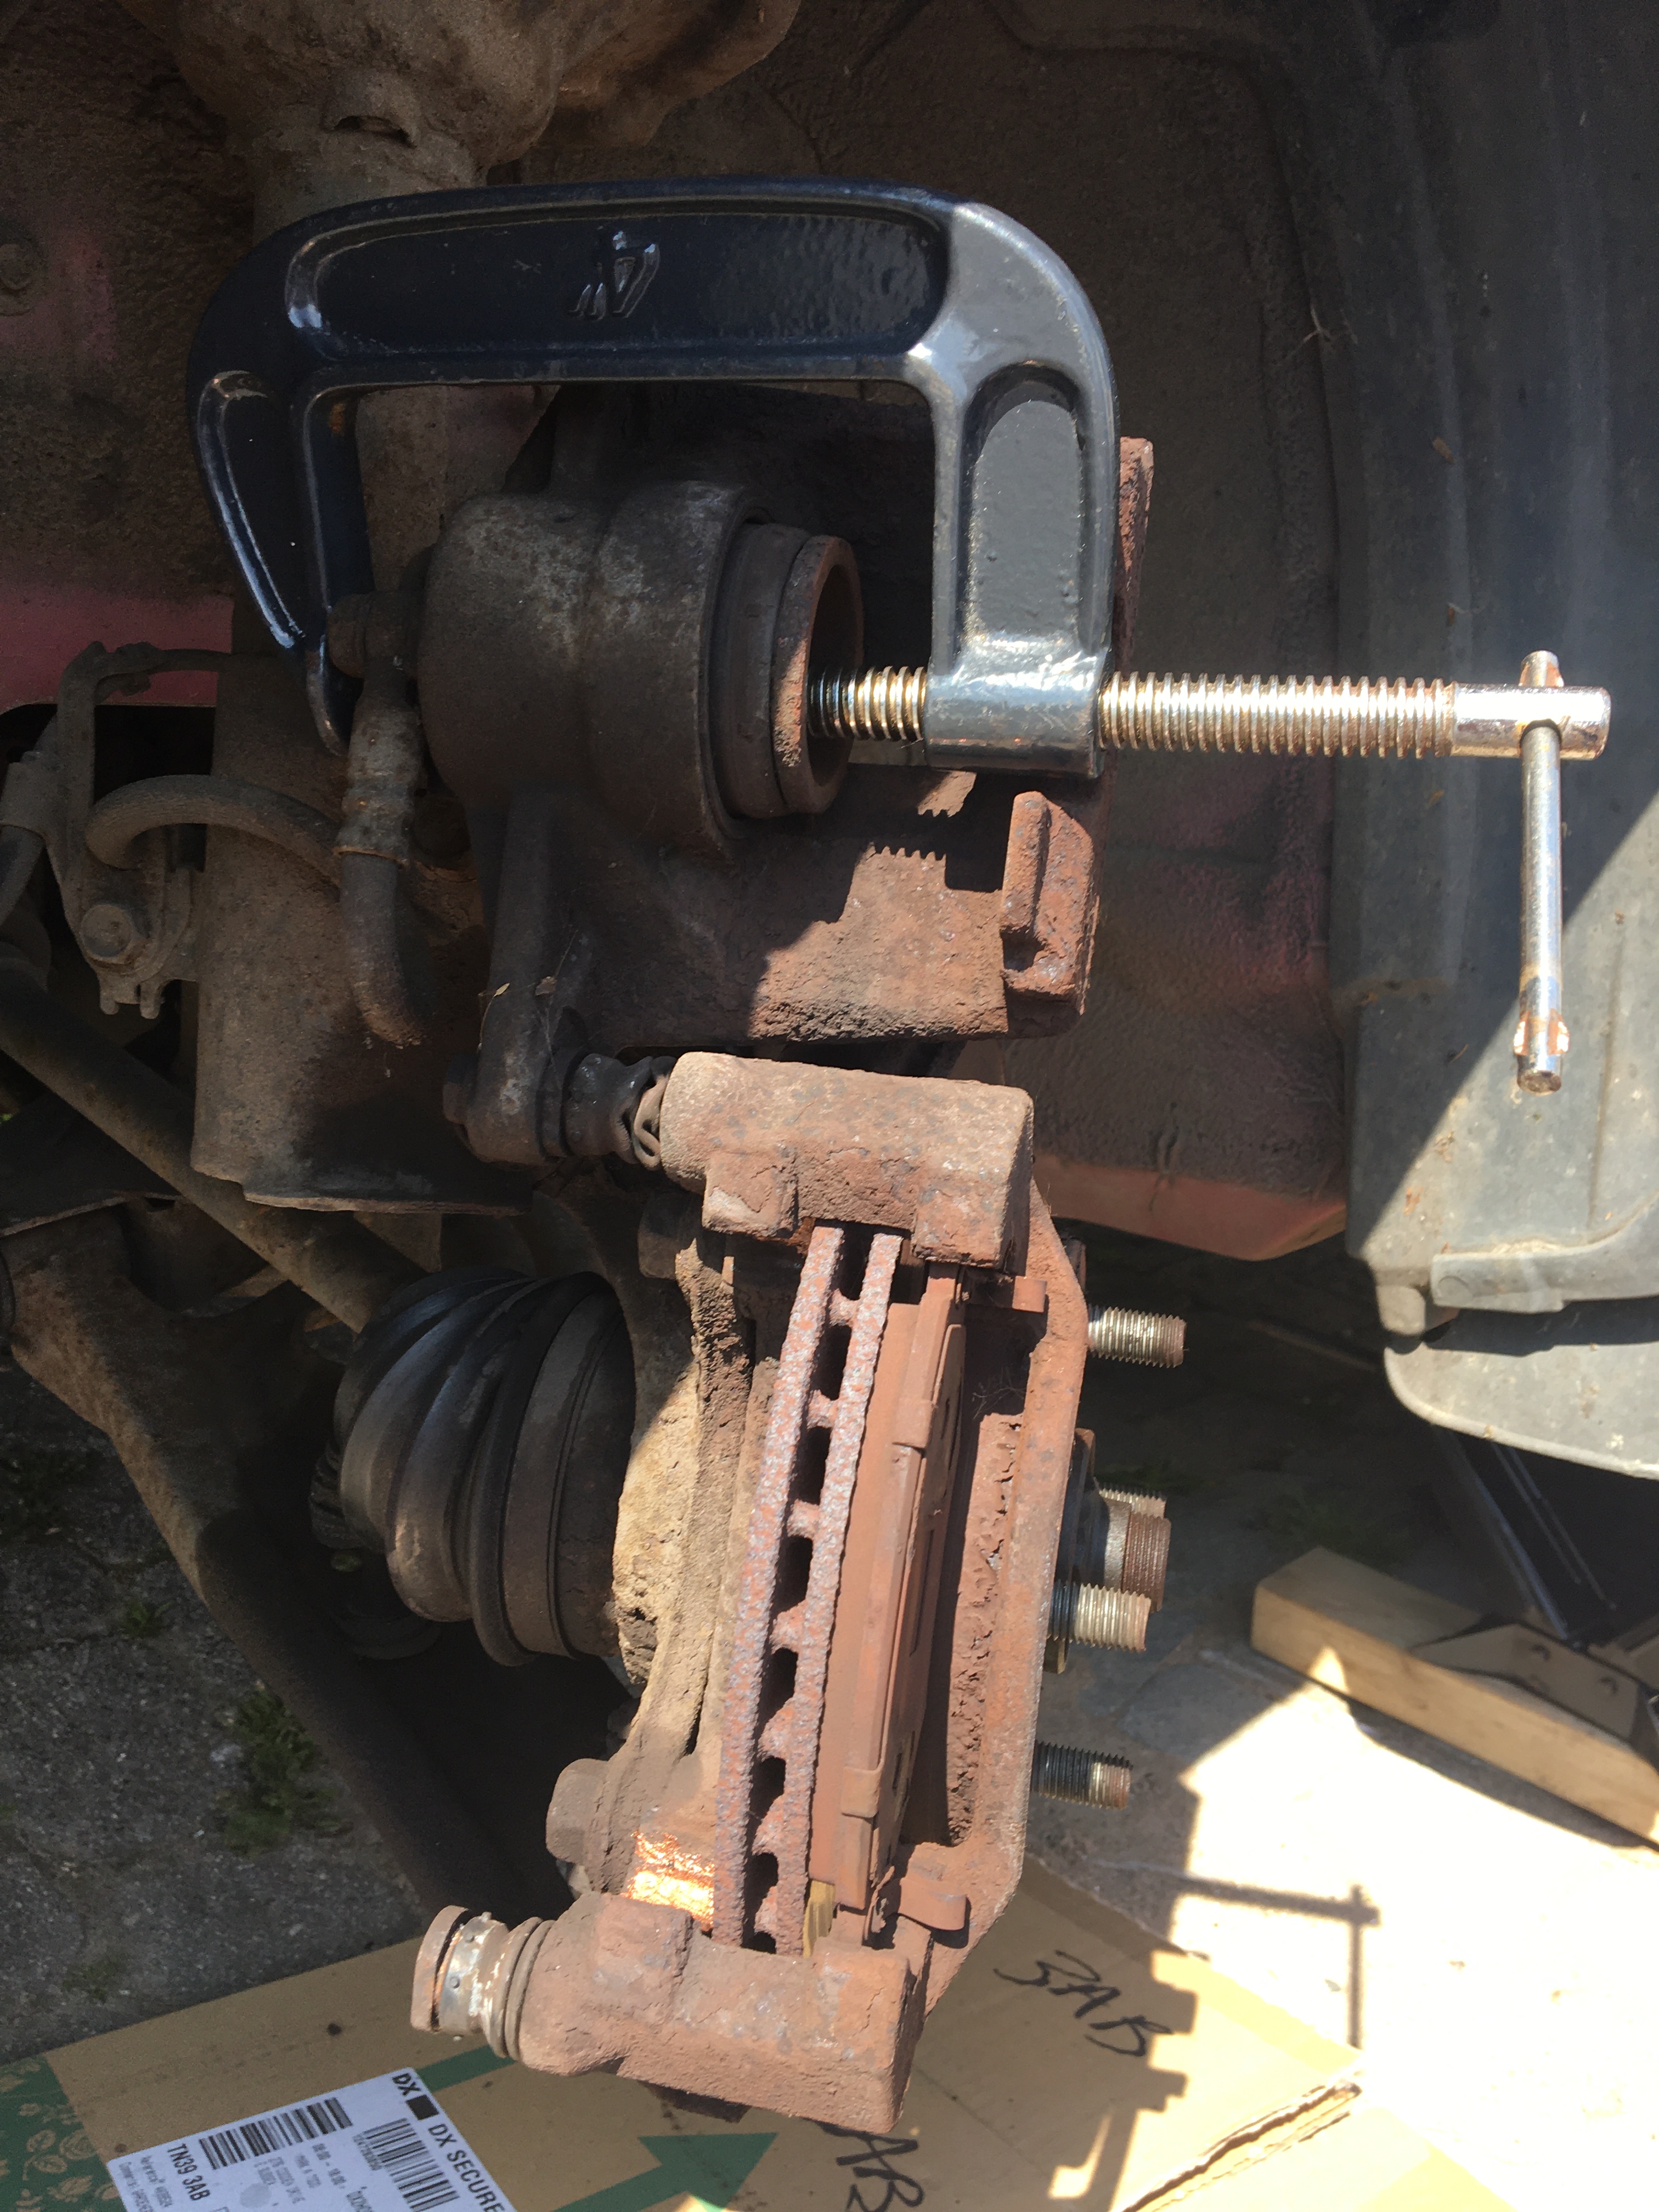
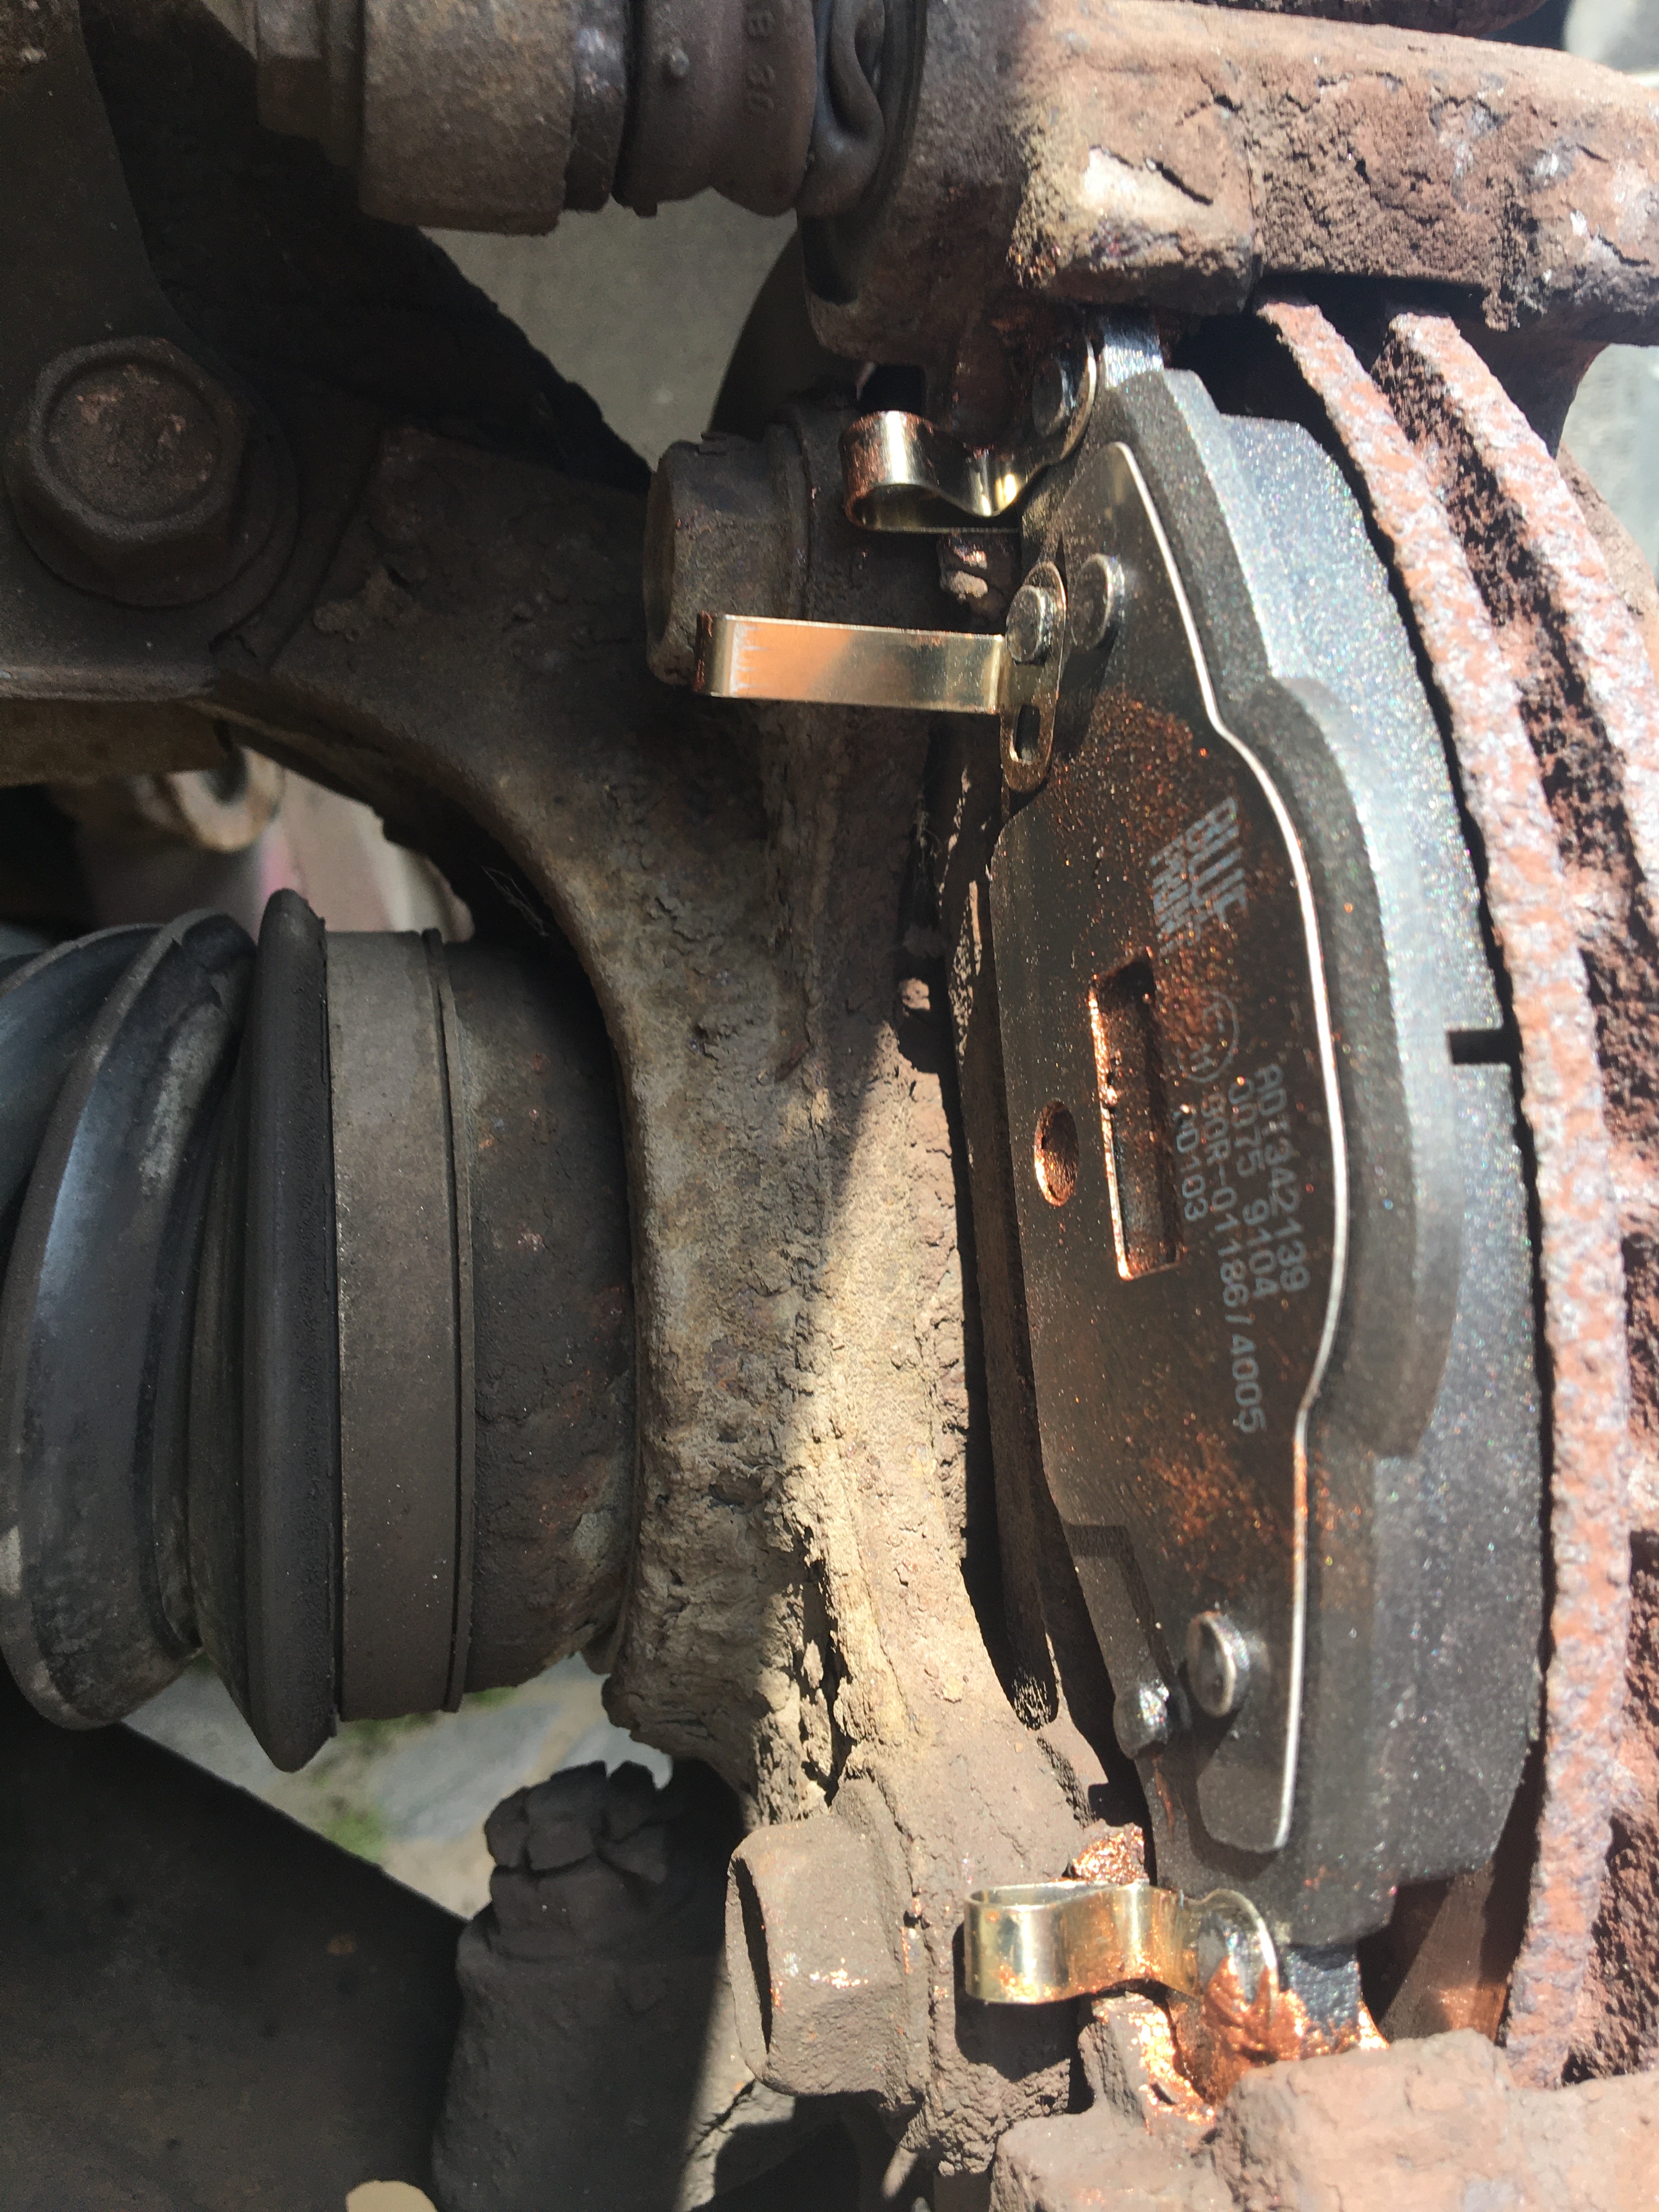
Same car as above, Toyota Corolla Verso 2.3 Diesel, inspecting and replacing rear brake pads;
Wheel off, and car well supported …Caliper swung clear, g-clamp used to push piston back ready for new thicker pads …Old pad (left) against new pad showing ‘tell tale’ wear indicator spring strip calliper/pads sliding surfaces thoroughly cleaned and lightly coated with ‘copper slip’ compound, new pads installed.
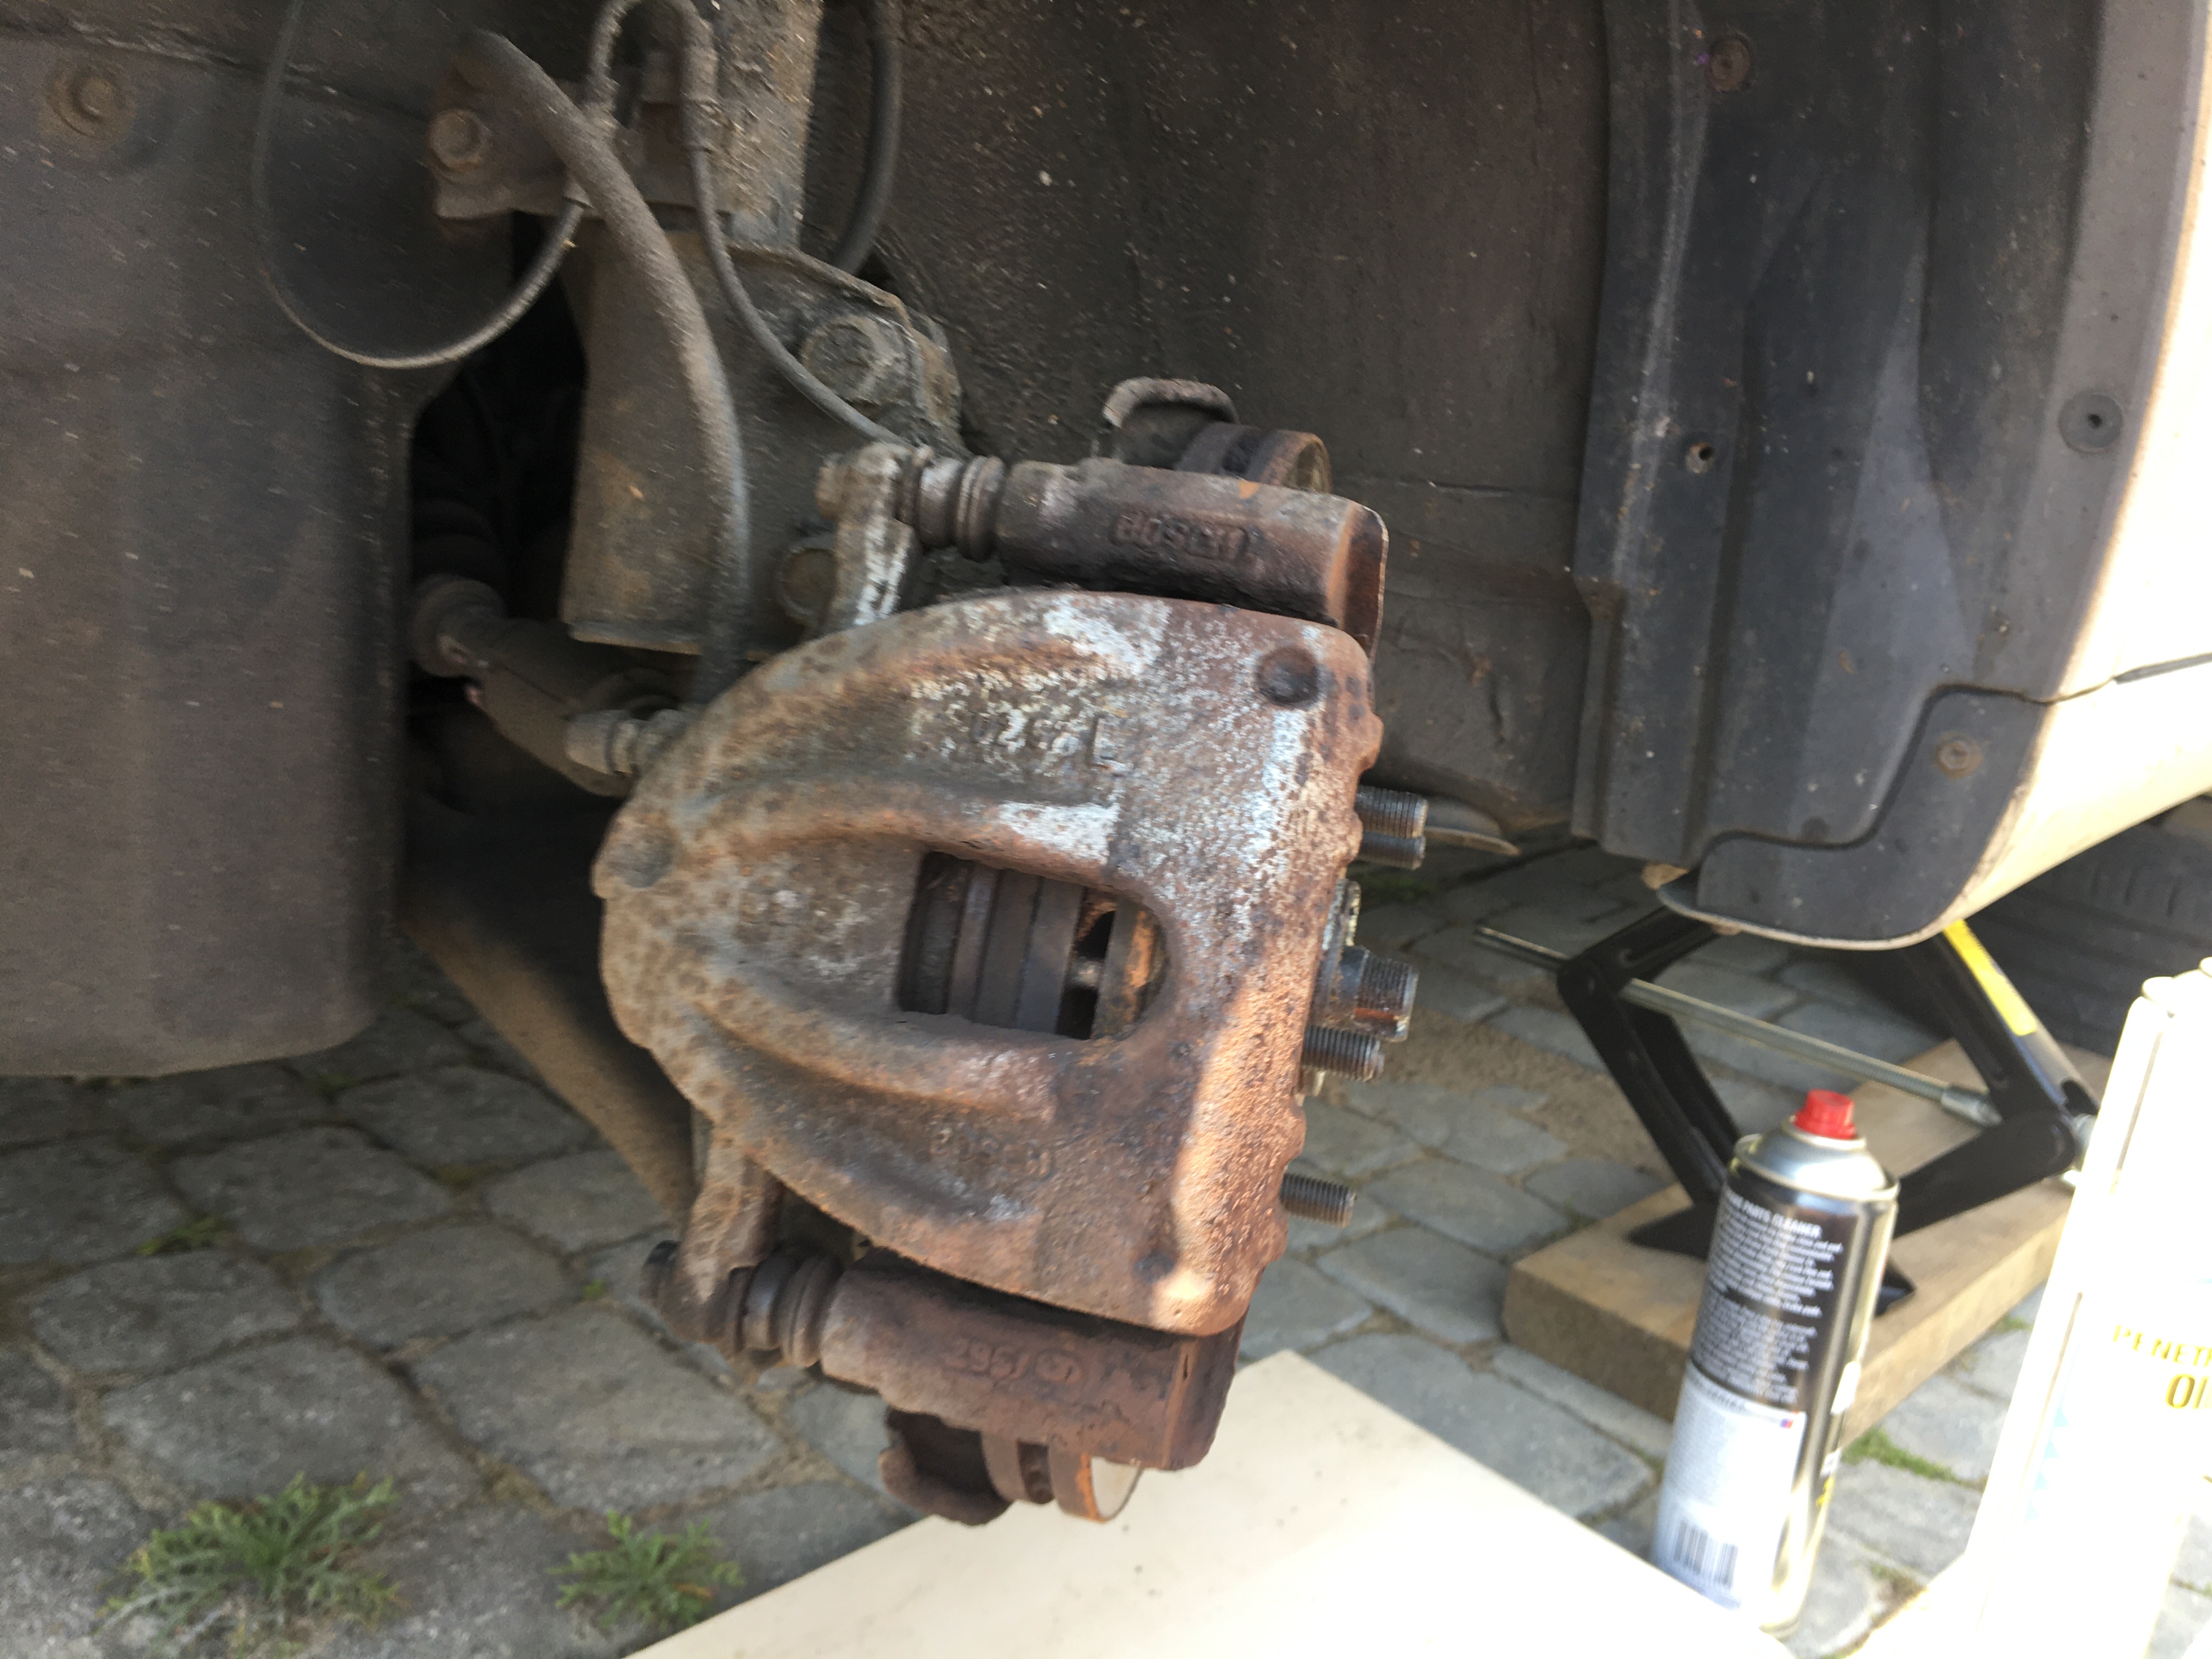
Same car front brake pad replacement;
Car jacked, wheel off and steering turned full lock for easier access to calliper …Calliper swung clear and trusty g-clamp used to push piston back … New pad installed on driveshaft side …Both new pads installed in cleaned and ‘copper slipped’ guides
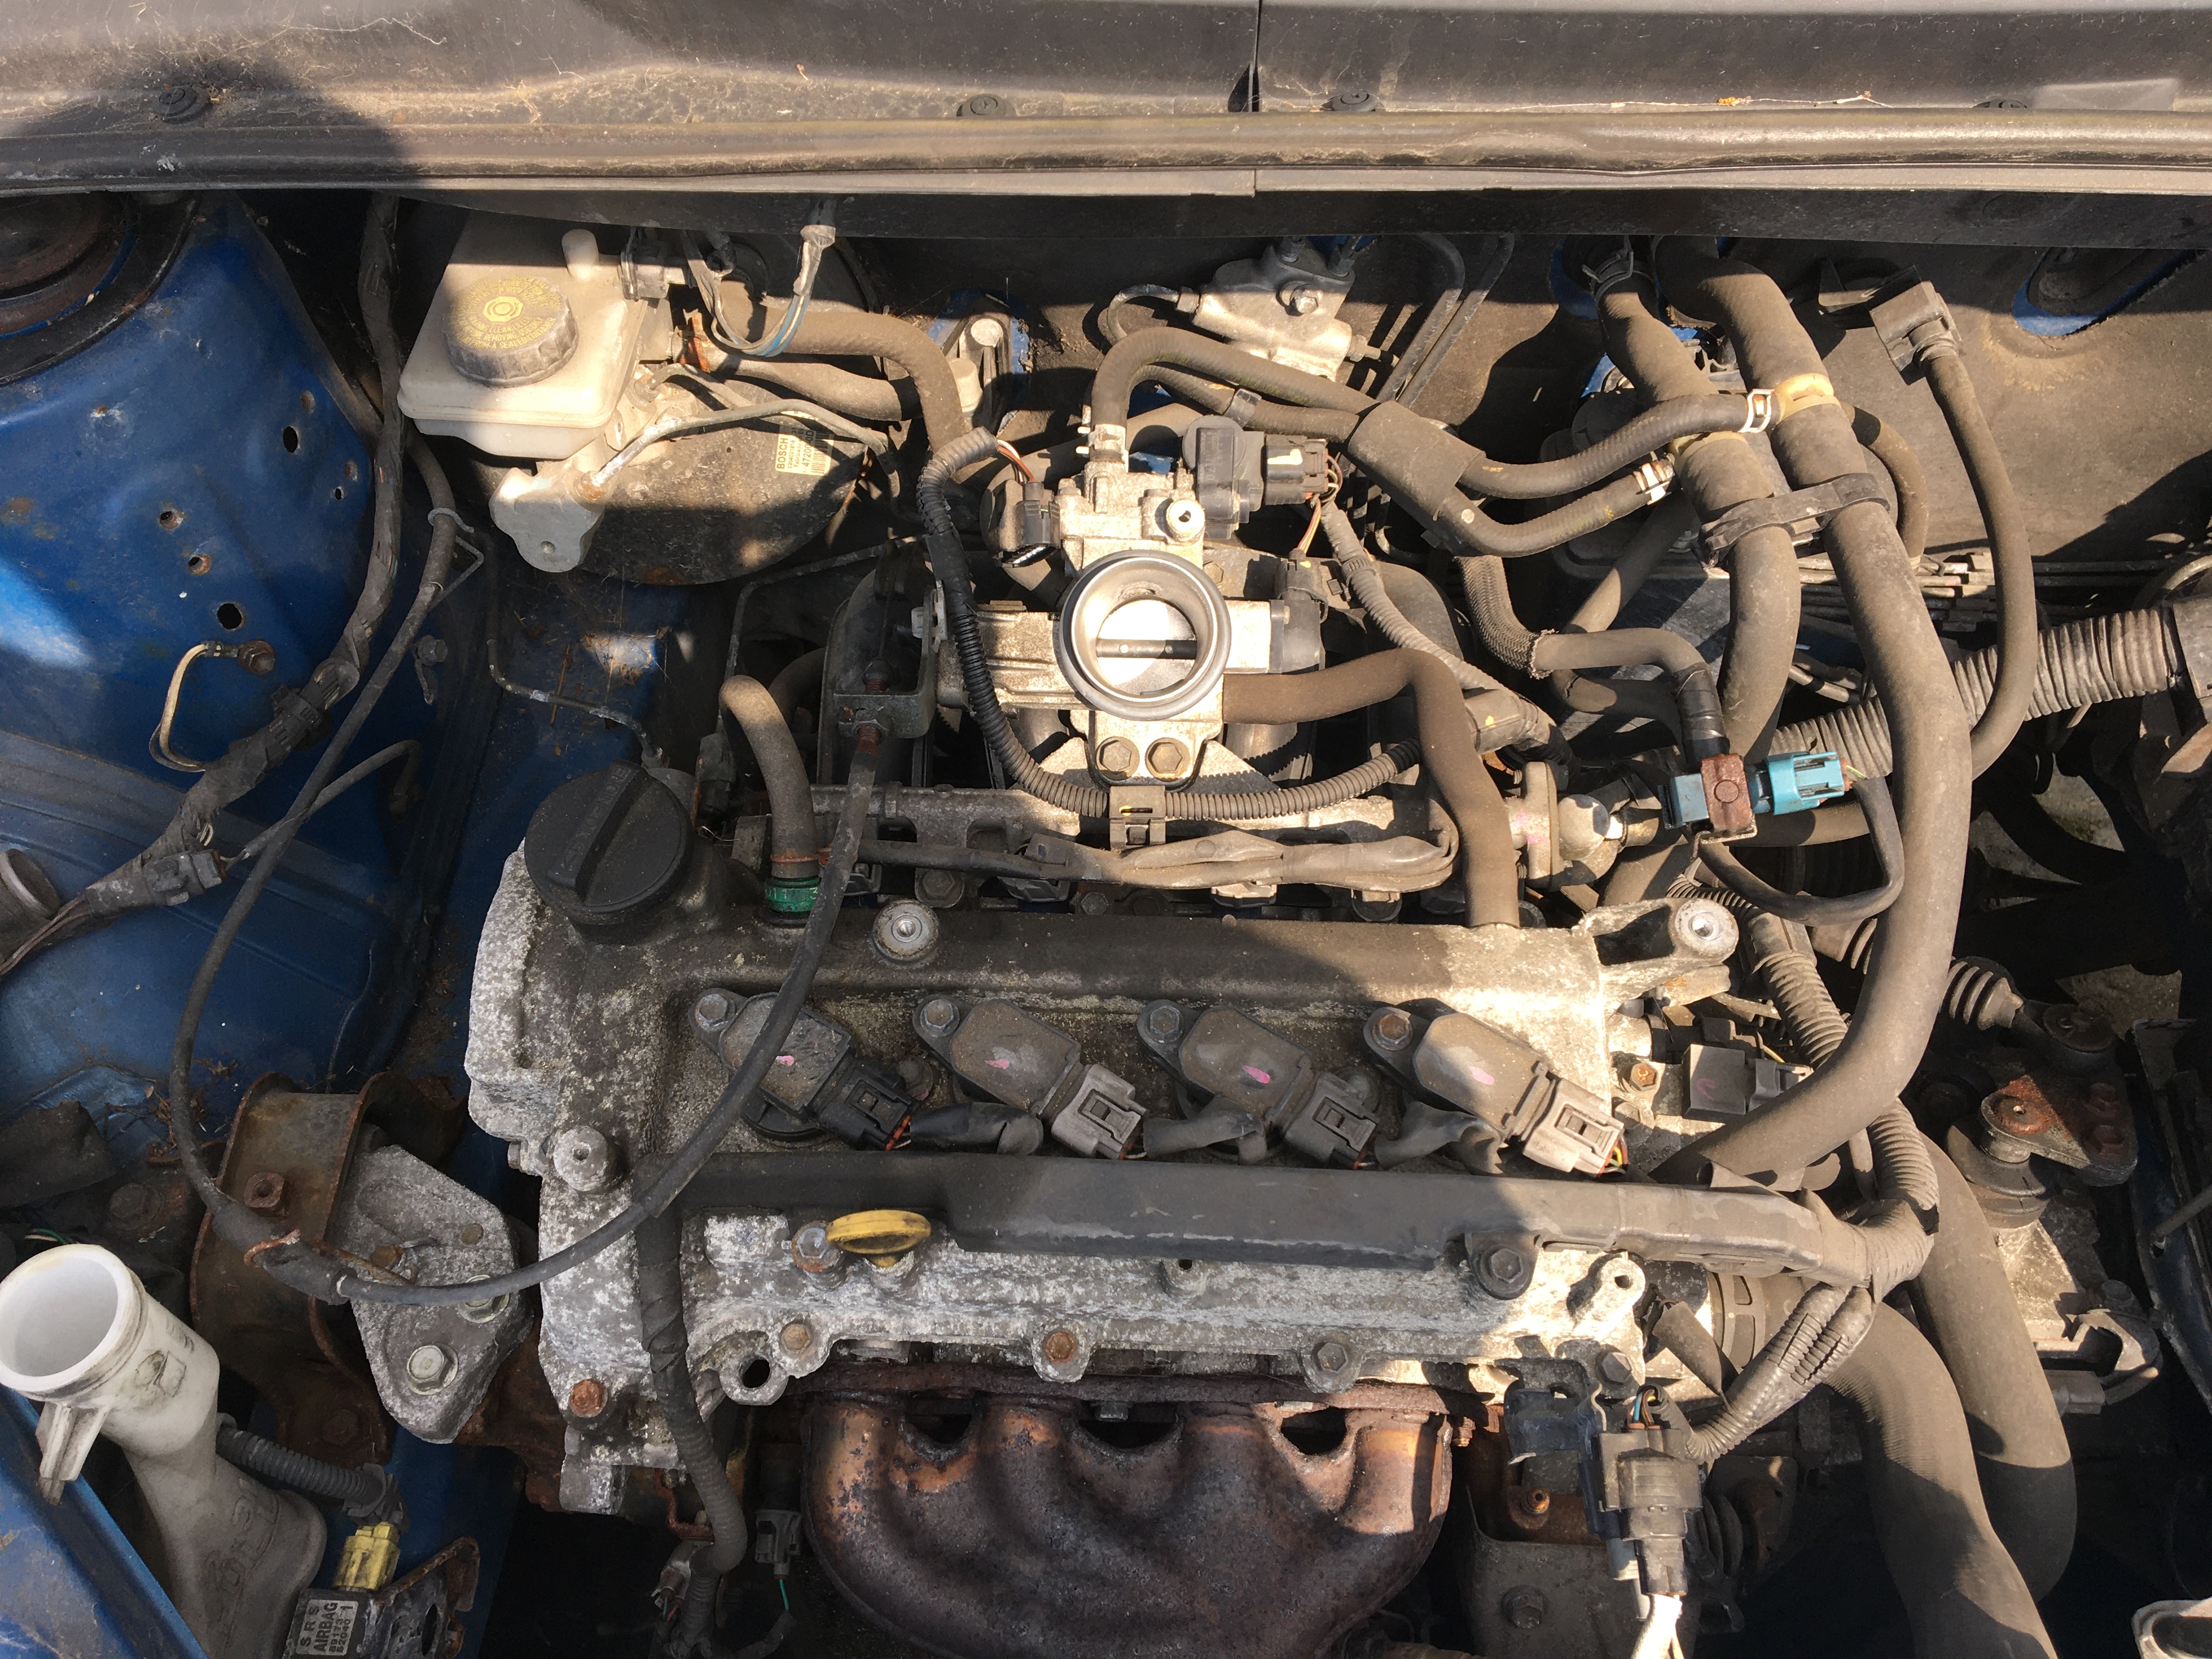
My Daughter’s 2003 Toyota Yaris with over 125,000 miles on the clock developed an idle problem. It would hunt and stall at tickover, in traffic, at traffic lights etc. Perfectly fine starting and driving, but at idle something wasn’t right.
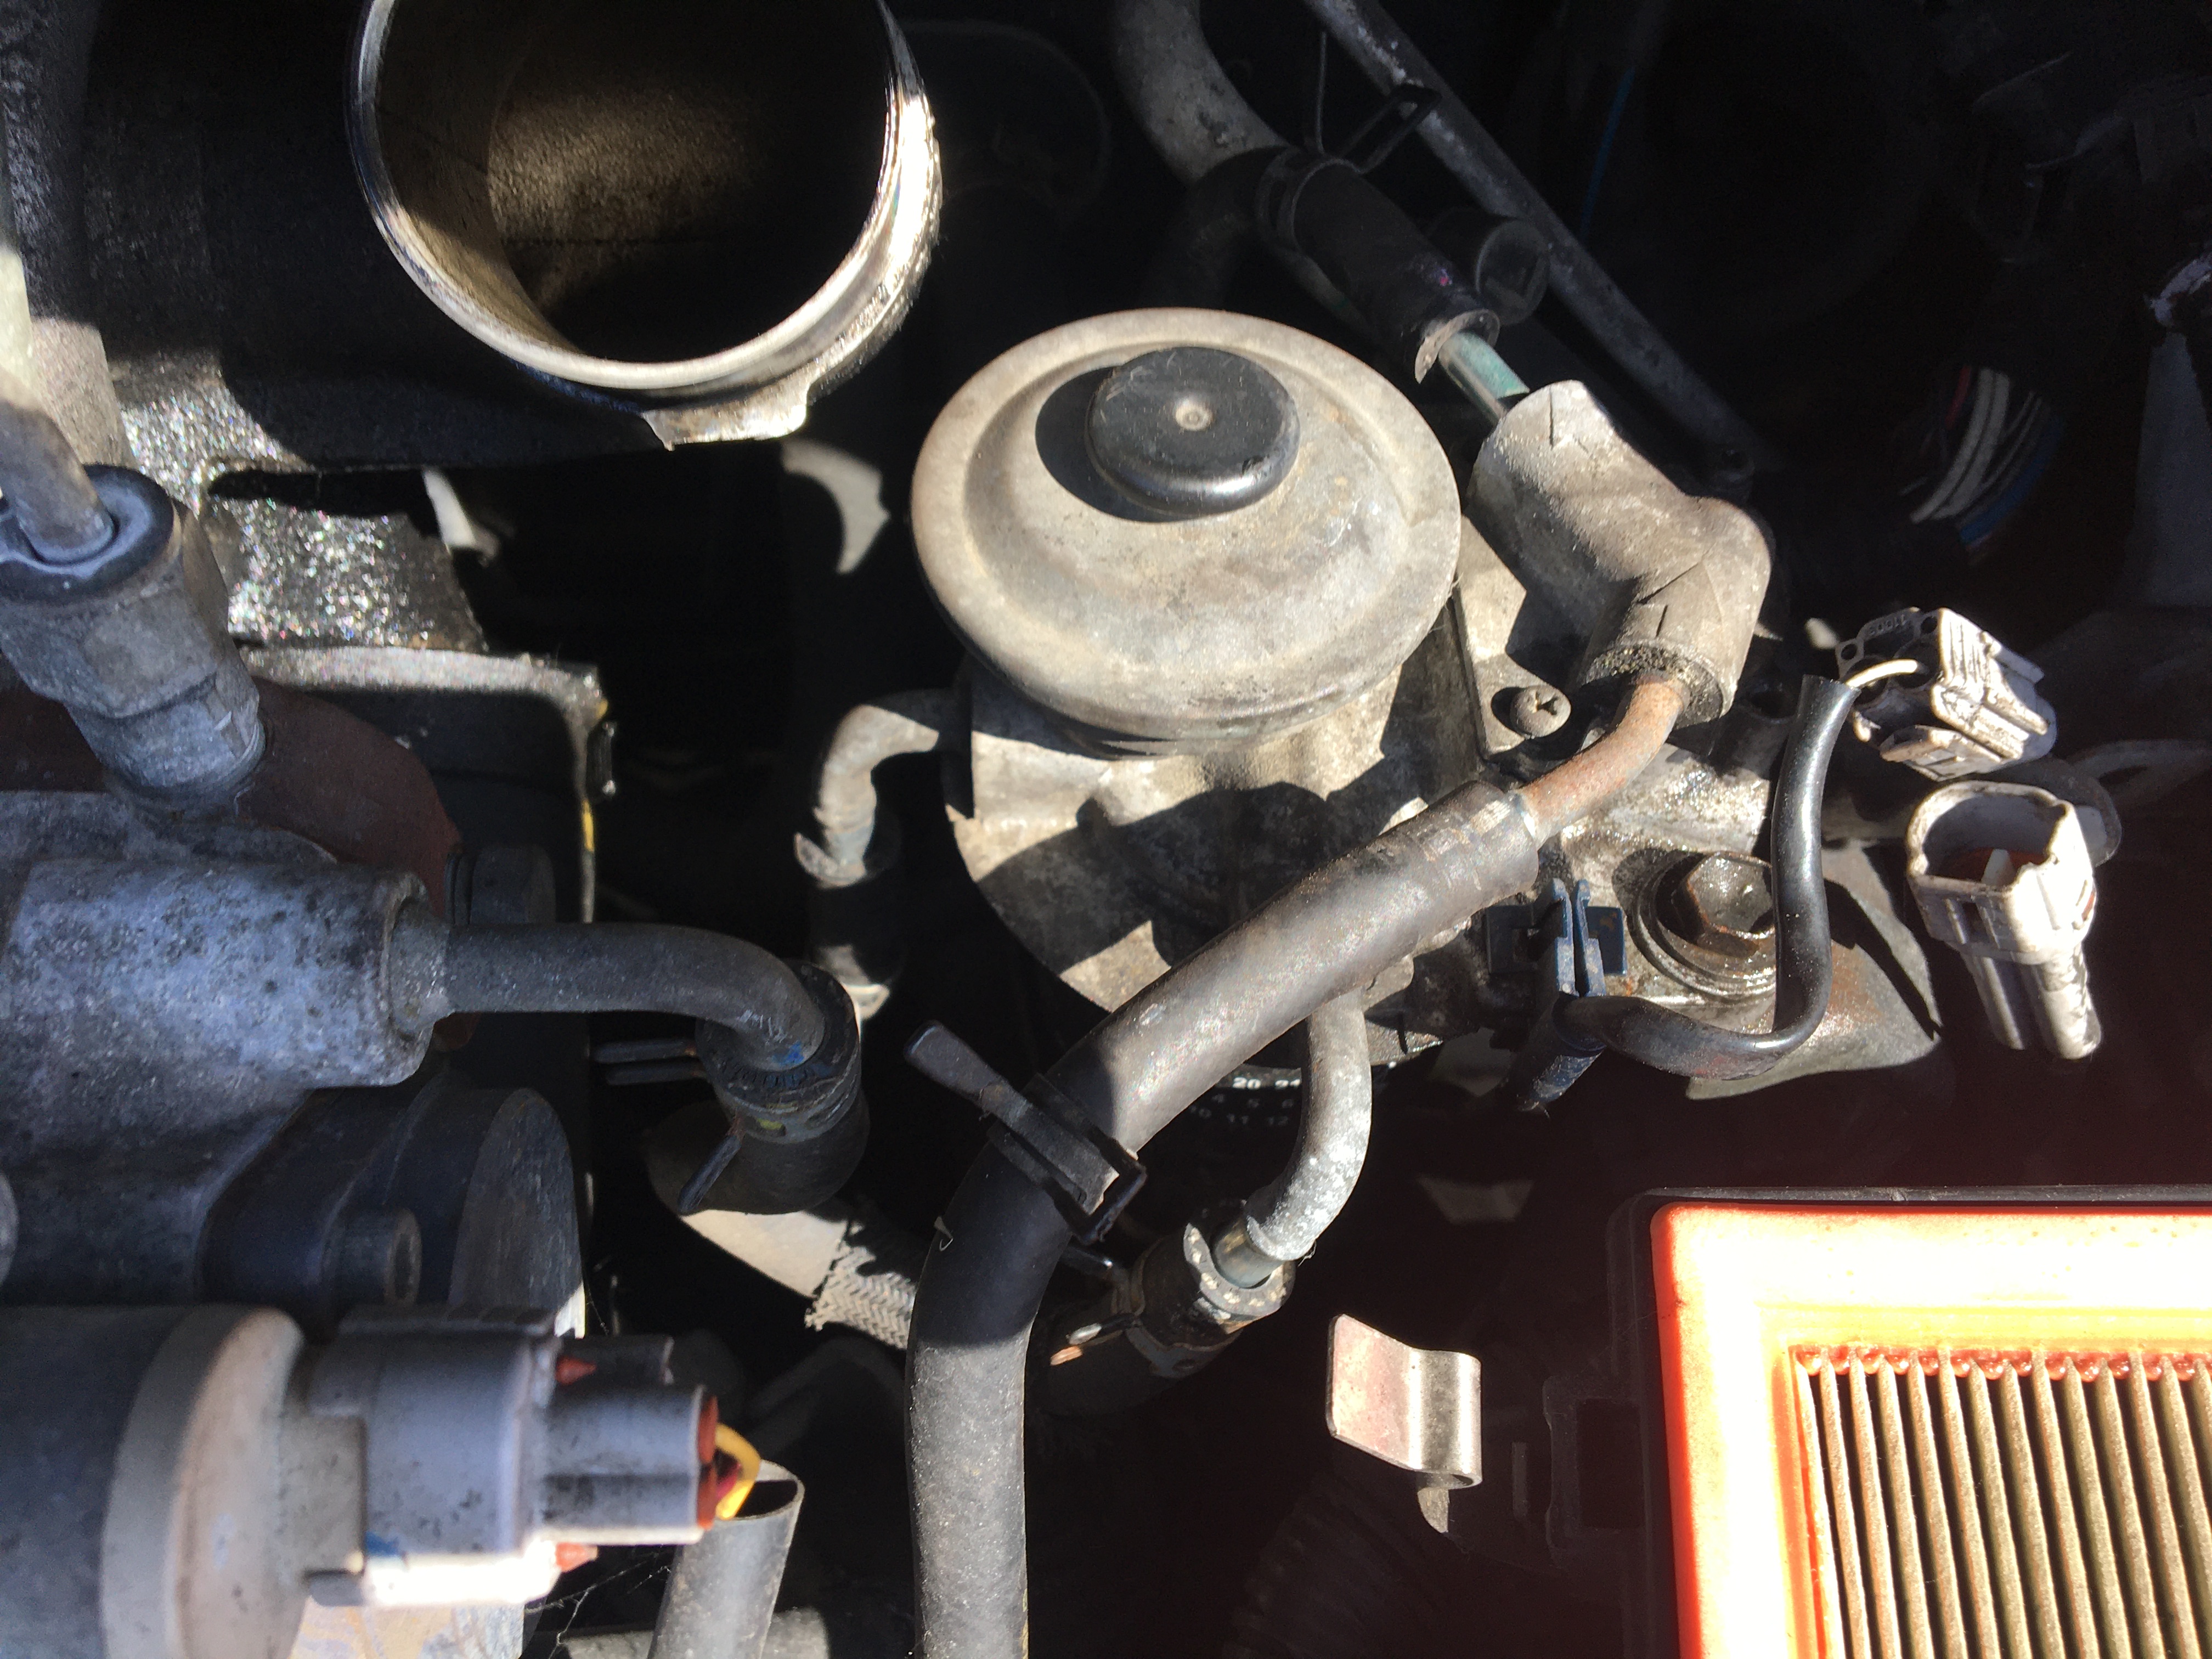
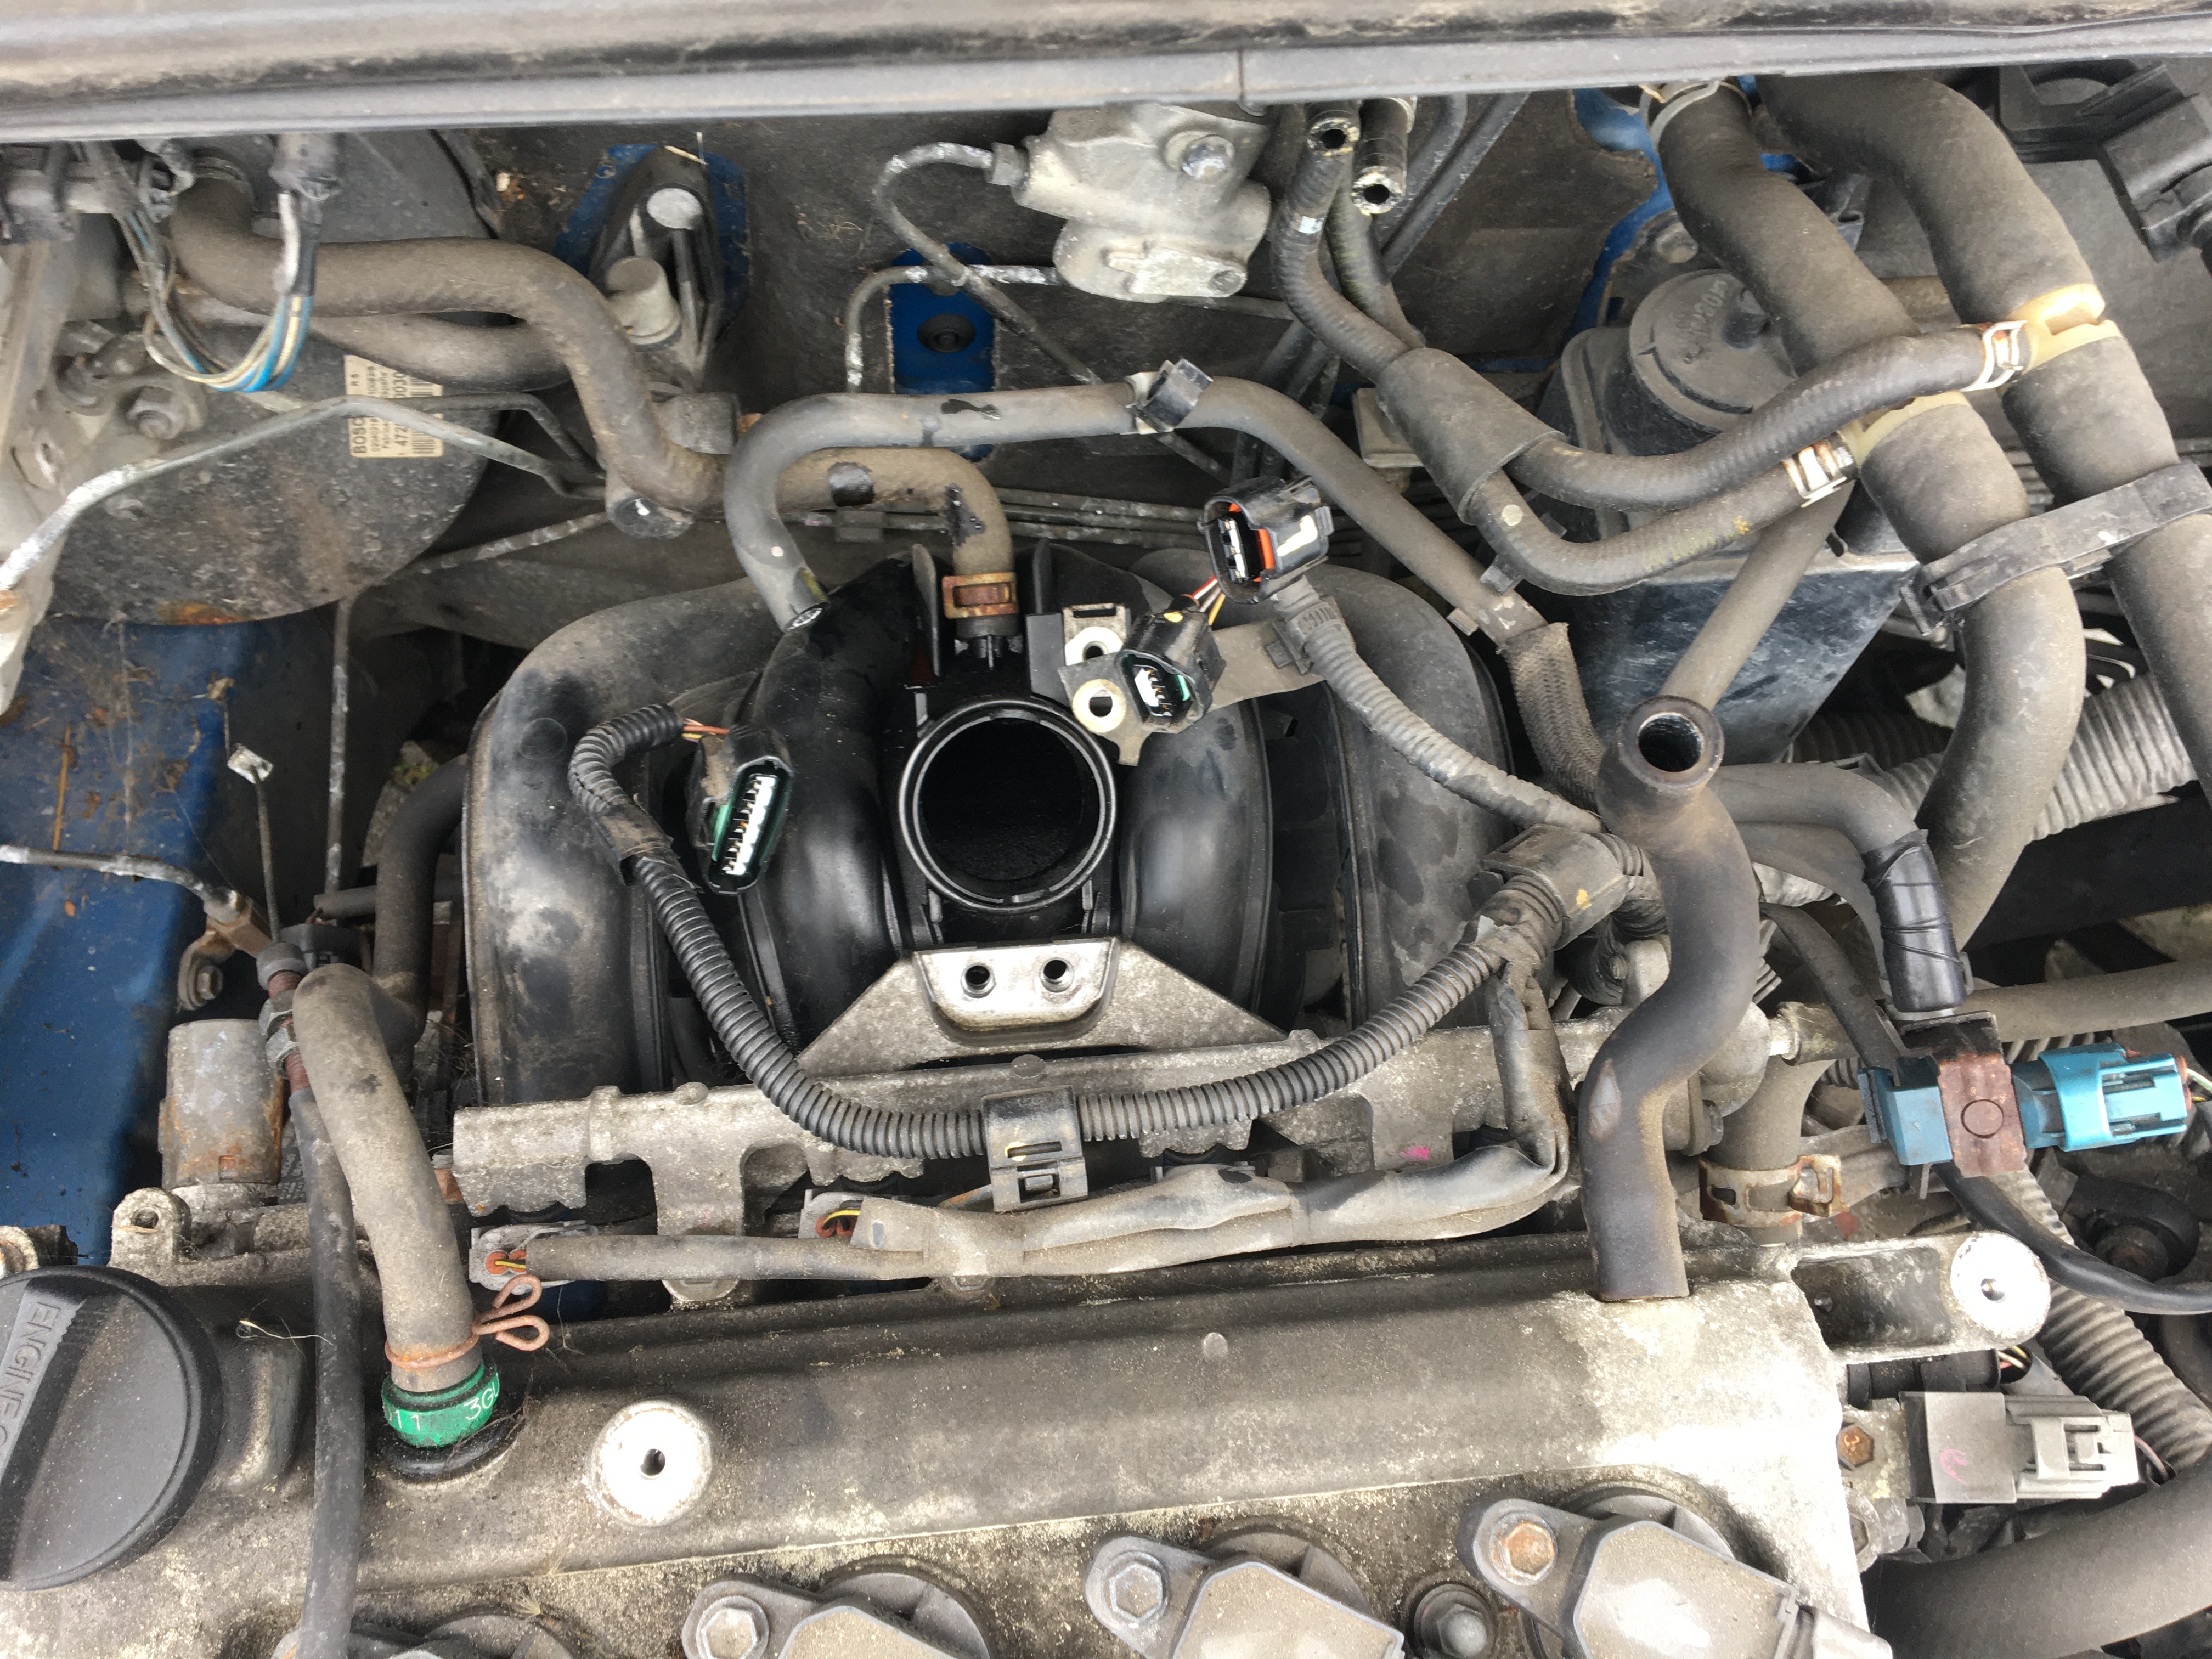
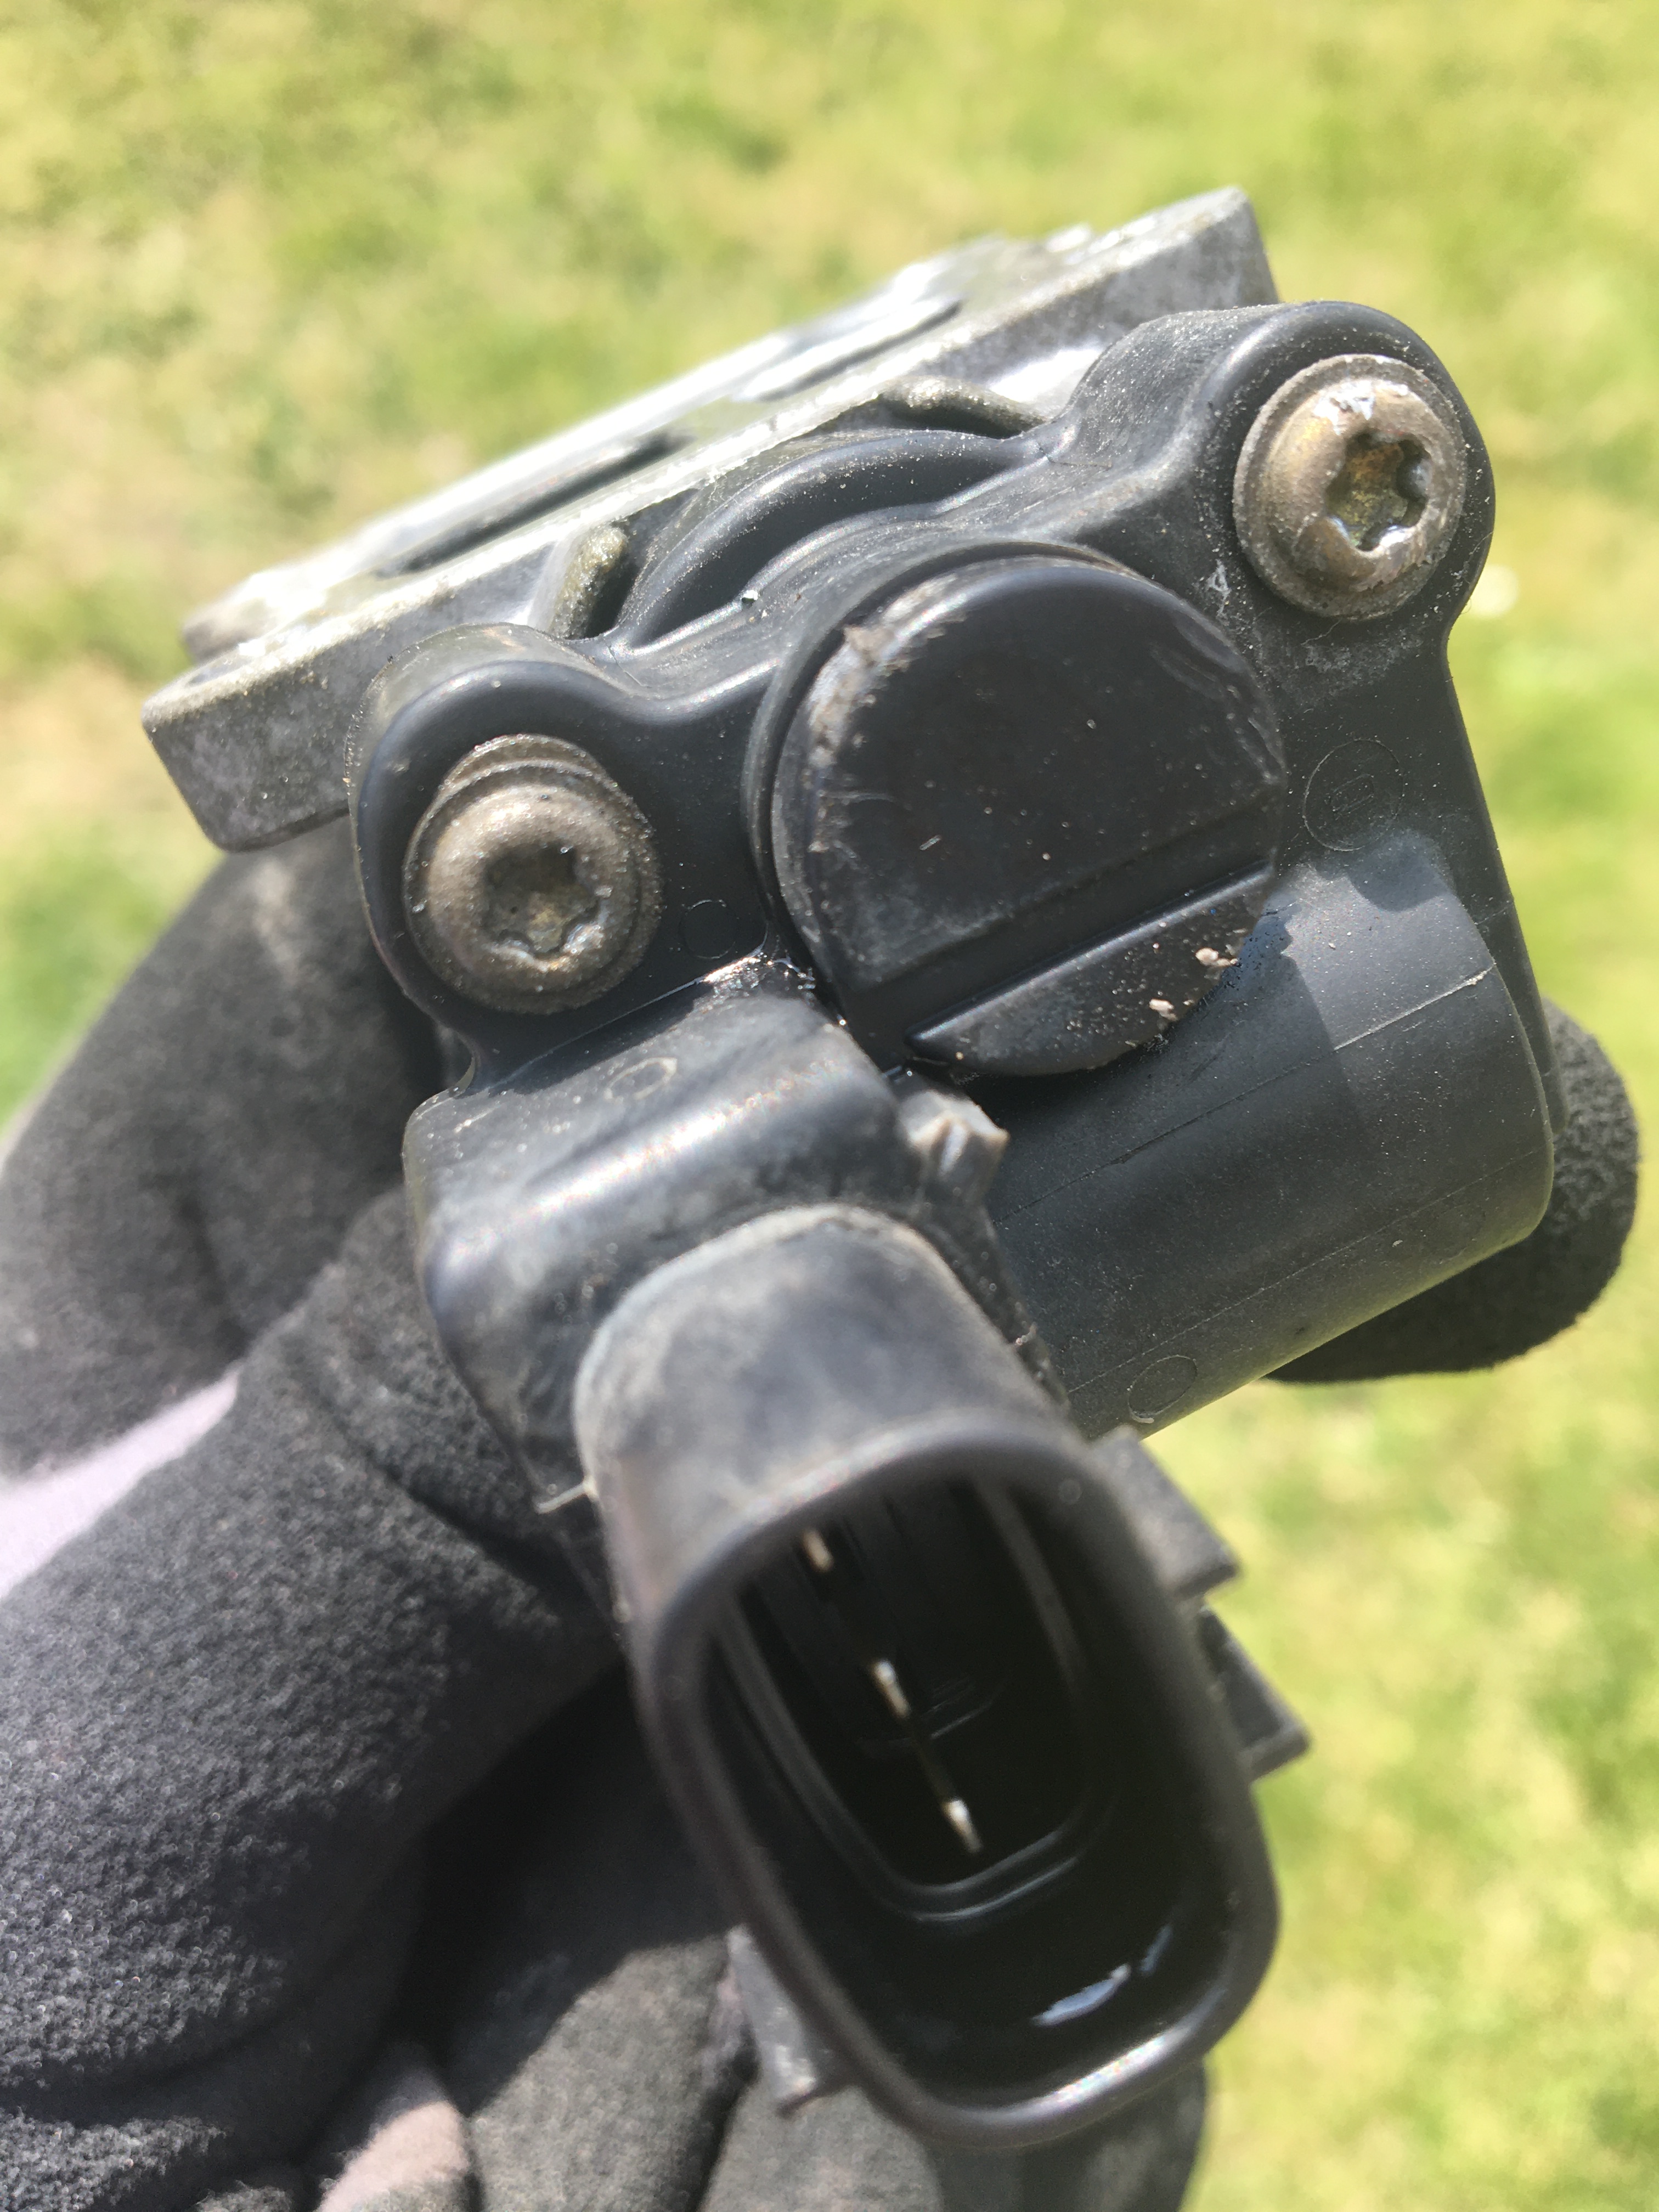
So I ‘Googled’ and searched YouTube and it seemed (as it often does) that this is a common problem that many makes and models of petrol engine cars of a certain age suffer from. And the culprit is the ‘Idle Control Valve’ located in the ‘Throttle Body’ … so I went in search and found the little devil;
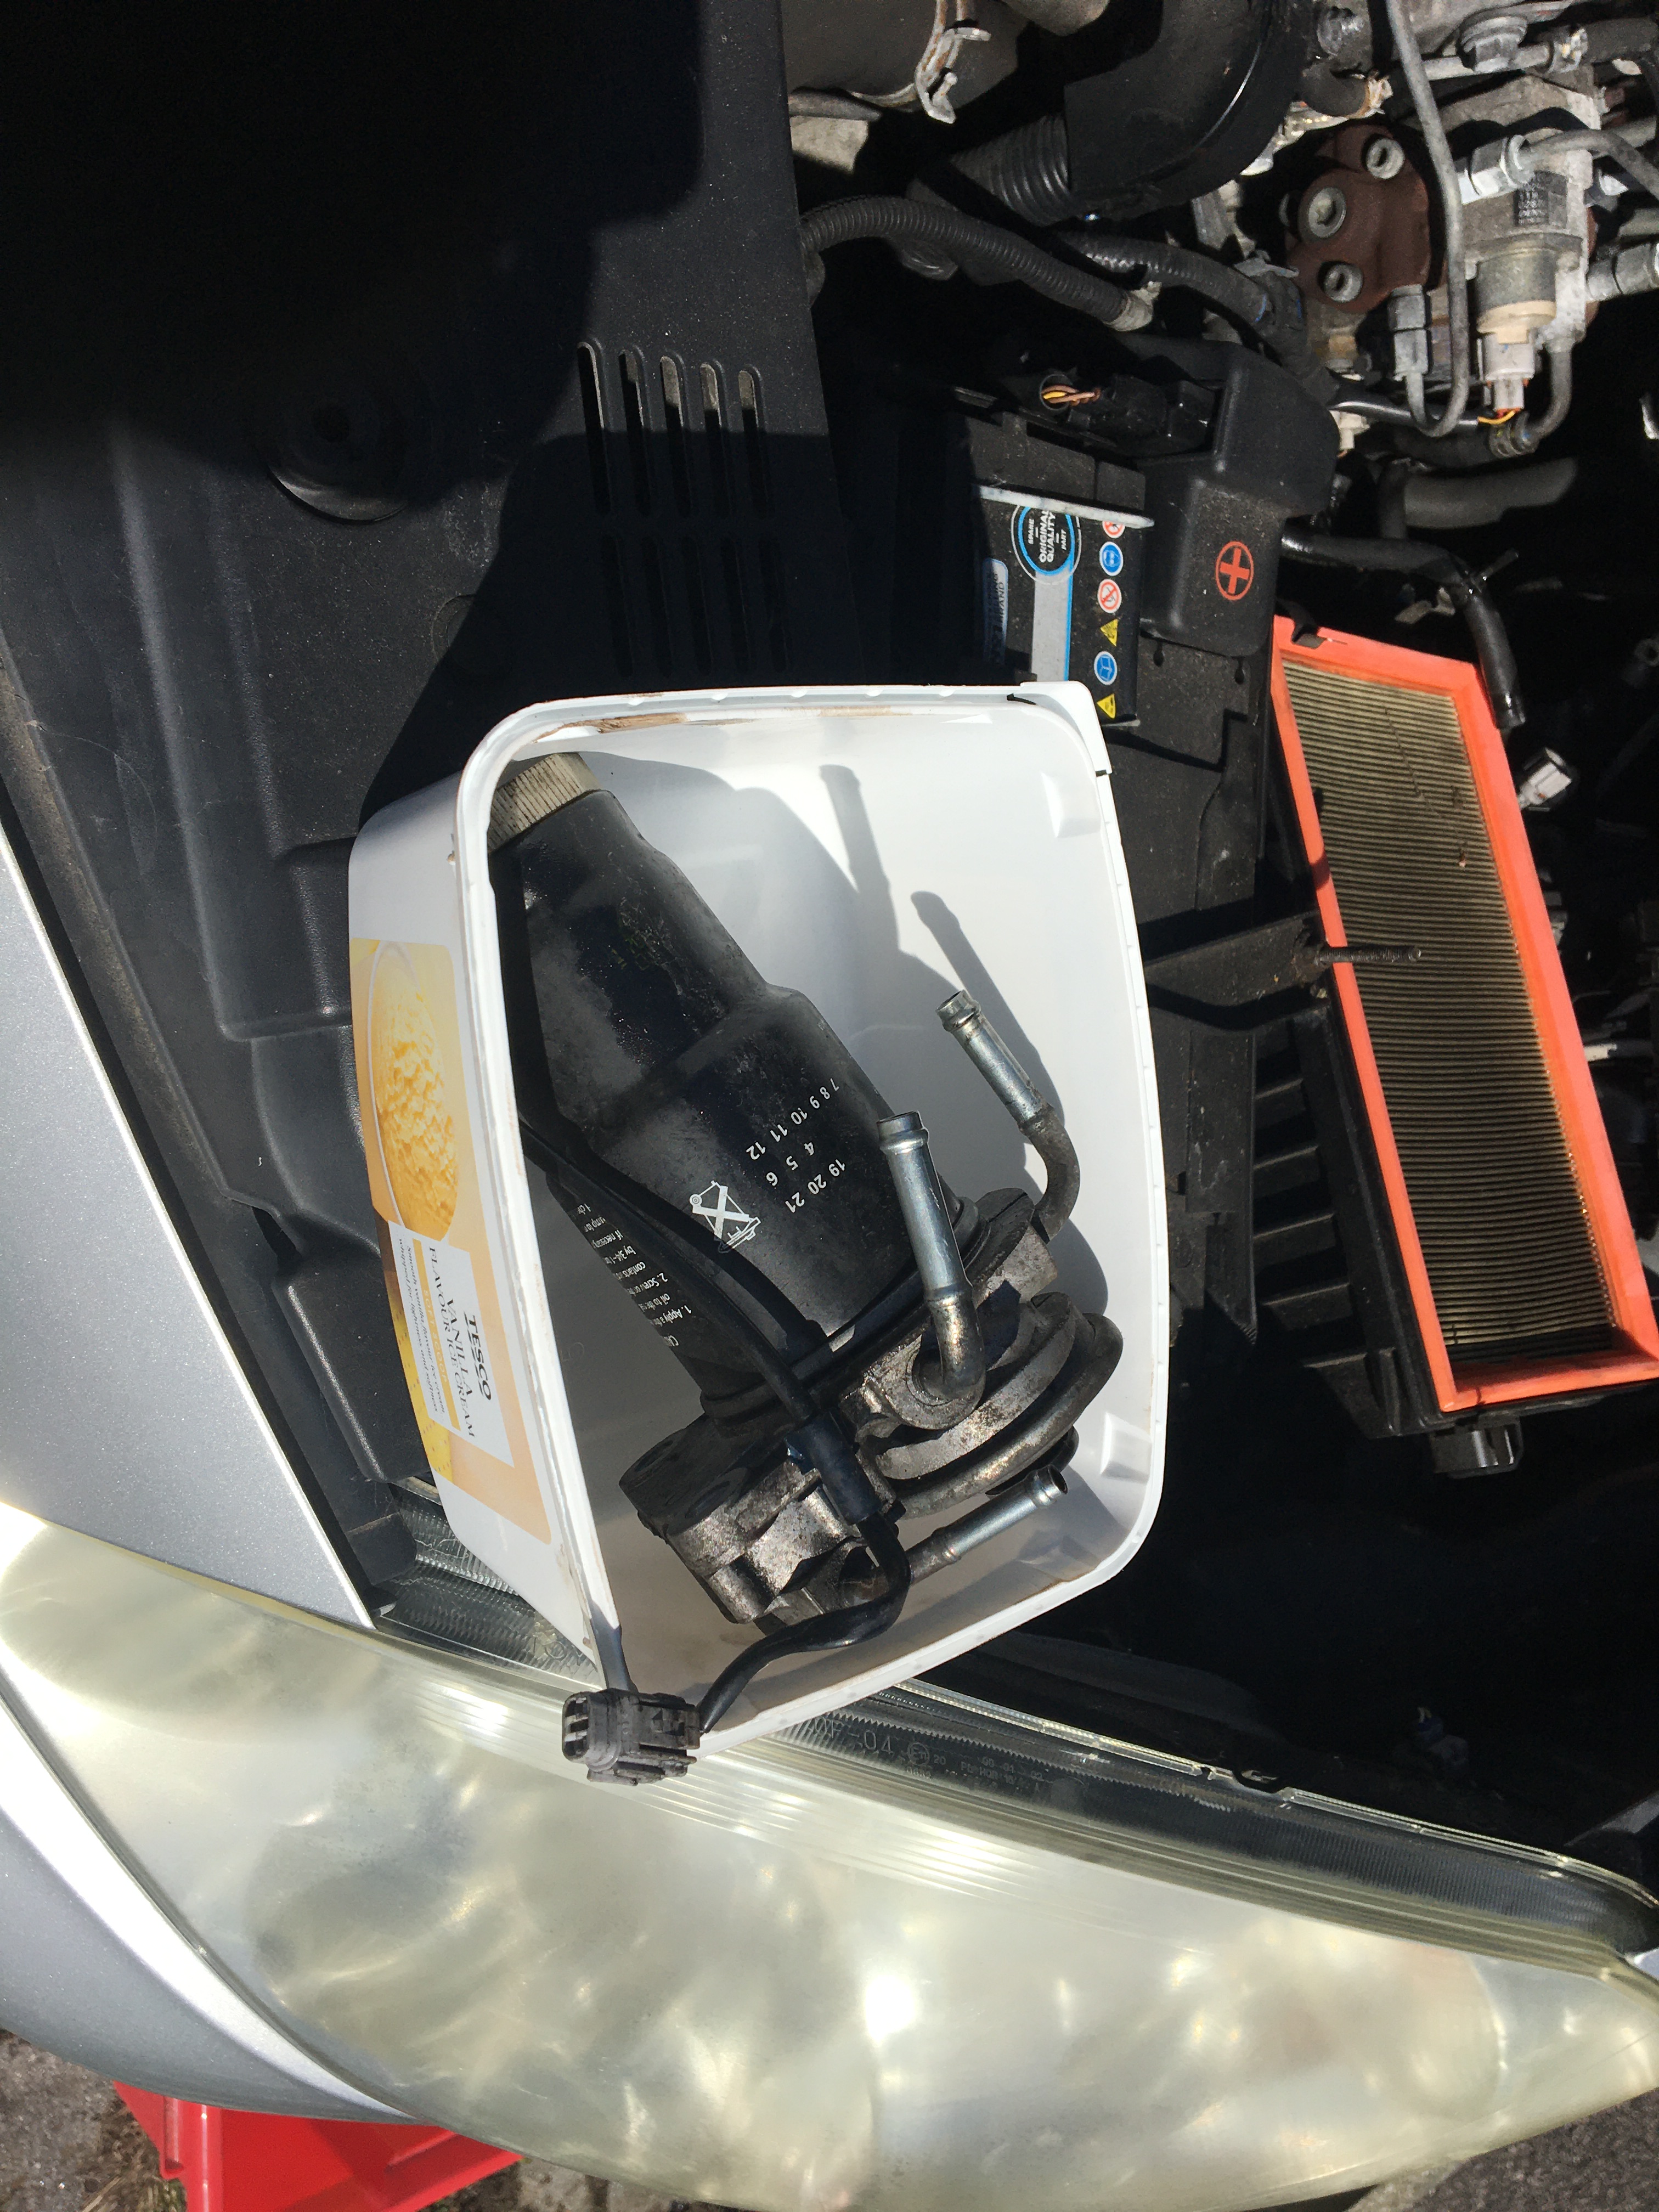
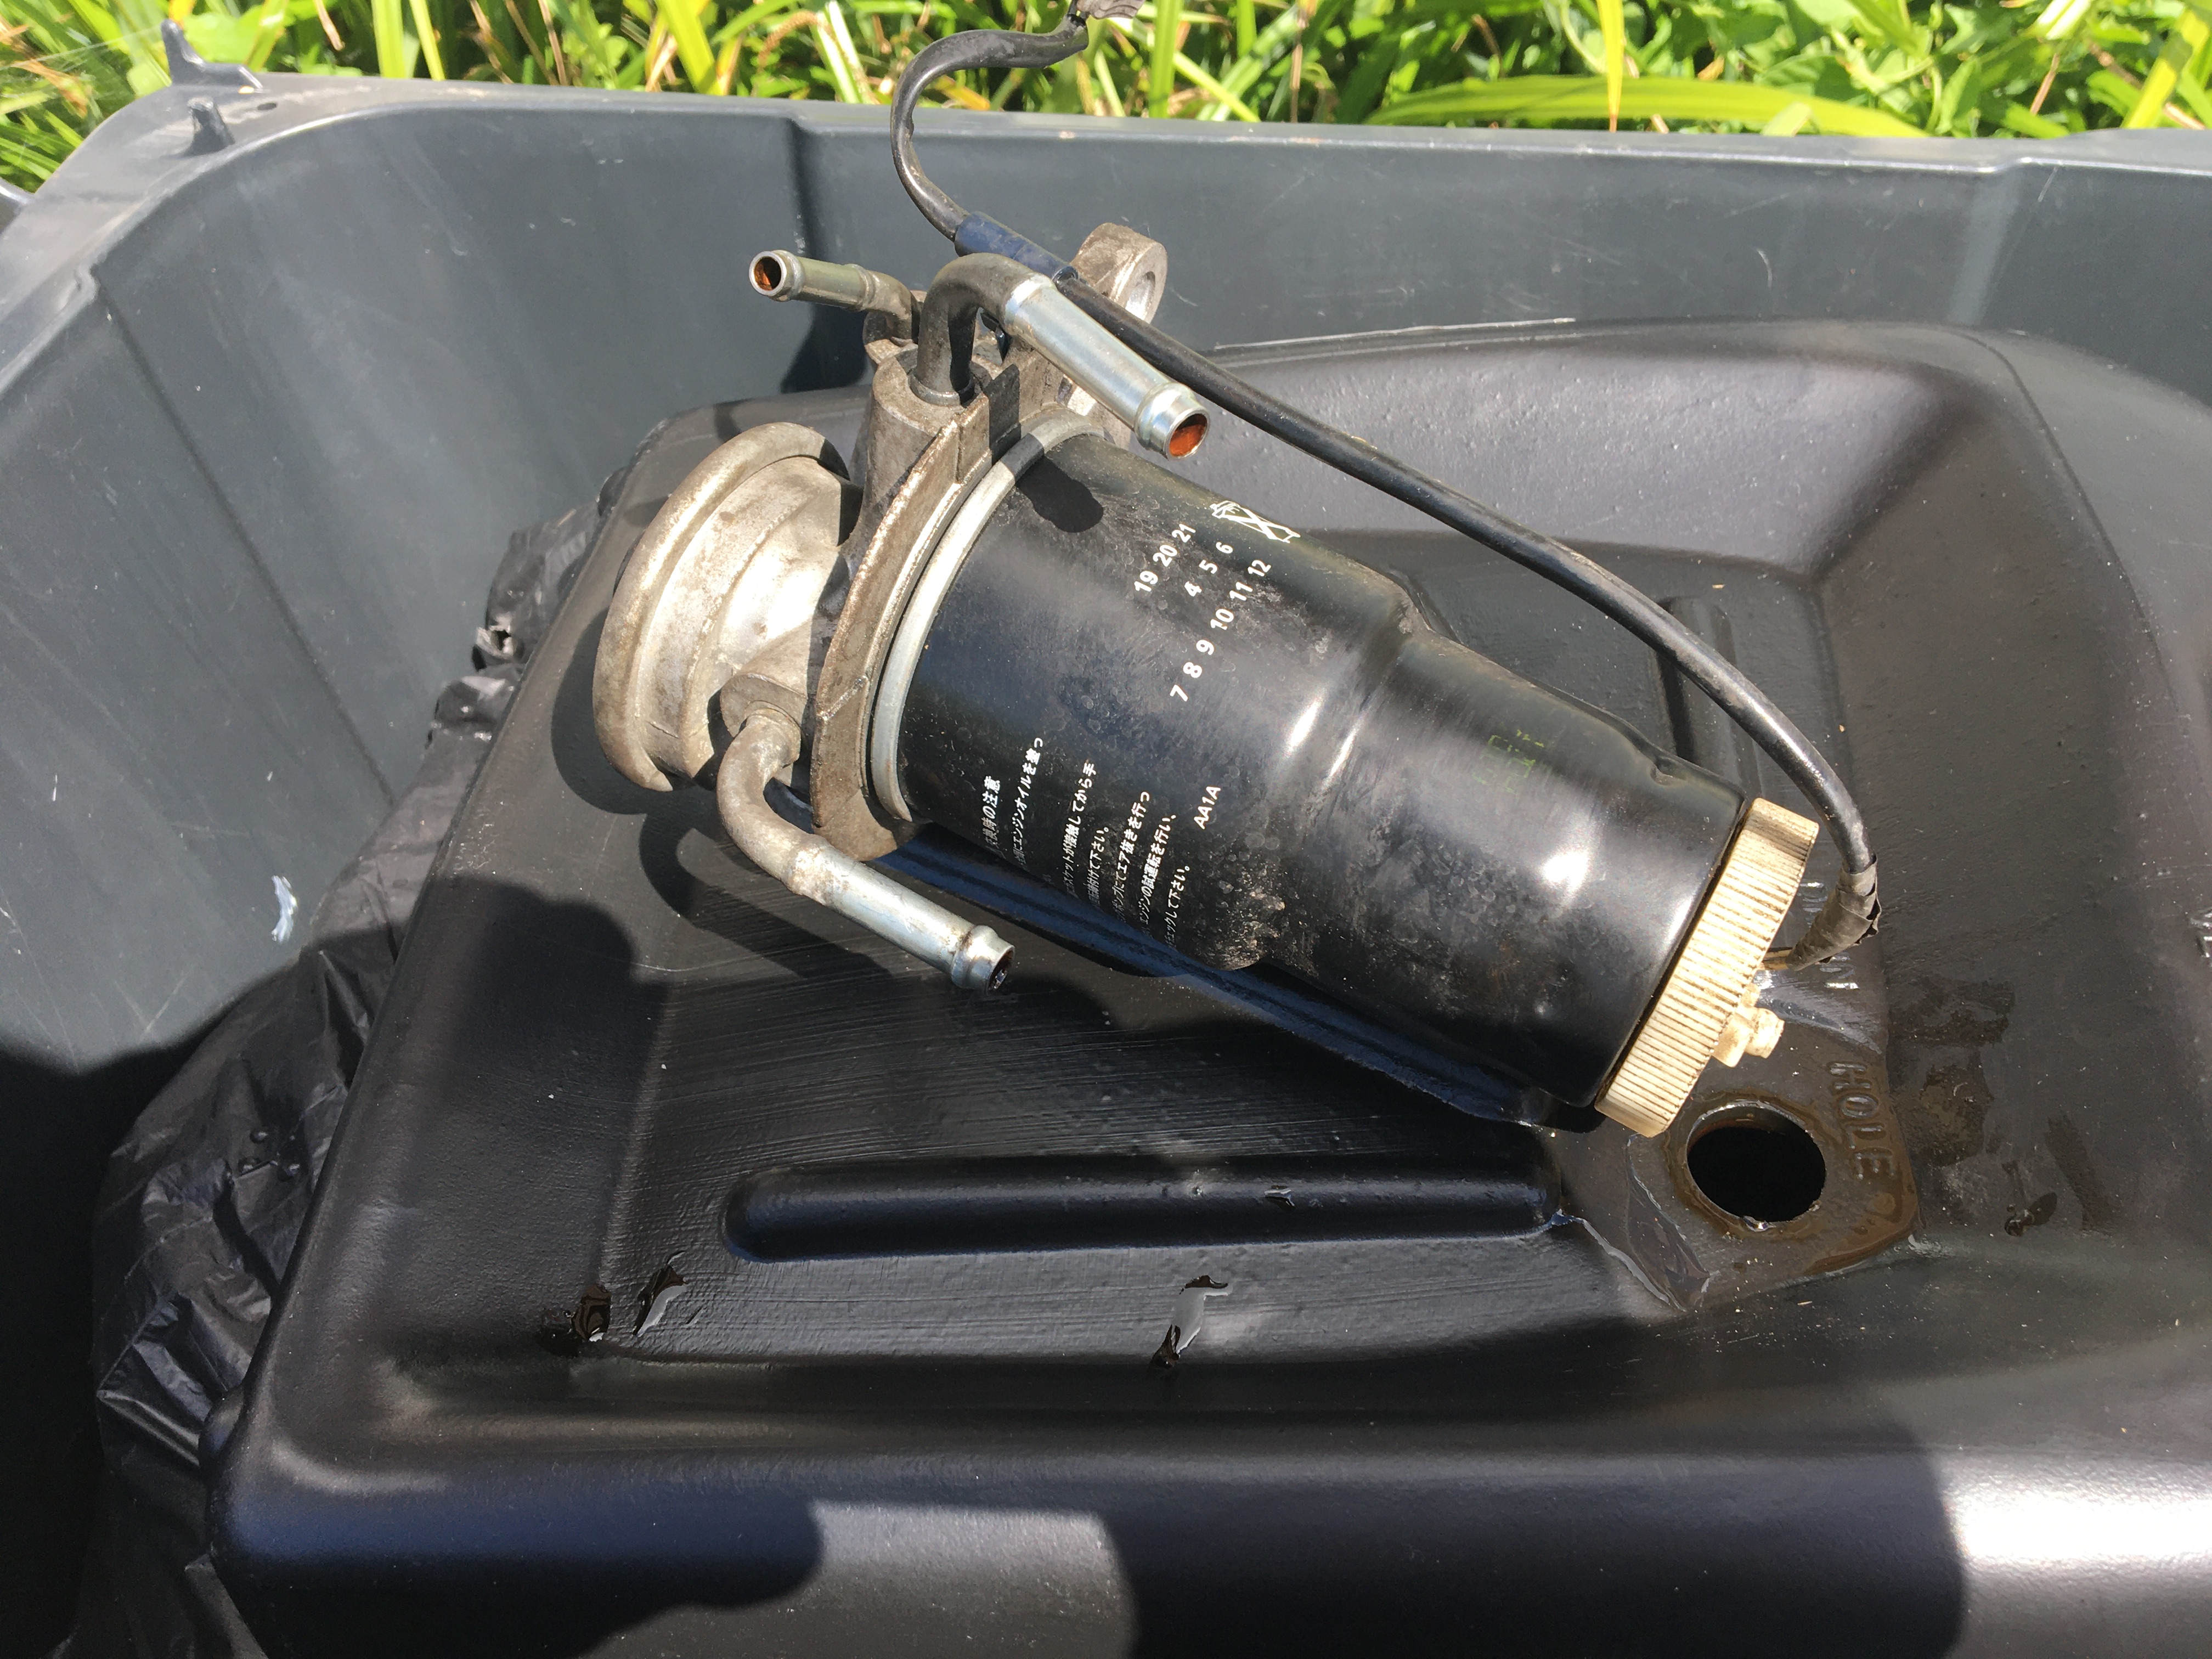
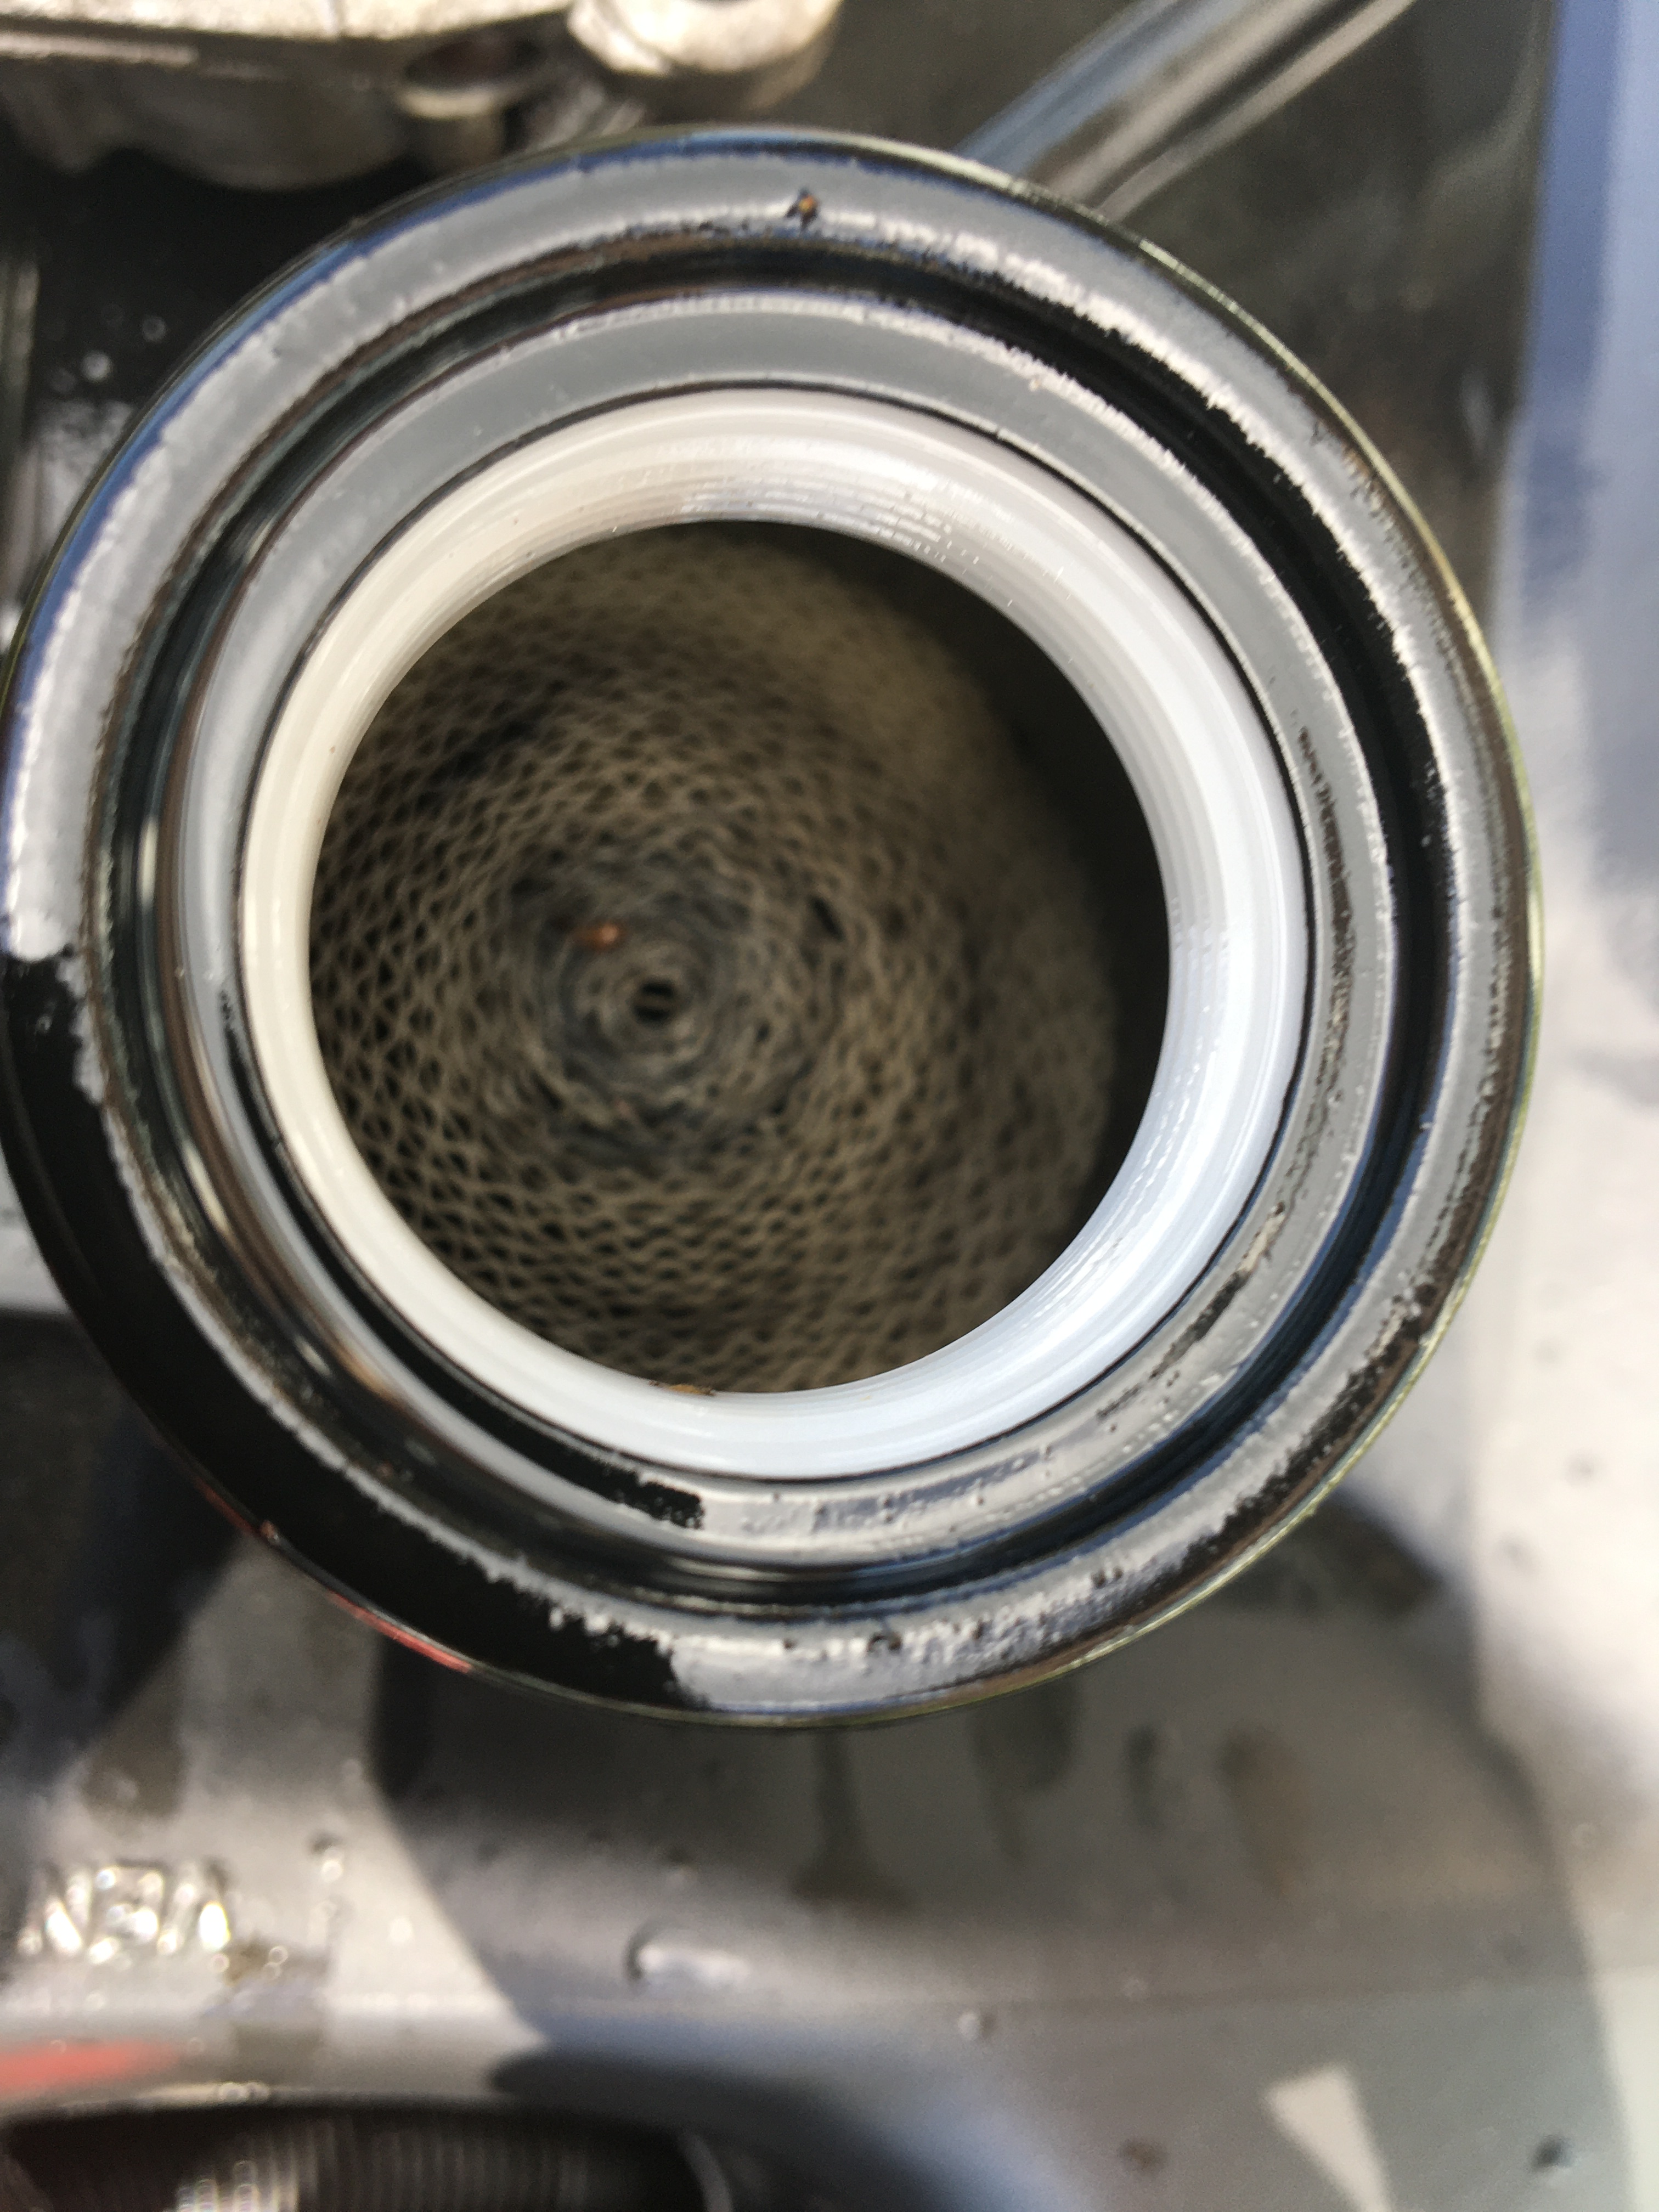
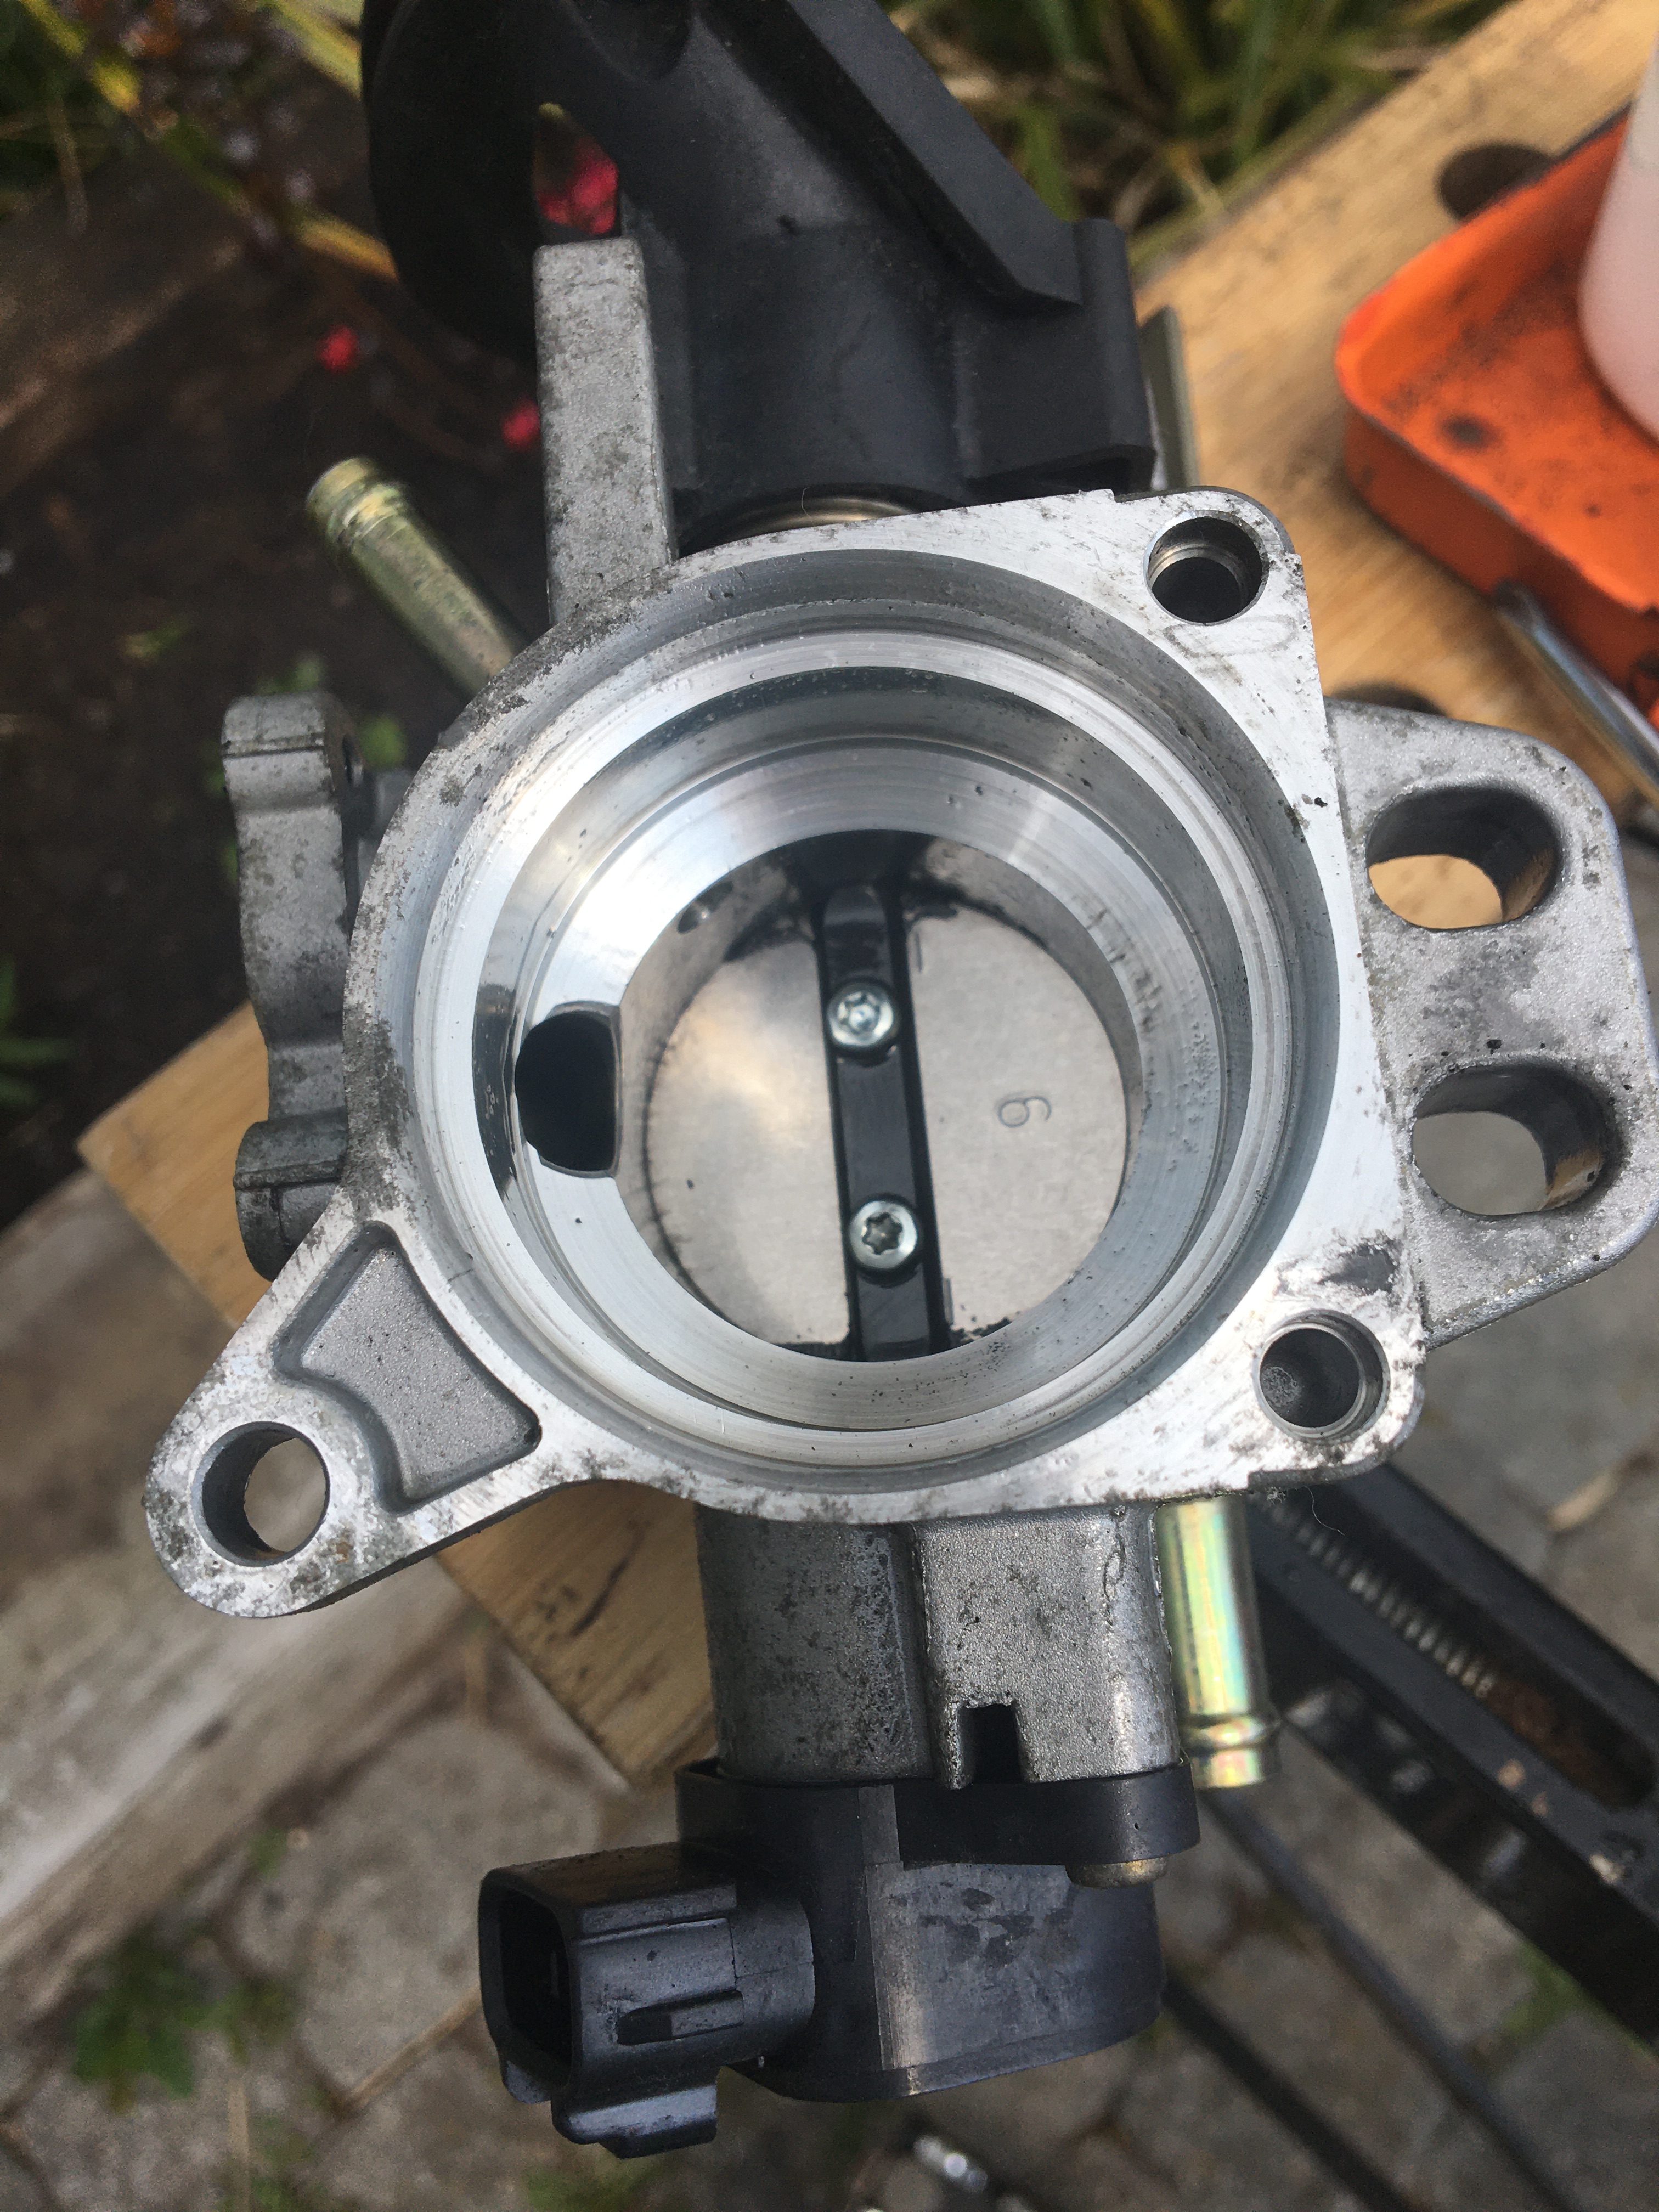
Above is the engine with the Airbox removed, the airbox connects to the Throttle Body which is that circular opening you can see near the top centre of the picture …Close up of the Throttle Body with the butterfly valve (operated by the throttle cable) closed …There are several electrical plugs to unplug, also 2 rubber pipes that run coolant to the throttle body which may leak a little coolant so be prepared …Here’s the Throttle Body removed …The Idle Control Valve is held on with 4 screws …… Here it is removed and I’d have liked to have removed the Idle valve itself but it is held on with these tamper proof ‘5 point star’ type screws which I do not have a tool for … oh well …… The valve itself is a cylindrical shape with a cut out and is turned by a servo motor controlled by the ECU. As I suspected, it was filthy and clogged with oil and gunge! A good spray with Carb Cleaner, an old toothbrush and some patience and persistence had it a lot cleaner!More Carb Cleaner, cloth and toothbrush action had the Throttle Body itself nice and clean, ready for re-fitting.
Re-assembly was just the reverse of the disassembly seen above. With all pipework and electrical plugs replaced, coolant level checked, it was time to start the engine — Yay! Success! The idle is good, no more hunting or stalling 🙂
Cost of parts £6.05 (for can of Carb Cleaner) £0.00 for Labour, £Priceless sense of achievement, reward and Mindful Wellbeing
Baffled by much of human behaviour, Life long engineer, Father, Mate, Love #Nature, #Engineering, Saved by #NHS, Stuck with #ChronicPain, Nature can provide #Green Clean #Energy #Politics is broken, we need #Sortition
View all posts by Baffled Ape